Tuesday, November 20, 2012

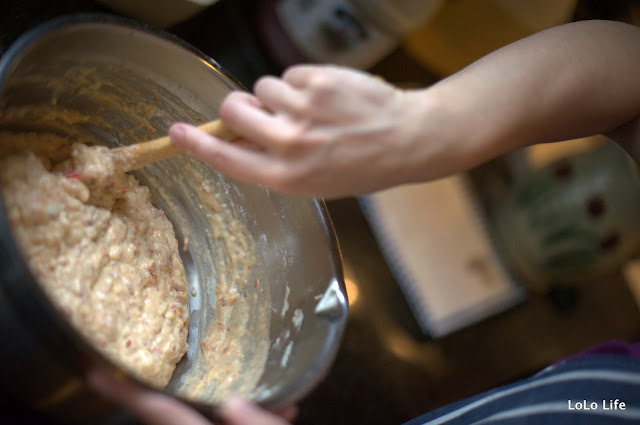
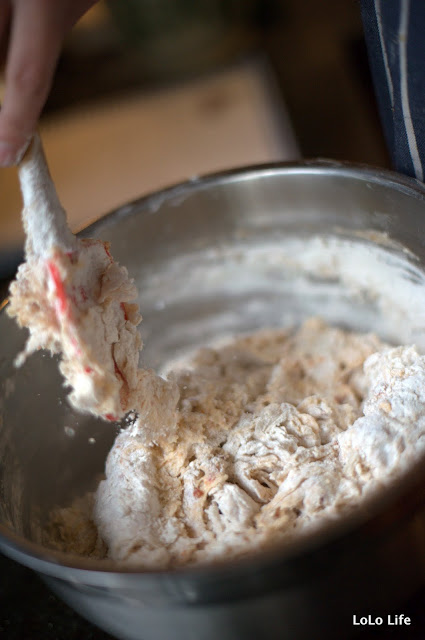
Barbecue Beef

This can be done in the oven, in the crock pot, or in a skillet (with ground beef.)  It's very good- a little tangy, a tiny bit sweet.  Beyond the ketchup, there's no added sugar.

The original recipe is from Taste of Home, 2007.

1 boneless beef chuck roast (about 3 lbs.)
2 tsp salt, divided
1 tsp pepper, divided
2 Tbsp vegetable oil
2 cups water
1 cup ketchup
1 large onion, chopped
1/4 cup cider vinegar
1/4 cup worcestershire sauce
1 Tbsp chili powder
1 garlic clove, minced
12 kaiser rolls, split

Season beef with 1 tsp each salt and pepper.  Brown in hot oil and drain.  Combine water, ketchup, onion, vinegar, worcestershire sauce, chili powder, garlic and remaining salt and pepper.  Pour over meat.  Cover and bake at 325 degrees for 2 1/2-3 hours or until meat is tender.  (Or in crock pot on low 6-8 hours.)  Remove roast; slice.  Skim fat from cooking juices.  Return meat to the pan and heat through.  Serve on rolls.

My stove top variation for a quick weeknight dinner: Brown 1 lb ground beef.  When about 3/4 done, add 1/3 cup ketchup, 2 tbsp vinegar, 2 tbsp worcestershire sauce, 2 Tbsp dried onion, a dash of granulated garlic, and some chili powder (or smoked paprika.)  Serve over mashed potatoes.  
Tuesday, October 23, 2012

Baked Salmon with a Coconut Scented Soy Sauce Glaze

Tonight's recipe is based off of this one here. I made one change (coconut oil for butter) and it made an amazing glaze that was good on everything on our plates. I served this salmon alongside steamed broccoli, butternut squash ravioli and homemade "pizza bread" (this french bread recipe, with sun-dried tomatoes and chunks of mozzarella mixed in).

Salmon with Coconut Scented Soy Sauce Glaze
(Adapted from Pots and Pins)

Yield: glaze for up to 5 salmon filets

Ingredients:
Salmon filets
1/4 cup coconut oil
1/3 cup brown sugar
1 Tbsp. regular soy sauce

Preheat oven to 325 and use a paper towel to blot your salmon filets dry. Prepare a cookie sheet with a sheet of parchment paper, sprayed with cooking spray. Arrange your filets on the sheet, and bake for 12 minutes.

While the fish is baking, prepare your glaze: Combine coconut oil, sugar and soy sauce in a microwave safe bowl and stir to combine. Microwave as needed to get everything combined with few or no lumps of coconut oil remaining.

When your 12 minutes are up, remove fish from oven, carefully turn each fillet over with a spatula, divide the glaze between the filets. Bake another 8 minutes, and then broil for 2-3 minutes if desired to crisp up the edges.


Wednesday, October 17, 2012

Autumn Mash-Up with Marshmallow Sauce

This is what happens when Mommy starts mixing up leftovers. Roast acorn squash, roast sweet potatoes (that came out just too dry for snacking) and half a can of sweetened condensed milk, leftover from a weekend of making moon cakes for Chinese Mid-Autumn Festival. It's a riff on a Thanksgiving classic, but not as cloyingly sweet. (Spoiler alert - there aren't any marshmallows in here, but sweetened condensed milk makes a fairly convincing substitute! At least it convinced my three year old son.)

Aunt LoLo's Autumn Mash-Up
Serves 6-8

Ingredients:
2 pounds roast autumn veg (acorn squash, yams, sweet potatoes, butternut, etc.)
1 can mandarin oranges (or pineapple), with its juices (11 oz)
1/2 can sweetened condensed milk (about 7 oz., or to taste)
1 tsp. salt

Mash up your veg as finely as you like, and stir in your sweetened condensed milk, fruit (oranges or pineapple) and salt. Heat on the stove, in a large pan, stirring occasionally. (Alternately, spread your mash into a 9x9 pan and heat in a medium oven until hot through, approximately 30 minutes.)

Friday, October 12, 2012

Pasta with Béchamel and Peas

Fancy name, eh? My daughter hangs out with Grandma, Grandpa, and her favorite cousin every week. One of their favorite dinners on "Grandma Days" is Grandpa's pasta with white sauce and peas. He keeps jars of Alfredo sauce on hand, just for this dish, and the kids eat it up!

Today was a really long day, and the kids were total troopers. (We hit up the aquarium after school. Coming home, I made a few wrong turns, and ended up stretching a 20 minute drive into nearly 90 minutes. Ouch.) I decided to make something I knew the kids would love, but it had to be QUICK. Quicker than frozen pizza. I already had some leftover (plain) pasta in the fridge, so this came together in about 5 minutes. Easy peasy! (Heh. See what I did there?)

(Oh, and about that name? My daughter asked me to please add this to our dinner rotation...so I told her she had to learn the proper name if she wanted me to remember what I made. No doubt this isn't a real béchamel, but...whatevs. It's cute to see a 6 year old asking for béchamel!)

I learned the recipe for this white sauce from my father when I was about 12. He, in turn, learned it from his grandmother. It's fool-proof, and easily customizable. Add cream cheese and rock shrimp, and you have an incredible dip. More cheese, and it's a great mac and cheese. Less cheese, and it could be a simple topping for poached eggs. This can also be used in white lasagnas, or over vegetables. Oh, and a classic béchamel would also have nutmeg in it, just a pinch.

LoLo's Pasta with Béchamel and Peas
Serves 4-6

Ingredients:
1 pound pasta (cooked, drained and set aside)
4 Tbsp. butter
1/4 cup flour
approximately 2 cups milk (I use skim, but nearly anything will work. Even evaporated, from a can!)
1 cup shredded cheese
3 cups frozen peas
Salt, Pepper to Taste


In a sauce pan, combine your knob of butter and flour over medium low heat. Whisk it as the butter melts - you need it to be lump free. It should be runny enough to not just clump up in your whisk. Add more butter if necessary.

Let your butter and flour cook for about 1 minute, until it starts to get slightly golden brown, and slowly whisk in your milk. Just a bit at a time, then let it cook. You want the consistency to be like melted ice cream, or just a bit thicker. The flour thickens as it cooks, so make sure you take your time, and keep whisking!

When the sauce is the right consistency, whisk in your shredded cheddar cheese and stir until melted. Add your frozen peas, heat through, and taste. Depending on your cheese, you may or may not need the salt, pepper, nutmeg, etc. (This is where you can make the sauce your own - White pepper is nice here, because it won't put black flecks in your sauce. Cayenne pepper would surprise people, too!) Pour all of your sauce over your pasta and fold to combine.

Enjoy!


Monday, October 8, 2012

Asian Pear and Pork Stirfry

Myrnie, my partner in crime on this blog, brought up a really great point - none of us are getting any MORE free time, and we are quickly losing track of our favorite recipes while we wait for beautiful posts with beautiful pictures to happen.

So.

Before I lose track of this one, here's a recipe to use up the Asian Pears (or pear apples) that are coming into season right now. It's delicious, and a really unexpected addition to your dinner table!

Aunt LoLo's Asian Pear and Pork Stirfry
Serves: 4-6

Ingredients:
1/4 pound lean pork (I buy pork chops, trim them, and slice them into 1/4" strips)
3-4 small pear apples, cored and sliced (or 1-2 large)
3 cloves of garlic, minced
2 Tbsp. oil (I use olive oil)
slurry (1 spoon cornstarch, 1 spoon soy sauce, 1 spoon sugar, enough water to total 1/3 cup)
Optional: Rice wine

In a saute pan, combine oil and garlic. Heat over medium heat until fragrant, and add the pork strips. Cook for 1-2 minutes, then add your pears. Cook until the meat is cooked through, and the pears are just starting to soften. Add your slurry, and cook until the sauce bubbles and thickens. Thin down with water, or season with soy sauce to taste. (If using the rice wine, add it to the pan BEFORE the slurry. Cook until the pan is dry again, and then add your slurry. You are just using the wine to deglaze the pan - it's not part of the sauce's liquid.)

Serve over rice.

Monday, October 1, 2012

Freezer Jam made with Plain Gelatin

My absolute favorite freezer jam is made with raspberries, rhubarb, and raspberry-flavored Jell-O.  It sounds like a crazy combination, but it tastes amazing.  I love the "set" of the jam, too- it's a soft, spreadable jam that's just perfect.

This year, we had lots of raspberries, but the rhubarb crop failed completely.  I searched for a plain-gelatin based jam for just raspberries, but found very little.

Here is why I like using gelatin in my freezer jams:
1)  Gelatin does not need sugar to gel- you can add sugar to taste.
2)  It is easily adaptable to how much fruit you have on hand.
3)  It is not dependent on certain temperatures to make a successful batch of jam.

Here is why you need to be careful when you use gelatin to set your jam:
1)  It can not be canned safely.  Don't try.  This MUST be a freezer jam.  Gelatin has protein in it, and must be kept frozen or refrigerated to be safe.
2)  If you keep the jam at room temperature, it will turn runny.  It's only firm when it's cold.
3)  This isn't vegetarian.  Nope.  See #1.

I wish I could remember the handful of links I used to cobble this recipe together, but I'm working from a scrap of paper I jotted my cooking notes on.  Use this as a starting point, and a reference for ratios- this recipe would work with any juicy fruit.  The basic equation is 1 cup of sugar and 2 packets plain gelatin per quart of mashed fruit (measure it after mashing to the texture you want the final jam to be.)  The sugar can be to taste. I actually had a bit of cantaloupe leftover from dinner the night before and chopped it up fine before adding it to the pot. See?  Versatile.

Raspberry Freezer Jam

5 quarts of raspberry mash
5 cups sugar
10 packets plain gelatin.

Bring it all to a boil, and boil one minute.  If your fruit isn't very juicy, let it sit in the pot with the sugar for a bit to macerate, and then add the gelatin before bringing to a boil.  Ladle into clean containers, leaving 3/4 inch headspace.  Freeze or refrigerate immediately.  

Thursday, May 10, 2012

Whole Fruit Limeade

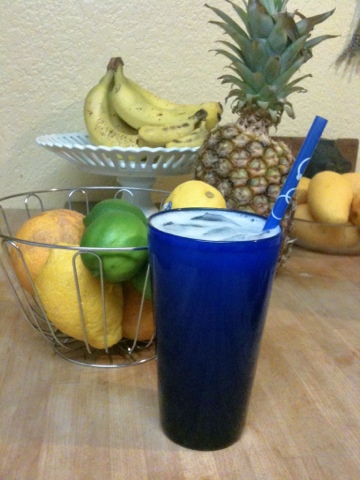
Make a pitcher of fresh limeade in two minutes flat! Because it uses the whole lime, it has an edge of bitterness to it that I think is really refreshing. But, don't be like me and drink two tumblers-full before bed. You'll get a stomach ache!

You can substitute a lemon, if you'd rather. This would also be excellent with sweetened condensed milk instead of sugar, for a Brazilian-style limonada.

Original recipe from here.

Ingredients:
2 small limes, washed and quartered
1/2 to 1 cup sugar (to preference)
8 cups water, divided

In a blender, blend limes, sugar, and 4 cups of water for 1 or 2 minutes. Strain into 2 quart pitcher and add remaining 4 cups water. Serve over ice- this is best super cold.

Wednesday, May 9, 2012

Scallops in Black Bean Sauce

I found a half-full bag of scallops in the freezer this afternoon, and decided to serve them for dinner. Lo Gung (my husband) and I love scallops, but I try not to make them too often, so they don't lose their mystique. I pulled out my favorite asian cookbook (aptly named...The Asian Cookbook) and found this recipe. We love black bean sauce, so this was a no-brainer! I served it to my husband, and sister, and we all agreed....I didn't make enough scallops. It was that good. You get sweet, from the sugar and the scallops, cut with the floral notes from the rice wine, and umami from the soy sauce and black bean sauce. Yum!

(Psst...hey, guys? Just because I love this cookbook THAT much, I did some research.  I found my copy of this book at the student bookstore of the Culinary Institute of America, in New York. You, though, can get your copy online! There are a few copes available here, at Thriftbooks.com. If you are interested in Chinese, Thai and Indian cuisines, this is hands-down my favorite cookbook. Everything is just delicious.

(PS - Do you know what I also love? Thriftbooks.com. Most books, including this cookbook, are about $4, and shipping is free. )

(PPS - Thriftbooks doesn't know I'm mentioning them here, but a friend is one of the owners, and it's just all-around an awesome resource for really inexpensive used books.


Scallops in Black Bean Sauce (Si Jap Chaau Dai Ji)
Adapted from The Asian Cookbook, from Parragon Press

Ingredients:
2 Tbsp. Olive Oil
3 cloves garlic, sliced thin
1/4" fresh ginger, minced
1 Tbsp. Black Bean & Garlic Sauce (I like Lee Kum Kee brand, available in most Asian markets, like this)
18 good sized scallops (I used previously frozen scallops, and thawed them ahead of time)
1/2 tsp. soy sauce
1 tsp. rice wine
1 tsp. sugar
3-4 green onions, chopped (just the green part)

In a wok or dutch oven, heat your oil over medium-high heat. Add the garlic and ginger and stir-fry those for about 1 minute, or until they are fragrant (but not burnt!). Add the black bean sauce, stir to combine, and then add the scallops. Stir-fry those for 1 minute, to get some color on them, then add the soy sauce, wine, and sugar.

Lower the heat and continue to cook for 2-4 more minutes, or until the scallops are cooked to your preferred done-ness. Stir in the chopped green onions, and serve immediately. Serve over rice.


Tuesday, April 24, 2012

Hearty Spinach Sausage Soup


This soup came together from what was kicking around in the refrigerator...and isn't that always the best way for a soup to happen? It was delicious - savory, hearty and light, all at the same time. Served with some broiled cheese bread, this was a fantastic little supper!

(The cheese pictured above is called No Woman, from Beecher's Cheese in Seattle, Wa. It's a tasty white jack-style cheese with some Jamaican spices, onions and raisins.) 


Aunt LoLo's Hearty Spinach Sausage Soup
Serves 4 as a main dish, or 8 as a side dish

Ingredients:
1 package smoked beef sausage, chopped (like Hillshire Farm sausage)
1 onion, chopped
3 carrots, chopped
4-5 medium tomatoes, cut into quarters
1 bunch spinach, chopped
3 cups frozen corn
Olive Oil
Water
Salt and Pepper to taste

In a large dutch oven, brown your sausage. (Mine was frozen, so I put it in the pot whole, then removed it to chop it and added it back later. If you plan ahead, then go ahead and chop your sausage up, brown it, and move on to the next step with your sausage remaining in the pot.) If your sausage is a little lean, add some olive oil to the pot, then add your onion and cook until slightly translucent, about 5 minutes.

Deglaze the pan with a splash of water, then add your chopped carrots and stir. Add about 4 quarts of water and bring to a boil. Add chopped sausage (if you removed it at the beginning) and tomatoes and reduce to simmer. Cook until the carrots are tender.

Add your chopped spinach and corn, and return to a simmer. Continue to cook until the corn and spinach are warmed through. Puree lightly with an immersion blender and season to taste with salt and pepper.

Serve with grilled cheese toast and enjoy!

Tuesday, April 10, 2012

Honey Whole Wheat Bread


(All photos courtesy of Sonja, from Simply Sonja Photography based in Bellevue, WA)

One of my most requested recipes, my Honey Whole Wheat bread! This bread is half whole wheat (fresh ground, if you can), half white flour, and all awesome. I use fresh-ground red wheat, but white-wheat would make a tamer taste, as well as a slightly smoother crumb.

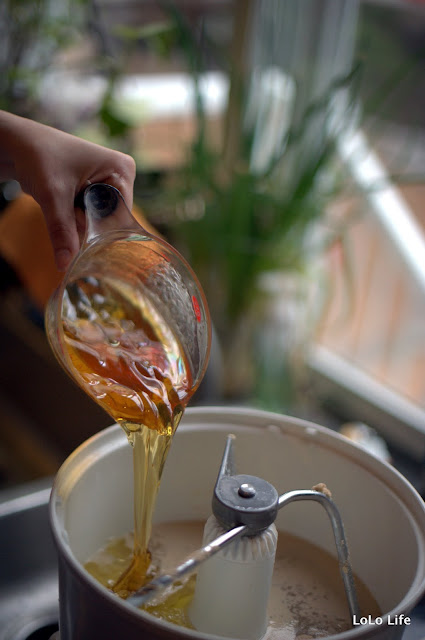
One of the tricks is to use plenty of honey and olive oil. These two things condition the wheat to give you a nice smooth, sweet bread.


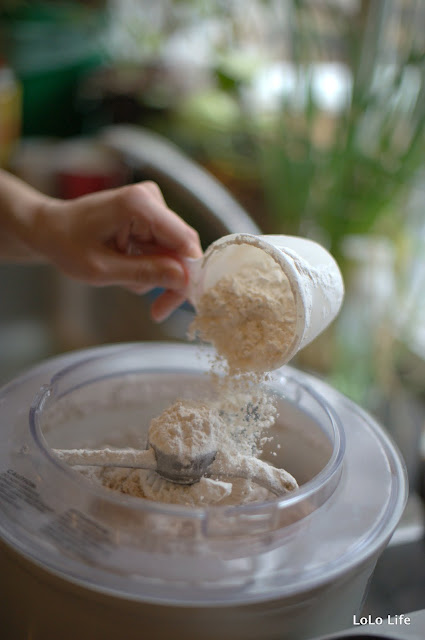
Fresh ground red wheat going into the 20 year old Bosch mixer. (I use the Bosch when I make 4-loaf batches. We keep one loaf out and freeze the rest. They come out of the freezer even better than when they went in.)

One thing you absolutely must do is to mix in the whole wheat flour FIRST, and then add white flour. This allows the whole wheat flour to plump up a bit and get evenly dispersed. The white flour can then work around it to form the gluten network it needs to make non-crumbly bread.

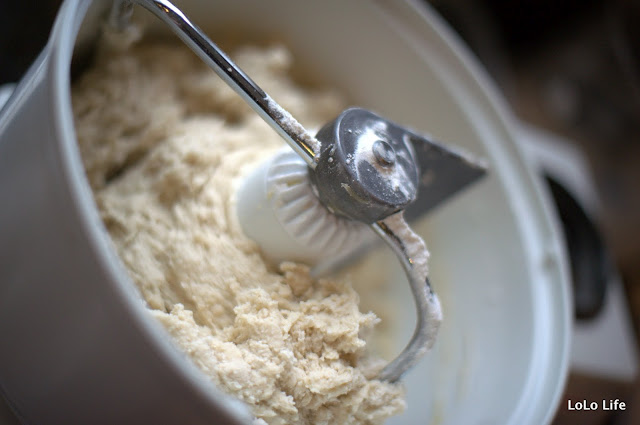
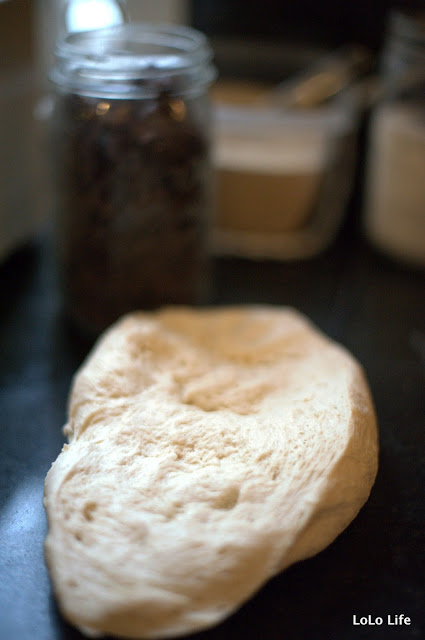
You can stop adding flour when your bread looks like this for a super fluffy, light loaf.

If your bread gets to this point, you will have a denser, sturdier loaf, perfect for peanut butter and jelly sandwiches.

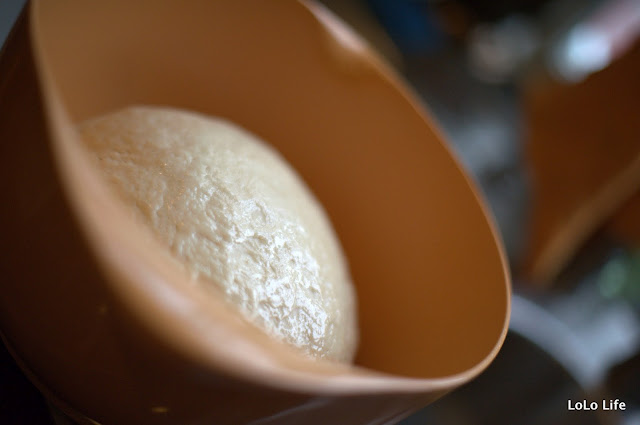
All rounded up and ready for its first rise. I needed the mixer for something else, so I moved my dough to a greased bowl to rise, instead of just letting it rise in the mixer.


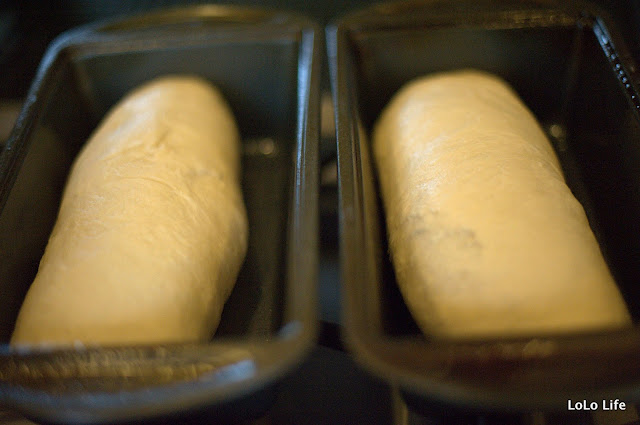
All baked up and ready to bag or eat!

LoLo Honey Whole Wheat Bread
Yield 2 loaves

Ingredients:
2 cups warm water
1 1/2 Tbsp. yeast
1/2 cup olive oil
1/2 cup honey
2 tsp. salt
4 cups of whole wheat flour (or 2 cups of wheat berries, ground. I measure whole wheat, not wheat flour. Fresh is best.)
2-4 cups of all-purpose flour

In the bowl of your mixer, combine water, yeast, olive oil, honey, salt and whole wheat flour. Mix until well combined, then add 2 cups of white flour. Continue to add white flour until the dough just pulls away from the side of the bowl. A stiffer dough will give you a denser bread. A lighter dough, with less white flour, will get you a fluffier bread. Once the dough is how you like it, continue to knead for 5 more minutes. Turn off your mixer, remove your dough hook, cover with a damp towel, and allow to rise until doubled in size (about an hour, in Seattle conditions). Remove dough from the bowl, divide into two loaves, *form and place into greased loaf pans. Allow to rise until larger by about 50%, then bake at 350 for 30-35 minutes, or until the bottom of the loaf sounds hollow when tapped with your fingernail.

To see how I form my loaves, go here. To find the rest of this bread course, go here.

Honey White Bread

(All photos courtesy of Sonja, from Simply Sonja Photography based in Bellevue, WA)

 This was the bread that started it all - the bread that was so delicious, my husband let me stop buying bread at the store. Wait...that sounds weird. Let me put it this way: I may be the cook in the family, but it's not fair of me to replace tasty bread from the store with nasty bread from home if nobody likes it.

Here is one of my most basic recipes, in pictures.

So, I experimented and tried new recipes until I found one that could surpass store-bought in quality and taste AND was less than half the cost of store-bought. (One loaf of this bread, even with olive oil and honey, is about $.75 if you buy the ingredients in bulk.)

I make the bread four loaves at a time, using my ancient Bosch mixer. The bread freezes beautifully, and is almost better from the freezer! It retains its moisture, and has a very smooth crumb.

Still too sticky. You want the dough to just barely stick to your fingers, but not climb to you and make a mess.


LoLo's Honey White Bread
Yield 2 Loaves

Ingredients:
2 cups warm water
1 Tbsp. yeast
1/2 cup honey
1/2 cup olive oil
2 tsp. salt
6-7 cups All-Purpose Flour

In the bowl of your mixer, add water, yeast, honey, olive oil and 6 cups of flour. (If you are concerned that your yeast might be old, you may proof it first: Combine water, yeast and honey in your bowl. Wait for it to foam, about 5 minutes, then add oil, salt and flour.) Mix with dough hook and add more flour as necessary, until the dough pulls away from the sides of the bowl and forms a ball. Knead for 5 more minutes, and then turn off your mixer.

Remove the dough from the bowl, remove the dough hook, spray the bowl with cooking spray, and return your ball of dough to your greased bowl. Turn the dough to coat with oil, and cover with a damp towel. (I like to wash my hands at this point, grab a fresh tea towel to dry them off with without shaking the water off my hands, and use that to cover up the dough. It seems just damp enough.) Allow the dough to rise until about doubled in volume. It's ready when you poke it with two fingers and it easily holds the indent.

When the dough has risen, remove from bowl, divide in half, and *form into two loaves. Place in greased loaf pans and allow to rise for 30-45 minutes, or until approximately 50% larger. Bake at 350 for 30-35 minutes, or until the bottom of the loaf sounds hollow when tapped.

Don't be afraid to play around with mix-ins! Dried fruit, spices, orange juice in place of part or all of the water. This is a really forgiving framework to work with. This is also the recipe I use for dinner rolls and cinnamon rolls - 1 loaf makes 12 dinner rolls or 12 cinnamon rolls.

*To see how I form my loaves, go here: How I Form Bread Loaves

For the rest of this bread course, go here: LoLo's Bread Class

How I Form Bread Loaves

(All photos courtesy of Sonja, from Simply Sonja Photography based in Bellevue, WA)

 Everybody has their favorite way to form a loaf. Some people cut off a hunk and carefully round it into a loaf shape. My sister slap their dough into the pan and then poke it until it fills out the corners. Some people...well, ok I don't know if anyone else does this...but I roll mine up like a jelly-roll. I think I read about this method in an ancient Betty Crocker cookbook. Since it's always worked well for me, I've stuck with it. There are a few tricks, though.

First, if you've made a batch with more than one loaf, divide your dough. I like to use a knife with large serrations.

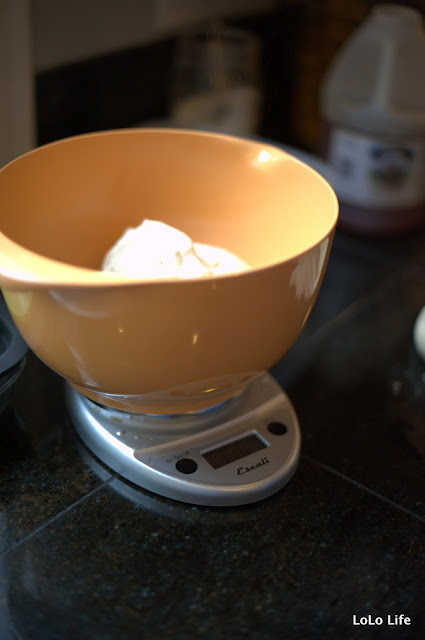
If eye-balling dough lumps isn't your thing, you can plop your pieces onto a scale to make sure they are all the same weight. That will take care of any differences in air content between the piece you squished when you cut it off and the piece you cut off FROM, that isn't squished yet. (Does that make sense to anyone??)
Next, take your loaf chunk, set it on the counter, and use your knuckles to flatten it out. You want it just about as wide as your loaf pan, and about 1/2" thick.
Grab one of the smaller ends and start rolling. You want NO air bubbles here, so make sure you stretch the dough and tuck it tightly. If you have any air bubbles, they will expand in the oven leaving you with large doughy holes in your final loaf.
As you work, you'll notice it getting wider than your pan, with scraggly little ends. Use your pinkies to tuck those ends in as you roll.

The final product! Round, with the seam on the BOTTOM of the loaf. If it's anywhere besides due south, your bread will kind of explode open in the oven. It will still taste fine, but it might not fit into the toaster. Now pop it into a greased loaf pan, or onto a greased cookie sheet, and let it rise about 30-45 minutes before baking.

French Bread

(All photos courtesy of Sonja, from Simply Sonja Photography based in Bellevue, WA)

If you've seen my post on "pizza" bread, this post will look very, very familiar. The process is basically the same...so I'm using a lot of the same photographs. Waste not, want not!


Put water in your biggest bowl. The water should be very warm, like a steaming bath. Other ingredients will cool it down before you add your yeast.


Add your salt, oil and sugar to your water. Add half of your flour.

This is what your dough should look like after the first addition of flour. (Except your dough will be white - remember I'm using pictures from a different variation of this bread.

Add your yeast to the loose flour mixture, then add the rest of your flour and stir to combine.

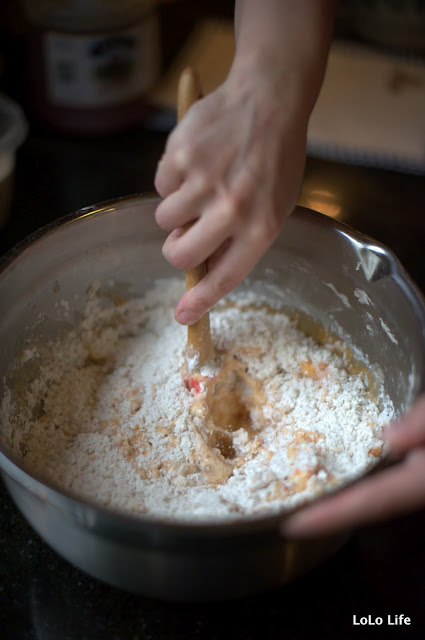
You'll need to use your hand at the end. Scoop around the side of the dough, catching some of the loose flour with your hand, and scoop under the dough. Then lift up the dough and fold it in on itself.


Once the dough is how you want it, let it rest for an hour, punching it down every 10 minutes. Form into two loaves, let rise for 30 minutes, and bake at 350 for 30-35 minutes. Delicious, and about two and a half hours from start to finish. These loaves come out to about $.50 each, if you buy the ingredients in bulk.

French Bread
(Adapted from Myrnie's recipe)

Ingredients:
2 1/2 cups warm water
3 Tbsp. sugar
1 Tbsp. salt
2 Tbsp. canola oil
6-7 cups of All-Purpose flour, divided
2 Tbsp. yeast

In a large bowl, combine water, sugar, salt, oil and 3 cups of flour. Stir well to combine - your dough should be very loose. Add the yeast and another 3 cups of flour. Stir with a wooden spoon, and then use your hand to fold in flour, adding more as necessary. The dough will be soft - you are not kneading the dough. Just folding in flour until it forms a basically cohesive shape. Let the dough rest for 10 minutes, and then punch it down and flip it over in the bowl. Repeat the resting-punching process every 10 minutes for an hour, then remove the dough from the bowl. Divide it into two loaves and form into long rolls. Place on a greased cookie sheet and allow to rise for 30 minutes. Preheat the oven to 350. Slash the tops (don't be afraid!) and bake for 30-35 minutes, or until the bottom of the loaf sounds hollow when you tap it with your fingernail.

Monday, April 9, 2012

Radish Cake (Loh Baat Gou)


Radish cakes were one of my first loves at the dim sum parlor. The flavor is fairly bland, so it is perfect for introducing the uninitiated to the wonders of dim sum!


You'll need to find some of these sausages - they're available at nearly every Asian market. There are two types - Taiwan style sweet sausages are, well...sweet. They would also be tasty, but these "Chinese Style" are more traditional. They are waxy, fatty and meaty tasting, with no detectable seasonings above some salt and sugar. 
You'll need to chop up a few sausages and sauté them in a pan until they just start to crisp up. 


We grated our daikon in a food processor fitted with a grating blade. It only took a few minutes - my mother in law was very impressed. (She's always done this step by hand.) 

These are dried shrimps, or haa mai. They are salty, shrimpy and a little sweet. They come in several sizes - you'll want to look for ones that are about 3/4" long dried. I think you can find them at Asian markets, but we usually get them at Chinese medicine shops. These are great to keep on hand - they're awesome in fried rice, rice noodles, or chow mein. We keep a small jar of these in the refrigerator at all times. (Refrigeration isn't necessary, but growing up in HUMID Hong Kong convinced my husband that all dried things should be kept in the refrigerator to keep them dry.) 

Maggi is another great thing to keep around. It's very salty, and the flavor is like nothing else...except maybe Vegemite. I think it's a by-product of creating Vegemite, but I could be mistaken. 

The daikon after it has been steamed and mixed with some seasonings. I got called away so I missed the part where Ma mixed in the rice flour, but it ended up looking like a very sticky cookie batter. Make sure you taste the final product - the basic flavor won't change after you steam it! Bland radish cake is just sad. 
The finished cake, cooling on the counter after being steamed. 

Ma's Homemade Radish Cakes (Loh Baat Gou)

Ingredients: 
6 Chinese Sausages, diced
2 large daikon, grated (about 5 lb. total)
2 tsp. chicken base (or 2 bullion cubes, crushed)
1/2 cup dried shrimp, soaked and chopped (haa mai)
1 1/2 lb. rice flour
2 Tbsp. chopped green onion
2 Tbsp. soy sauce
2 Tbsp. Maggi sauce
1 Tbsp. sugar
2 tsp. each salt, sugar (to taste)
Water, as needed

(Yield: 5 pie plates of cakes)

Cook sausage on the stove until shiny, a bit crispy, and slightly translucent. 

Put grated daikon into a large pot and add 1 cup of water and the chopped dried shrimps. Cover and cook over medium heat. Add more water as necessary. Steam until the daikon is cooked - it will be soft, and will have lost its peppery bite. 

Add rice flour, green onion, soy sauce, Maggi sauce, sugar, salt and 2 cups of water. Stir and season to taste. 

Spray pie plates with cooking spray and spoon daikon mixture into prepared pie plates. Steam each plate for about 30 minutes, then set aside to cool. These cake rounds can be wrapped well in plastic and frozen for later use. 

To serve, slice the cakes into flat slices and pan fry in a little bit of oil until they are crispy on the outside and soft on the inside. 

Serve with soy sauce, maggi or hoisin sauce to dip. 


Tuesday, March 27, 2012

Miso Ginger Chow Mein


This was a recent experiment, and it was pretty decent! Be very generous with your flavors - you have to make them stretch a very, very long way. 

Miso Ginger Chow Mein

Ingredients: 
3 rounds of dried ramen noodles 
1/4 cup miso paste
5 tbsp olive oil
4 slices of ginger
Soy sauce and sugar to taste
Sliced green onions, to garnish

Bring a pot of water to boil and cook your ramen noodles according to package directions. Drain and set aside. 

Meanwhile, in a large wok or dutch oven, heat your olive oil and add the ginger slices. Stir those around to give the olive oil plenty of ginger-y flavor. Add your miso paste, and stir, stir, stir. (You might need to add a little water here, just to get things blended). When everything is mixed, add your noodles back in and toss to coat. Cook for just a minute more, to make sure everything is hot through, then season with soy sauce and sugar. Serve topped with sliced green onion. 

Monday, March 26, 2012

Caramel Apple Upside Down Cake


The cake portion itself was a fail, the apples were amazing, and the whole thing looked like a hot mess... but the idea is irresistible! 2 pounds of granny smith apples, cored and sliced, then cooked in a mixture of butter and brown sugar. I simmered that in my dutch oven on the stove until the juice reduced and the apples were just slightly cooked, then removed that from the heat and poured a whole wheat cake batter over it and popped the whole thing into the oven. I baked it for about 35 minutes at 350, and inverted it onto a serving platter. It smelled amazing, and the apples were just to die for. The cake recipe was bland, and quite tough, but the SWEET apples kind of balanced it out. The kids liked it! (I used an apple upside down cake recipe from Cooks Illustrated for the apples, and then a recipe for pineapple upside down cake from my Vitamix cookbook for the cake.) 

Please, somebody - perfect this recipe for me! The cake needs to be fairly sturdy...but not THIS sturdy. Take on the challenge! 

Monday, March 19, 2012

Bok Choy Smoothie!


I'm borrowing a BlendTec blender from my little brother for a while, and we are trying to get the most out of it. Today was an experiment to see if I could get my kids to drink some vegetables. (A previous experiment with lettuce earned a resounding NO. Not even I could muscle my way through that grass-flavored breakfast.)

Bok Choy Fruit Smoothie
1 8" head baby bok choy, washed and separated
1 cup chopped pineapple
1 cup chopped cantaloupe
1 orange, peeled and halved
1 ripe banana, peeled
1 cup water
1/2 cup ice

Combine all ingredients in blender and blend until smooth. (Also delicious with 1 cup of frozen berries added.)

Thursday, March 15, 2012

Korean Sweet Potato Noodles


ETA: I've been informed these noodles are called "glass noodles" or "japchae". Thanks, Myrnie!


I wish I really knew what to call these things. The official name  on the front of the package is something like "Korean Taste Noodles", which really isn't helpful. I don't think they taste like a Korean at all. (baBOOM) A quick look at the ingredient list shows that the main ingredient is sweet potato flour, so we call them Sweet Potato Noodles. The noodles are long, slightly bendy, hard, and very faintly purple. They cook up in about 6 minutes, but it seems impossible to overcook them. Even left overnight, in the refrigerator, in a pool of broth, they remained very nearly al dente.

If you run into these noodles in your Asian market, grab a package. They're only about $3, with enough noodles to feed four people.

Enjoy!

PS - These noodles? Extremely slurpable. So, go ahead - slurp it up!

Korean Style Sweet Potato Noodles with Tofu

1 package Korean Style noodles (sweet potato)
1 package tofu (silken or firm), diced into 1/2" cubes
1/4 cup soy sauce
1 cup water
8 Tbsp sugar
2 Tbsp sesame oil
1 tsp black pepper
2 tsp roasted sesame seeds

Fill a large pot with water, and bring to a boil. When that's ready, pop your noodles in and cook those for about 6 minutes, or until tender. Drain and rinse with cold water. Set aside.

In the (empty) pot, combine soy sauce, water, sugar, sesame oil, black pepper and roasted sesame seeds over low heat. Add tofu and cook for 3-4 minutes, until the tofu is a rich brown color. Return noodles to the pot and cook gently until they are just a bit shiny.

Serve garnished with scrambled egg, strips of meat, green onion or vegetables.

Wednesday, February 29, 2012

Review: Wonder Mill Electric Whisper Mill


(Originally published at Motherhood Reflections.) 


About three years ago, I stopped buying bread from the store. After a year of (rather tasty) white bread, I decided it was time to take the next step and start making whole wheat bread. Luckily, I had put a small hand-crank grinder on my Christmas wish list that year, so I felt I was all set. I pulled out my bucket of wheat, clamped my grinder onto the counter, and started cranking.

And cranking.

And cranking.

45 minutes later, I had produced 2 cups of whole wheat flour. I checked my recipe, and found that one loaf of bread requires at least 6 cups of flour. So, I kept cranking. (To add insult to injury, the resulting loaf of bread was horrible - dense and tasteless.)

I happened to be on the phone with my father that day, and told him my funny (and pathetic) story of my afternoon in the kitchen. As we talked, he hatched a plan - if he acted as my sponsor, and bought me a nice electric wheat grinder, would I make bread for his house as well as mine? (I still have a few siblings at home.) Of course! About a week later, after some research, my Wonder Mill Electric Whisper Mill arrived, in a big happy Amazon box.

I quickly got into the kitchen to try my new toy out. First of all, set-up was a snap. Put the lid on the flour canister, plug the feed tube into the grinder tower, and hit the power button. Easy peasy! One cup of whole wheat berries will give you approximately one and a half cup of whole wheat flour. And it is FAST. The flour canister can hold about 12 cups of flour (or 8 cups of whole wheat berries). The mill is, of course, noisy, but not so much so that you can’t carry on a conversation if you are determined to talk. It is noisy enough, though, that I can’t hear the phone ring when it is going. Think noisy-vacuum type noise levels. My favorite benefit of the machine, though, is that I can grind wheat so quickly, experimenting with new whole-wheat bread recipes no longer took hours of hand cranking! I can get the wheat going, and let it grind away while I add my water, yeast, sugar, etc. to my bowl. By the time I’m done with that, the wheat flour is ready to join the party.

Over the past three years, I have ground approximately 200 pounds of wheat...and this little machine is still going strong! It’s a kind of hefty investment (around $300), but for our family, it was worth it. Whole grain flours, whenever we want them? Yes!