Thursday, December 1, 2011

Mushroom and Egg Tart

A base of baked puff pastry, topped with a pan of cooked-down onions and mushrooms, and topped with perfectly-set eggs.

I think yes.

This was a huge hit for dinner the other night- the husband, six-year-old, and myself polished this off with no problem, along with a big green salad.  It took some time, but most of the prep could be done ahead of time for a quick meal prep later.  If you pre-baked the pastry shell, and cooked the mushrooms and onions, all that would be left is piling them into the oven and baking.

This came from the November '11 edition of Everyday Food.  I've marked, and tried, so many recipes from that edition- definitely shelf-worthy, with the rest of my cookbooks!

The original ingredients called for shitake mushrooms and tarragon, and parmesan cheese for dusting.  Here is how I made it.

Crimini and Egg Tart

Serves 3 as main course, or six as side dish

Ingredients:
1 sheet puff pastry, thawed
2 Tbsp unsalted butter
2 medium onions, thinly sliced
3/4 pound crimini mushrooms, cleaned
1 Tbsp. fresh thyme leaves
sea salt and ground pepper
6 large eggs

1.  On a piece of parchment paper, unfold puff pastry.  Cover with a sheet of cling film, and roll out to 11x14 inches.  Remove cling film, and use a sharp paring knife to trim pastry edges straight.  A half inch from the edge of the dough, using your paring knife, lightly cut partially through the dough.  Transfer pastry, on parchment paper, to a rimmed baking sheet.  Use a fork to prick all over, inside the scored border.  Refrigerate 20 minutes.

2.  Turn oven on to 375.  In a large skillet, melt butter over medium heat.  Add onions and cook, stirring occasionally, until lightly caramelized (10 to 15 minutes.)  Using a large glass measuring cup, or a small fry pan, crush mushrooms lightly.  Finish chopping with a knife into 1/4-1/2" pieces.  Add mushrooms and thyme to caramelized onions and cook until mushrooms are soft and dark, about 10 minutes.  Season with salt and pepper.  Deglaze pan with a few tablespoons water, if necessary.

3.  Bake puff pastry until light golden, about 15 minutes.  Remove from oven and top with mushroom mixture, staying within border.  Crack eggs into a small bowl or cup, and carefully pour eggs on top of mushroom mixture.  Bake until whites are set and yolks are still runny (about 10 minutes) or longer if you like your eggs more cooked.  I thought it was perfect after about 20 minutes.

Tuesday, November 29, 2011

Whole Wheat Chocolate Chip Cookies


This was an experiment...a delicious one. I received the Cook's Illustrated Cookbook for my birthday a few days ago, and I am SO excited to try a few of the recipes out. They are well-laid out, and well-explained, and well-proved. Last night, I asked my daughter what she would like to bake today, and her answer was chocolate chip cookies! The recipe looked pretty familiar, so I decided to play with it a little. I subbed in whole wheat flour for the white flour, and used olive oil for half of the butter. The result was a chewy, hearty, nutty cookie that is absolutely wonderful. I wouldn't call these healthy...but definitely a healthier version of a lunchbox favorite! 


LoLo's Whole Wheat Chocolate Chip Cookies
(adapted from Cook's Illustrated Cookbook, Ultimate Chocolate Chip Cookies)

1 3/4 cups (8 3/4 oz) whole-wheat flour
1/2 tsp. baking soda
1 stick (4 oz/ 8 Tbsp.) butter
6 Tbsp. olive oil
3/4 cup packed (5 1/4 oz) brown sugar
1/2 cup (3 1/2 oz) granulated sugar
1 tsp. salt
2 tsp. vanilla extract
1 large egg plus 1 large yolk
1 1/4 cups (7 1/2 oz) chocolate chips

1. Set up your oven rack to the middle of the oven, and preheat to 275. Line 2 baking sheets with parchment paper or silicone mats. Whisk together flour and baking soda in a medium bowl, and set aside.

2. In a medium sized skillet, melt your stick of butter over medium-low heat. It will foam. Keep swirling and wait for the foam to subside, using your nose to watch for danger. You want the butter browned, but not burnt. When the foam goes down, your butter should be a nice chestnut color. Take it off the heat and mix in your olive oil. Dump your butter mixture into a large heatproof bowl.

3. To your large bowl, add brown sugar, granulated sugar, salt and vanilla. Whisk until totally incorporated. Add your egg and egg yolk, and whisk until the mixture is smooth and lump free. Set the mixture aside for 3 minutes, then whisk for 30 seconds. Repeat this process two more times until the mixture is thick, smooth and shiny. Use a rubber spatula to fold in your flour mixture just until combined, then add your chocolate chips. Make sure there are no streaks of flour. Roll your dough out into 2" (3 Tbsp.) balls and place 2" apart on your prepared cookie sheets.


4. Bake the cookies one sheet at a time 10-14 minutes, until the edges are just set but the centers are still puffy and soft. Underdone will give you a soft, chewy cookie. Cooking until set all the way through will give you a light, crisp cookie. Let the cookies rest on the pan for a minute after removing them from the oven, and then transfer the cookies to a wire rack to cool completely.


Wednesday, November 23, 2011

Lemon Chess Pie

This was still a bit jiggly when it was done, and a knife came out wet, but it set up in the fridge.  Kind of like lemonbars, but not nearly as sweet or tart :)  


I can't remember where this recipe came from, and had to search for it in my e-mail.  Luckily, I sent a copy to my MIL!  It's really, really good.


-Myrnie

Lemon Chess Pie

Ingredients:

  • 1 unbaked 9-inch pie shell (use your favorite pastry recipe or purchase frozen piecrust)
  • 1 1/2 cups sugar
  • 2 Tblsp. flour  (or 1 T flour and 1 T cornmeal)
  • 5 large eggs
  • freshly grated zest of one lemon
  • 1/3 cup fresh lemon juice
  • 1/3 cup butter, melted
Preparation:
  1. Preheat oven to 325°.
  2. Place pie crust in 9-inch pie plate...and flute edges.
  3. Combine sugar and flour in mixing bowl.
  4. Add eggs, one at a time, beating at medium speed with mixer until well blended.
  5. Add lemon zest, lemon juice, and melted butter. Mix well.
  6. Pour filling into the prepared pie crust.
  7. Bake on lower rack of oven for 45 minutes at 325°F...or until puffed and golden brown in colour.
  8. When cool...cut and serve each wedge with a dollop of whipped cream...and a sauce of fresh raspberries or blackberries

Monday, November 14, 2011

Brown Sugar Buttermilk Pie


You need this pie, but if you eat this pie...eat nothing else.  With three eggs, 2 egg yolks, and 3/4 of a stick of butter, there's no messing around here!  BUT (and this is a big but.  Ahem.) You need this pie.

 I cook a lot.  A lot, a lot.  And this is the best thing to come out of my kitchen in a long time!  Crispy pie crust.  Soft custard.  Nutmeg that floats to the top.  Add this to your Thanksgiving line up, folks.

(If you don't subscribe to Martha's "Everyday Food" magazine, PLEASE do.  It's that good.)

browned butter- buttermilk pie


Brown-Sugar Buttermilk Pie
from Everyday Food originally, in my own words

3 Tbsp flour
3 large egg eggs, plus two more large yolks, beaten
1 cup packed brown sugar
1 1/2 cups buttermilk, room temperature
1/2 tsp ground nutmeg
1/4 tsp ground cinnamon
6 Tbsp unsalted butter

  1. Press your favorite single-crust pie crust into a glass pan, and bake at 425 for about 10 minutes.
  2. Put 6 tablespoons of butter in a small sauce pan on the stove, over medium heat, for 8-10 minutes and let it melt and cook.  It's going to froth up, and it's going to turn brown.  Swirl the pan occasionally, especially towards the end.  When the froth subsides, and it's nut-brown, it's done!
  3. In a mixing bowl, whisk together flour, eggs, and brown sugar until smooth.  Whisk in buttermilk, nutmeg, and cinnamon until combined.  This pie, with such small amounts of spices, is already heavily spiced.  I wouldn't recommend increasing them at all.
  4. When the butter is done, immediately whisk it into the buttermilk mixture.  It will foam up dramatically, be prepared!  Pour mixture into baked pie shell, and bake at 425 for 25-35 minutes, until the custard is set but still jiggly.  This will continue to cook a bit as it cools.
  5. Let cool completely, 2 hours, before serving.  Can be refrigerated up to 3 days.
(If you use this pie crust recipe, you won't be sorry!  It mixes together with a fork, IN THE PIE PLATE.  Then you just smash it out with your finger tips.  No rising, either, so it's perfect for this.  My  mom has always, as long as I've known her, left her pie crust behind when she eats pie.  It's just wasted calories, when she could be eating more filling! She ate this crust, and relished it :)

browned butter- buttermilk pie

--Myrnie

Friday, November 11, 2011

Sweet Potato Dessert Soup with Tong Yuen

IMG_0128


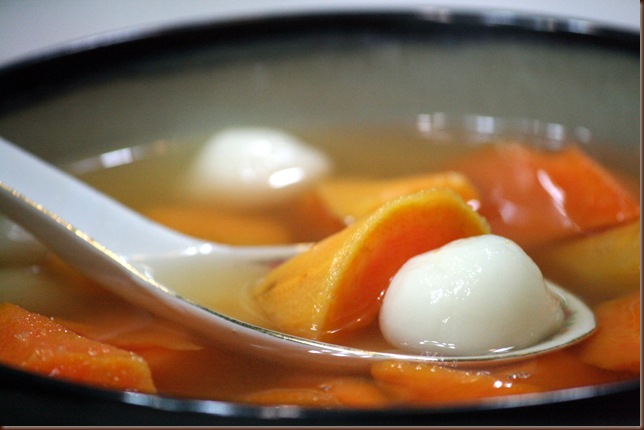
After a long day of sick kids, cancelled plans and one truly awful dinner (made by yours truly), Lo Gung and I both deserved something tasty (and filling..since dinner was so nasty). This is what came to mind. I had a few sweet potatoes in the refrigerator, and some ginger that was only getting spicier by the day. Sweet potato dessert soup (fan syu tong seui) is kind of a perennial staple around here. However, I am an absolute sucker for anything involving glutinous rice flour, so I got fancy and threw a few fresh tong yuen into the mix. The result was tasty, satisfying…and almost made us both forget about the long day we had just survived.


Aunt LoLo’s Sweet Potato Dessert Soup with Tong Yuen

Makes 2-4 servings

Ingredients:

2 medium sweet potatoes, peeled and chopped into 1” pieces (fan syu)

3-4” knob of ginger, peeled and cut into 1/2” chunks (geung) (fyi – ginger is super easy to peel – scrape it with a spoon)

1 lime-sized chunk of Chinese rock sugar (bing tong)

1/2 of a dried satsuma peel (chaang pei)

15-20  plain glutinous rice dumplings (tong  yuhn) (recipe here) (to make 15-20 dumplings, you will need approximately 1/2 cup glutinous rice flour and less than 1/4 cup water)

Water (4 rice bowls full)


1. Put your water, ginger and satsuma skin into a medium sauce pan, cover, and bring to a boil.

2. Add your chopped sweet potato, reduce heat to medium, and simmer until potatoes are almost fork tender.

3. Meanwhile, prepare your tong yuen. When the sweet potatoes are about 2 minutes from being done, drop your tong yuen into the simmering water. Continue to cook until the tong yuen float, then add your rock sugar and stir to melt. Taste the broth, and add more sugar if necessary.


Enjoy!

Tong Yuen

My apologies. This post has been sitting in my queue for…well, since the Super Bowl. I didn’t want to publish it until I could successfully use it to make my own tong yuen. And tonight…I did it! Tong Yuen are very simple, if you know what you’re looking for. Simply combine glutinous rice flour with enough water to make a dough. Easy peasy.
February 2011 037

Tong Yuen are one of my favorite Chinese treats. One of my companions introduced them to me when I was a missionary in Hong Kong. We were both craving something sweet and, since I was freshly arrived from America, my sweet companion was scouring the grocery store for ice cream that didn’t cost half of our weekly food budget. “No,” I said. “I don’t want something that sweet…” Right after she picked her jaw up off the floor (she knew I had a sweet tooth!), she grabbed a package of tong yuen from the freezer department. “Try these!” she said. We brought them home and boiled them up. They were delicious! Soft and chewy, filled with sweet black sesame seed paste, they were amazing. They are still one of my favorite ways to satisfy a sweet tooth, but I rarely get to enjoy them. They aren’t too expensive ($4 a package for the good ones), but I always seem to want to save them for a Special Occasion.


When my mother in law came to visit this month and told me she knew how to make them herself, I was so excited! She whipped these up, literally, an hour before we took her to the airport to fly home. They come together quickly, but create a lot of dirty dishes as there are several components coming together.


The trickiest part is, of course, making up the tong yuen. They are a simple mixture of glutinous rice flour and water. That’s it!
February 2011 032

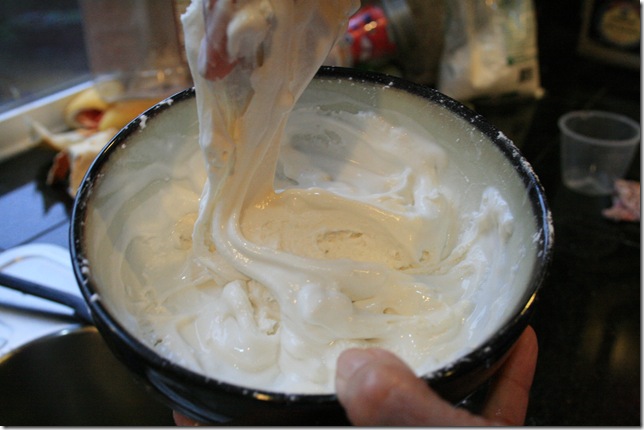
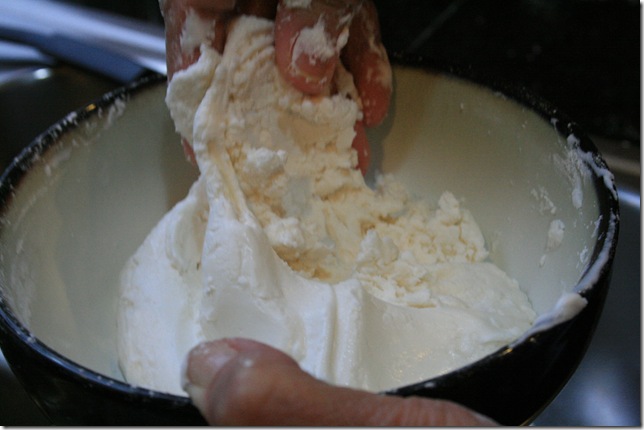
This is too dry.


February 2011 034

This is too wet.

February 2011 035

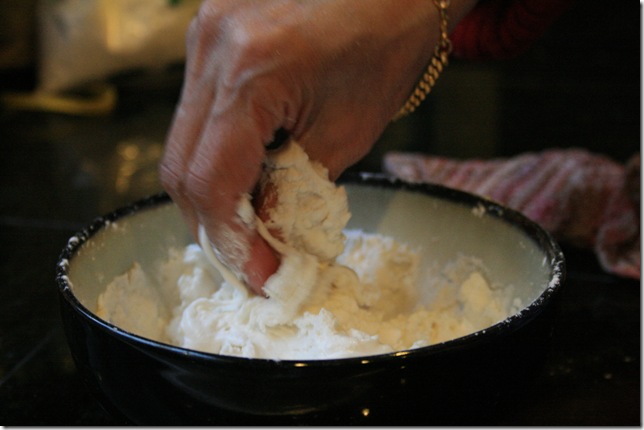
This is just right! It should resemble…playdough? It’s similar to the Gaak you might have played with in elementary school (cornstarch and water). It stretches if you pull slowly, but snaps off if you pull quickly. You need to be able to roll it out into firm balls that will hold their shape. Just keep adding glutinous rice flour, or water, until you’ve got it right. My MIL started out with 2 cups of flour, and then decided to just mix up the whole bag. We made it our lunch. Yum!
February 2011 038

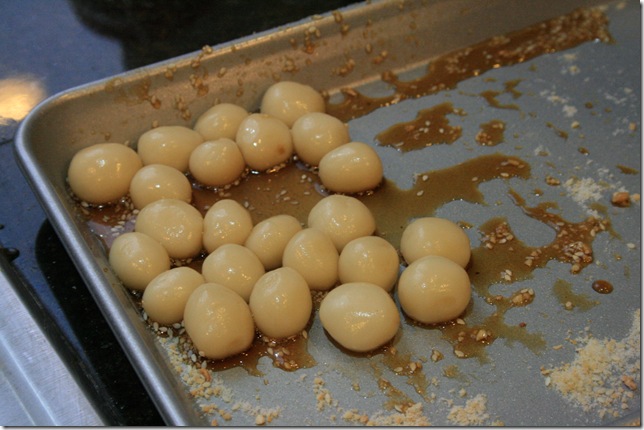
The boiled, and syruped, tong yuen waiting in a pan to be eaten.
February 2011 039

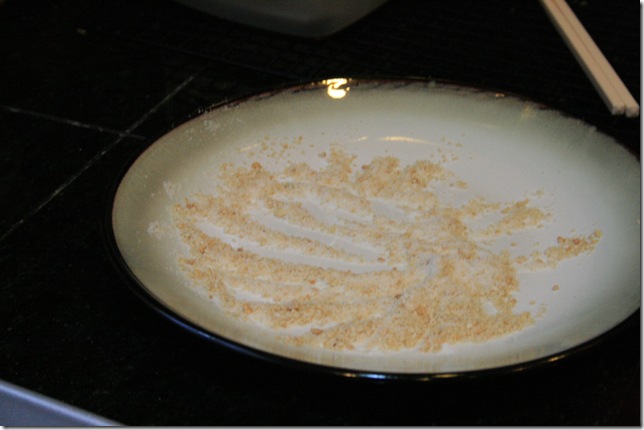
Our “dipping plate.”

February 2011 042


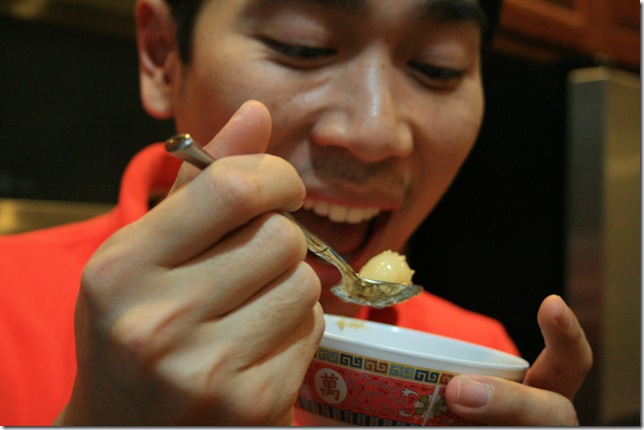
One very excited Lo Gung. He hadn’t had his mothers homemade tong yuen in years! (I was smarter than him, though. While he was busy watching the Super Bowl, I was hovering near his mother in the kitchen, hoovering up any unclaimed tong yuen as fast as I could. Heh.


These are very “traditional”. MaMa laughed when I said I wanted to learn. These are the treats of her youth, not the lovely filled ones you can find in Asian grocery stores now. However, I think these are just perfect. If you like fillings in your dumplings, you could definitely use this recipe to wrap up some red bean paste or sesame seed paste.


MaMa’s Tong Yuen

Makes enough for 4-6 people

Ingredients:

Dip:

2 Tbsp. sesame seeds

3 tsp. white sugar

1/4 cup nuts (cashew, peanuts, almonds, etc. Whatever you want.)


Syrup:

2 bars Chinese brown sugar (pin tong) (these are sold in Asian grocery stores and look like small bricks)

1/4 cup water


Tong Yuen:

2 cups glutinous rice flour, plus extra for adjustments

1/2 cup water, plus extra for adjustments


1. Prepare a medium sized pot and fill it about half way with water. Bring to a boil, then reduce heat and let it simmer until you are ready to cook your tong yuen.


2. In a small sauce pan, combine your pin tong (Chinese brown sugar) and water. Simmer, stirring occasionally, until the sugar is completely dissolved. You may need to help it along by breaking up the sugar bars with your spoon.


3. In the bowl of a small food processor, pulse your nuts until coarsely ground. (Alternately, you can put your nuts in a plastic bag and use a mallet or rolling pin to bash them up.) It should look like chunky cornmeal when you are done. Combine with your white sugar and sesame seeds in a small bowl, and set aside.

4. In a bowl, combine your glutinous rice flour and 1/2 cup water.  Mix it with your fingers and adjust the water or glutinous rice flour until you have the right consistency. Do not over-mix this. Over-mixed tong yuen are chewy, gummy, dense tong yuen. Not good eats. Use three-four fingers to lightly mix the flour and water together, sort of pinching and folding until everything is right. You should be able to roll it out into balls that will keep their shape. It will look a little like spackling!


5. When your tong yuen are rolled out, carefully lower them into your simmering water. Return to a boil, and cook until the tong yuen float (about 2-3 minutes).


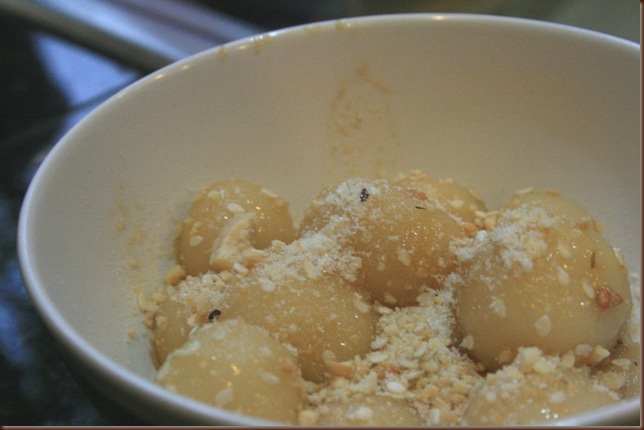
6. When the tong yuen are finished cooking, use a spider or slotted spoon to fish them out of the water and into the pot of syrup. Stir to coat, then use your spider or slotted spoon to remove to a serving dish. You can sprinkle with your nut/sugar mixture, or allow your guests to dip their tong yuen individually as they eat them.


Enjoy!

Thursday, November 10, 2011

Gai Mei Bau (Rooster Tail Bun)

Hello, all! Welcome to my crazy. I am trying (and trying and trying) to recreate the Hong Kong Gai Mei Bau (้›žๅฐพๅŒ…). It is my husband’s favorite bakery bun, and we haven’t found any great ones near our home. Oh, I’m sure they’re out there, but I’m too lazy to drive around and test buns from all the local bakeries to find a great one!


I’m just lazy enough to stay home and test recipe after recipe to figure out how to make them myself. Because that is how my crazy works.


My first attempt was using a recipe from Auntie Yochana (here). They were delicious. I omitted the Mexican Cream topping, as well as the egg wash and the sesame seeds. (They would have been delicious, I’m sure, but at that point in the day, I was tired of adding butter to my creation, and I was just tired in general. So…there.)


Oh my goodness, guys. These buns were seriously delicious. However, as tasty as they were, they didn’t taste like the real buns. The filling was declared “right” by Lo Gung, and so I will keep that portion of the recipe. The bread portion came out tasting a lot like the Australian Toaster Biscuits I loved to eat when I was a kid (and didn’t realize how much butter could be packed into a baked good. Mmmm…those were the days!).


So. Here’s the filling recipe (adapted from Yochana’s Cake Delight!)

Coconut Filling for Buns

250 gm. Butter, softened
250 gm. shredded coconut
120 gm. plain flour
100 gm. powdered milk
1/2 tsp. Vanilla extract


Combine all ingredients  in a bowl and set aside.

When I made my initial batch of buns, I made a half batch, and froze half of my filling mixture. If that doesn’t work out well….well, then, I will let you know.

My next attempt at the dough will be using this recipe, from Hong Kong Breads.

The first recipe I tried involved custard powder, which is fabulous in other applications, but I don’t think it quite works here. I’ll let you know how this goes!

Tuesday, November 1, 2011

Pan Seared Tilapia with Mandarin Orange Sauce


If this was a fancy restaurant, I might call this Mandarin Orange Pan Seared Tilapia with Crisped Ginger and Garlic. Whatever.


This was quick, delicious, and (amazingly) totally adored by everyone at the table. Including the five year old who would prefer to eat Nutella and bread five times a day.


Mandarin Orange Tilapia


Ingredients:

Tilapia filets

1/2” knob of ginger, julienned

5 cloves of garlic, thinly sliced

Olive oil

1 tin Mandarin Oranges

3 tsp corn starch

Green onions, to garnish


1. In a small sauce pan, stir together the can of mandarin oranges (including the juice), and the corn starch. Cook over medium heat until bubbly and thickened.

2. Meanwhile, in a skillet, combine a drizzle of olive oil with the ginger and garlic. Turn on your heat to medium high, and heat the oil until the garlic and ginger just start to sizzle and smell good.

3. Add your tilapia (carefully dried on paper towels!) and cook until golden and done, approximately 3-4 minutes per side.

4. Serve the tilapia over rice, with the orange sauce, and garnish with sliced green onions.


Enjoy!
Friday, October 28, 2011

Flourless Chocolate Crisps

Adapted from Kumquat


Ingredients:

3 cups powdered sugar

2/3 cups sifted cocoa powder

1/4 tsp salt

1 1/4 cups chocolate chips

2 tsp vanilla

2-4 large egg whites


Preheat oven to 350 and line two cookie sheets with silicone mats or parchment paper.


In a bowl, combine your powdered sugar, cocoa powder, salt, chocolate chips and vanilla. Add two egg whites, and give it a stir. It will probably look like wet chalk. Add another. Maybe another. You’re looking for anything between brownie batter (a slightly thicker cookie) and Elmer’s Glue (a thinner cookie).


When desired consistency is reached, put your cookies by spoonful onto your cookie sheets. Two tablespoon-sized heaps will give you 24 cookies. One tablespoon-sized heaps will give you smaller cookies, and more of them.


Bake 14 minutes per sheet, or until the cookies are shiny on top and slightly cracked. Cool a few minutes on the cookie sheet, then carefully move your paper/mat to your cooling rack. When you are able, peel your cookies off and allow them to finish cooling on the rack.

Marshmallow Popcorn Treats

marshmallow popcorn balls


Marshmallow Popcorn Treats

Makes two 9x13 pans- can be halved

Pop one cup of popcorn. 

In a large pot over medium low heat, melt 3/4 cup shortening.  Add 1 large bag of mini marshmallows, about 10 cups, and melt them, stirring occasionally.  You want to keep the heat low, so the sugar doesn't cook too much and make your treats crispy!  Stir in 1/2 teaspoon vanilla.

Pour the marshmallow mixture over the popcorn, and mix quickly before it cools off too much.  I did this in another large pot, or you could do it in batches in a big bowl.  This is a LOT of popcorn!  The easiest way is to grease your hands and just dig in and mix it around- wait just a minute or two for the sugar to cool enough to handle.

Press lightly into two well-greased 9x13 pans and let cool.  Turn onto a cutting board and cut into squares.

Tuesday, October 25, 2011

Whole Grain Corn Bread

This is, hands down, my favorite corn bread.  It's sweetened, but not sweet.  It's made with freshly ground corn and wheat, so it's filling.  It's soft and hearty and moist, with little crunchy bits of corn, and so, so good.  The original recipe is from the side of the Alber's Corn Meal box.  I've doubled it, and substituted freshly ground grains.

This is fantastic with chili or beans.  I like it plain, and some in my family smother it with butter and honey.  I remember, growing up, drizzling molasses over my corn bread- I highly recommend it!  (Plus, molasses is a good source of iron.)

Whole Grain Corn Bread
1 heaping cup popcorn, ground into coarse flour
1 heaping cup winter white wheat, ground into fine flour, plus more (see below)
1/2 cup sugar
2 Tbsp. baking powder
2 tsp. salt
2 cups milk
2/3 cup vegetable oil
2 eggs, beaten.

Measure out 2 cups of corn meal and 2 cups of wheat flour.  (I normally grind a bit of extra wheat flour, to make sure I have 4 cups of grain flour total, since I can more easily use up excess wheat flour than corn meal.)  Mix with dry ingredients in a bowl.

In a large measuring cup, combine liquid ingredients- stir to beat eggs.  Mix the wet ingredients into the dry, with as few strokes as you can.  As soon as everything is wet, stop mixing- lumps are OK!

Baked in a greased 9x13 pan, at 400 degrees for 20-30 minutes until a knife inserted in the center comes out with just a few moist crumbs.

Tuesday, October 11, 2011

Cream of Broccoli Soup

Every member of my family, including the infant, loved this soup.  L.O.V.E.D.  Also, it had a boat load of vegetables in it.

Cream of Broccoli Soup
2 heads broccoli, chopped
1/2 head celery, chopped
2 carrots, chopped
3 Tbsp. oil
1/4 cup flour
2 Tbsp dried onions
1/2 tsp granulated garlic
1 tsp worcestershire sauce
8 cups water
Chicken base or bullion (I used 2 tsp)
1 1/2 cups powdered milk (or amount indicated on package for 2 quarts of water)
Cooked corn, optional

Heat oil in a large pot, and add chopped vegetables, granulated garlic, and dried onions.  Saute until softened, and stir in flour.  Cook a few minutes, then add a little of the water and clean the bottom of the pot.  Add the rest of the water and worcestershire sauce .  Once heated through, add powdered milk.  Let simmer, stirring often to keep from sticking to the bottom of the pan, until carrots are softened.  Puree in a blender (or with an immersion blender) and pour through a colander to strain.   We served ours with corn stirred in.

You could also add potatoes, or other mild flavored vegetables like cauliflower, or young turnips.

If you have extra milk, that could easily be substituted for the powdered milk and water.

Sunday, October 9, 2011

LoLo’s Marmalade Cake

This cake was an experiment, to use up part of a quart of lemon marmalade I had in the refrigerator. (Why do I have a quart of marmalade? Well, because I canned it! I put it in a quart jar to save time, so I didn’t have to can a half dozen tiny jars. Guess the joke’s on me. Nobody likes the marmalade!)

This is rather loosely based on a cake I found here, on Orangette.  The way I made it, it was sticky, and sweet, and absolutely awesome. Even the kids loved it. So. If you have large quantities of marmalade on your hands, give it a go!

LoLo’s Marmalade Cake
Ingredients:
2 cup all-purpose flour
1 Tbsp. baking powder
4 large eggs
½ tsp. table salt
1 cups sugar
1/2 cup brown sugar
2/3 cup olive oil
2 tsp. vanilla
1 cup marmalade (I used lemon, and it was quite tasty)

Preheat your oven to 350 and prepare your pan. I used a jelly roll pan, lined with a Silpat. Whatever you use is probably fine, just adjust baking time accordingly. A bundt cake will take longer to bake than a 9x13 pan or a jelly roll pan.  This is a STICKY cake, so whatever you use, either line it with silicone or parchment paper, or grease and flour liberally!

1. In a bowl, sift together your flour and baking powder. Set aside.
2. In the bowl of your stand mixer, combine your eggs and salt. Beat until light and frothy. Gradually add  your sugars and mix until combined. Slowly add your flour mixture and mix just until combined. Add your olive oil, vanilla and marmalade. Mix again, just until everything is incorporated.
3. Scrape the batter out into your prepared pan and bake until a toothpick inserted in the center comes out batter free. (A few crumbs stuck to the stick are ok.) (I baked mine in a 1/4 sheet pan, luckily on top of another 1/2 sheet pan. This cake  has some lift to it! If baking in a 1/2 sheet pan, start checking it at 40 minutes.)

EDITED TO ADD: (11/10/11) When the cake is cool, spread it with glaze, wait about 20 minutes, and then cut into small pieces. These are awesome...like lemon blondies.

Glaze recipe:
1 cup powdered sugar
Lemon juice (about 8 Tbsp.)

Mix powdered sugar and enough lemon juice to make a drizzly glaze. Spread over the cooled cake.

These were amazing...like lemon bars in a cake form.

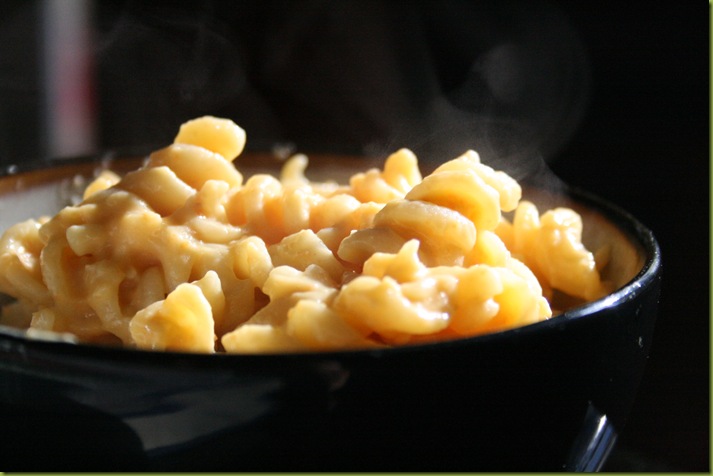
Healthy Mac and Cheese

Guys, help me out here. I got this recipe from a friend. All I know is that it is copied from chapter 15 of a cookbook, and it is officially called “Healthy mac and Cheese, Believe it!” For all I know, it’s from a diet book. (Come to think of it, it probably is from an Eat-Clean book.)


Wherever it’s from, this friend (Jen) came over on Friday with a dish of it and I ate way, way too much. It is absolutely delicious, and totally crave-worthy. I wouldn’t say it’s a trick-you version of mac n’ cheese, but it’s absolutely delicious in its own right. The whole point of Jen bringing it over was to try it together, and tweak it if it needed it. Here’s what we came up with.


Healthy Mac and Cheese

(Adapted)

Ingredients

2 Tbsp. olive oil

2 Tbsp. flour (any kind – whole wheat, gluten free, etc.)

3/4 cooked, mashed sweet (or regular) potato

3/4 cup liquid (low-fat or skim milk, or broth) heated to just warm

1 cup yogurt cheese (made by draining plain yogurt in cheese cloth)

2 Tbsp. grated parmesan cheese

Sea Salt and Pepper, to taste

Worcestershire Sauce, to taste (about 1 Tbsp.)

Nutmeg, to taste (about 1/2 tsp.)

3/4 pound whole grain pasta

Panko bread crumbs


1. Cook your pasta according to package directions. Drain and set aside.  Also, grease a small casserole pan and set aside.

2. Meanwhile, in a skillet, heat your olive oil over medium heat and add your flour. Whisk to make a roux – don’t let it burn! Gradually add your warmed liquid (milk, broth, etc.) and continue to whisk and cook until thick. Add potato puree and continue stirring.

3. Add parmesan cheese and yogurt cheese. Add salt, pepper, Worcestershire sauce and nutmeg to taste. Add your noodles and stir to combine.  Taste again, and adjust seasoning if needed.

4. Move your sauced pasta into your prepared casserole pan and sprinkle liberally with panko bread crumbs. Broil in the oven just until the bread crumbs turn golden brown. Serve hot.

You may also stir in steamed veggies, or sliced chicken, to make this into a one-pot meal.


Enjoy!
Tomato Pepper Carrot Puree (Raw Spaghetti Sauce)

Staring down a pile of ripe tomatoes, I knew I wanted pasta sauce for my freezer.  I knew that I wanted to make a huge batch, eat some for dinner, and freeze the rest.  I knew that dinner was in 30 minutes.  So, I punted (which is a luxury I can afford, when I don't intend on preserving the final product in a jar, on the shelf.)

After finding this recipe and taking stock of what I had, I scoffed at the suggested three tomatoes, grabbed as many things from my fridge as I dared, and came up with this.

Technically, I'm going to call it a tomato-carrot-bell pepper puree.  Eat it cold and plain, it's gazpacho.  Warm it up and thin it down with some chicken stock, it's a nice warm soup base.  Cook it down thicker, and it would make an excellent spread for crackers or little toast points or crusty baguette rounds.  Use it as a pizza sauce.  Do what I did, and spoon some into a hot pot of drained pasta, add back some of the starchy pasta water, and stir it over low heat till the sauce is thick and clingy on the noodles.  The main thing to remember is it's raw, it's delicious, and it's fast.  Oh, and it's smooth.  Very, VERY important to my kids.

Tomato Pepper Carrot Puree
Makes about 5 Cups


1/4 cup olive oil
10 medium sized tomatoes, halved (I used Early Girls and very, very fat Romas from the garden)
3-4 cloves garlic
1 small onion, halved
1 tsp salt
1/4 tsp red pepper flakes
2 Tbsp dried basil (use fresh if you have it- I made ALL of my basil into pesto yesterday)
2 Tbsp white vinegar (for a little kick, and to keep it bright looking)
2 red bell peppers, topped and seeded, then torn into quarters
2 good-sized carrots, chopped into 1" cubes
Pepper

Start with the first eight ingredients, but only put in two or three halved tomatoes.  Blend well- as you can, add the rest of the ingredients.  I have a workhorse of a vintage VitaMix, you might need to adjust things or use a food processor at home.  Grating the carrots would also help in smaller blenders.  Taste test, and add more basil or salt or pepper or garlic or red pepper, or whatever you fancy.

As a pasta sauce, I'd say this made enough for about 5 pounds of pasta.


Alton Brown’s Super Chewy Chocolate Chip Cookies

(from LoLo’s Cooking School, session 2)


The Chewy

(Adapted from Alton Brown’s Good Eats: The Early Years)

(I ADORE this cookbook. If you do not have it, I HIGHLY recommend it. Not only are the recipes foolproof, but the book is packed full of interesting culinary facts, scientific facts and trivia bits from the Good Eats cooking show.)

Ingredients:

1 cup butter, melted and cooled

2 1/4 cup (12 oz) flour

1 teaspoon kosher salt (3/4 tsp. table salt)

1 teaspoon baking soda

1/4 cup (2 oz) white sugar

2 cups (8 oz) brown sugar

1 large egg + 1 egg yolk

2 Tablespoon milk

1 1/2 teaspoons vanilla

2 cups (12 oz) chocolate chips


1. Sift together the dry ingredients and set aside.

2. In the bowl of a stand mixer, combine butter and the two sugars. Beat on medium speed for 2 minutes.

3. In a third (small) bowl, whisk together the egg, egg yolk, milk and vanilla extract.

4. Lower the mixer speed to low, and slowly add the egg mix. Mix until totally combined, about 30 seconds.

5.  Still on low, slowly add the flour mixture to the mixing bowl, stopping several times to scrape down the sides. 

6. When the flour is all mixed in, put the mixer on its slowest setting, and add the chocolate chips.

7. Chill the dough in the refrigerator for one hour, then preheat your oven to 375.  Position the racks in the top and bottom thirds of the oven.

8. Scoop the dough onto parchment or silicone lined cookie sheets, and  bake two sheets at a time, 10-15 minutes, rotating the sheets halfway through cooking. Cool the cookies on a wire rack.

Wednesday, August 17, 2011

Chinese Tomato Salad

IMG_9252

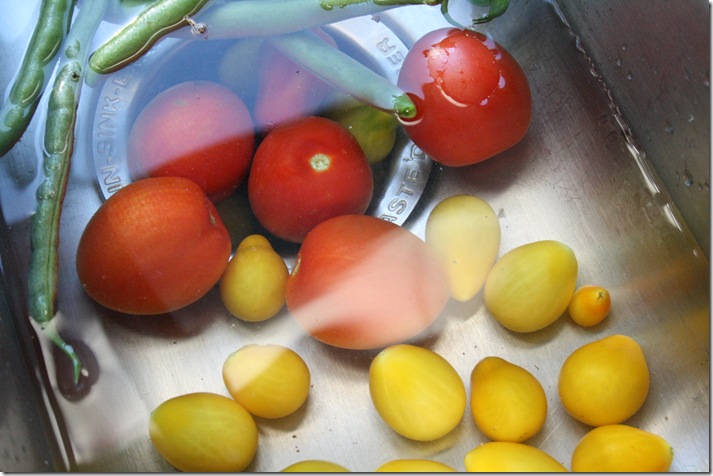
The day’s haul from Mom’s greenhouse, getting a cool bath in the sink

IMG_9259IMG_9264


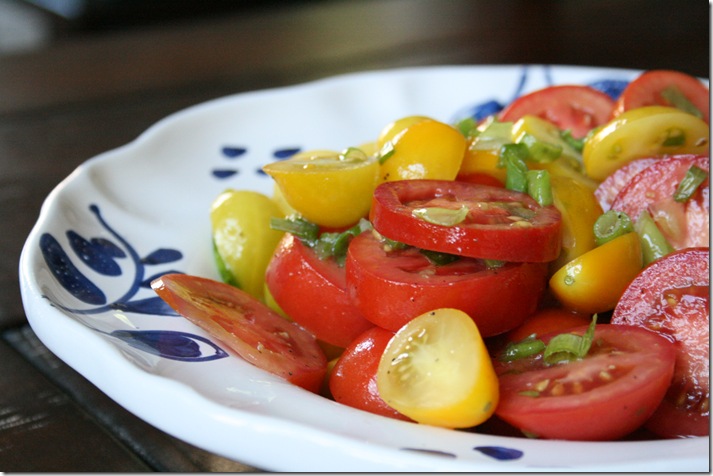
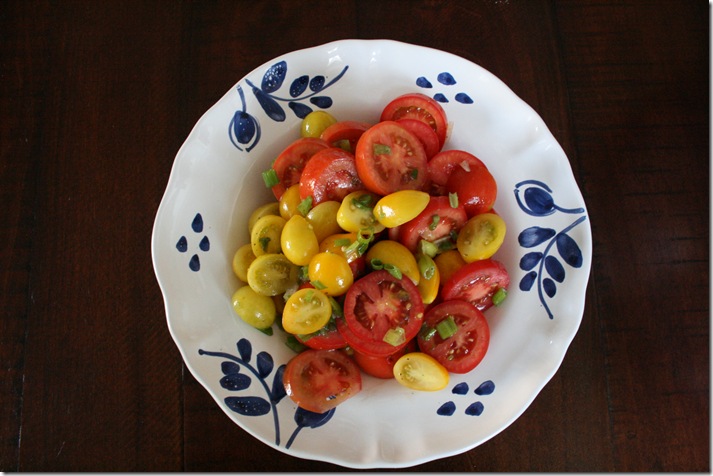
I made this salad the other day, after picking some truly gorgeous tomatoes (red roma and yellow cherry) from my mother’s greenhouse. This salad is so light and refreshing – it’s perfect for a summer meal. The dressing is so striking, this dish will work with winter-time grocery store tomatoes, but summer time is the BEST time to enjoy this dish!


Chinese Tomato Salad

Adapted from The Asian Cookbook, from Parragon Publishing

(I don’t usually link to books on Amazon, but this book is one of my favorites, and very inexpensive. I highly recommend it!!)


Ingredients:

Tomatoes (2 large, or enough to fill a small serving dish), sliced

Chopped green onions (I used the top 5-6” of three green onions)

Chopped garlic (2 cloves)

Sesame Oil (1/2 tsp)

Rice Vinegar (1 Tbsp)

Salt (1/2 tsp)

Pepper (white or black, one pinch)

Sugar (one generous pinch)


Combine your green onions, garlic, sesame oil, rice vinegar, salt, pepper and sugar in a large bowl. Whisk, and taste. Adjust seasonings to taste. Add your sliced tomatoes, gently fold to coat and transfer to a serving dish. Garnish with additional sliced green onions if desired.


Optional: If using only large tomatoes, the tomato slices can be arranged in a ring on a serving platter, and the completed dressing can be spooned over the top.


Can be made ahead of time. Serve at room temperature.

Tuesday, July 26, 2011

Brown Rice Jumble Bowls

This is an easy, super yummy, weeknight dinner idea.  Everyone in the family enjoyed customizing their own bowl- I set out the rice and bowls of toppings, and let the kids just go to town.  Ernie didn't mix anything at all, just had little piles of everything she loved (rice, parmesan, chicken, and cucumbers) and Mimi just chose rice and shredded cheddar cheese- I didn't list the cheddar below because it doesn't quite fit with the flavor profile, but I knew Mimi would eat it!


  This has unlimited variations, but this is what I used.  You could substitute other grains- quinoa or wheat berries would be amazing, or even pasta!  If the toppings you use are chewy or unwieldy, chop them small- I chose to cut my mushrooms and chicken rather finely, but left the cucumbers and tomatoes big enough to grab with a fork.  An asian-inspired bowl would be delicious, with steamed edamame and a ginger-sesame dressing.


Remember when you cook brown rice that it takes much longer than white rice.  I cooked two cups of brown rice with three cups of water in my rice cooker on the "brown rice" setting, and it took about an hour.  I love the flavor and chewiness of brown rice, but often forget to leave myself time to cook it!

Cooked brown rice
Chopped tomatoes
Chopped cucumber
Finely chopped cooked chicken
Finely chopped white mushrooms
Minced chives
Grated Parmesan cheese
Balsamic vinaigrette

Sunday, July 10, 2011

Cheater S’Mores

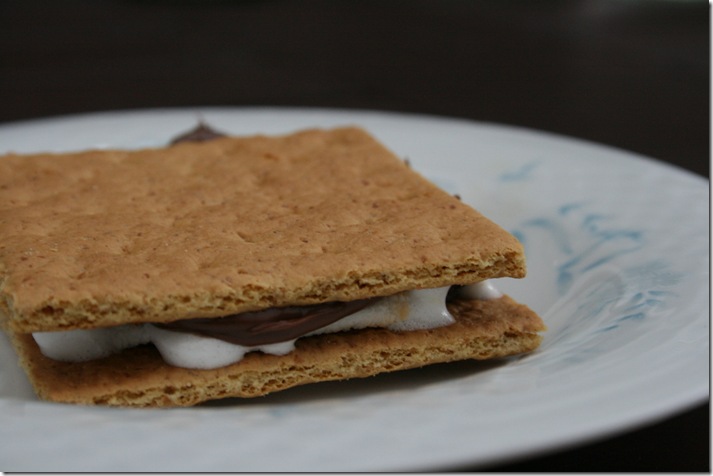
IMG_9087


So…s’mores aren’t exactly rocket science. For those of you that didn’t grow up in America, a s’more is a treat we enjoy as children, usually around a campfire. It is short for “some more” as in “I want some more.” The classic version is a marshmallow, skewered on a long stick, and roasted over a campfire. The crispy, gooey marshmallow is then sandwiched with two squares of graham cracker and a piece of chocolate…almost always Hersheys, because it’s the only chocolate in the right shape.


That’s all very well and good, but campfires aren’t always plentiful around Suburbia. One night, I had the brilliant idea to skewer my marshmallow on a long lobster fork and roast it over an open flame…on my gas stove. Hrm. Well, it was toasty and gooey, but it wasn’t quite right.


Then I figured, as long as I was butchering a classic, I might as well take it all the way.


And my kids’ new favorite treat was born.


LoLo’s Cheater S’mores

Ingredients:

Graham crackers

Marshmallow

Nutella (chocolate hazelnut spread. peanut butter is delicious here, too.)


Spread one square of graham cracker with Nutella, and put the other square on a plate with one marshmallow on top. Microwave your marshmallow clad graham cracker for 15-20 seconds (be sure to watch it – it’s pretty impressive to see a marshmallow the size of an apple!). Take your plate out of the microwave, and smash your Nutella-smeared graham cracker on top.


Hand it to a toddler, stand back, and enjoy the view.


Oh, and you might want to have a wet rag handy. Just in case.


IMG_9088

Saturday, July 9, 2011

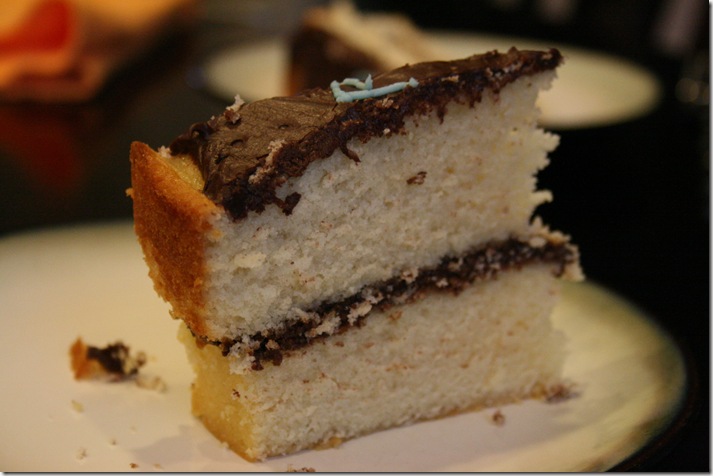
A Vanilla Cake That Looks Like Cake

IMG_9113

IMG_9120

My fellow Chow-ians…I give you a vanilla cake. It is not a “white cake”, because it involves egg yolks…so it’s yellow. But it’s tall! And fluffy! And it looks like a cake. My father will laugh when he hears this, but I spent all weekend trying to recreate, from scratch, what would take me $.99 with a box. My father’s grandmother was brilliant, both in the classroom and in the kitchen. Her husband was a scientist. They both appreciated a good cake…and knew that the easiest way to get one was to take advantage of all the science and work that went into the boxed mixes. They drilled that fact into their grandson, who in turn passed the wisdom on to me – Use The Box.


And, can I vent for a moment? Indulge me. Last weekend, I baked four white cakes. Why? Because the second one didn’t turn out how I wanted it to…neither did the third. Or the fourth. The first one was for us, and I used Dorie Greenspan’s Perfect Party Cake recipe. It makes the most amazing cupcakes – tiny crumb, moist, tender. However, my cake? Didn’t rise more than 1/2”. Not acceptable, but it was just for us, so…what are you going to do, right? (After some research, it turns out that great cupcake recipes don’t often translate to great cake recipes. However, great cakes can usually be made into great cupcakes. Weird, right? It’s sad, too, since Dorie’s cake was intended to be baked as a cake! However, she knows all about the issues with the cake, going so far as to nickname it “The Cake that Won’t Rise.” She has no idea why her cakes work and ours don’t.) The second cake was an “order” from a friend, for her mother’s birthday. It was the same recipe, baked in a 9x13 pan. It hardly rose. I tried again, to make a second layer for the cake (since the first cake couldn’t very well be split). I followed the directions exactly…and got the same results.


The next day, after hours of research the night before, I tried another recipe…just to see what would happen. It was the Cook’s Illustrated White Cake. Not only was the rise as sad as Dorie’s cake when baked in a 9x13 pan, but the texture of the cake was something like sweet, butter-laden cornbread. It was great with strawberries and whipped cream…but it wasn’t the white cake I was looking for. (It was at this point that I started to get just a little bit Mad at The Universe. Seriously, folks – if a white cake should be WHITE, why does it rely on temperamental YELLOW butter??!) (I realize now, after some more research, but I probably could have solved a lot of my problems by just substituting in shortening for the butter. And my cake would have been white.)


Finally, I came across King Arthur Flour’s Golden Vanilla Cake. Not only did it use ingredients I commonly kept in the cupboard (who keeps cake flour around??!), it came with a KAF guarantee, oodles of great reviews, and a handful of horrible reviews…followed by responses from the KAF team with suggestions for the bakers, or offers of telephone assistance, or both. When I found the recipe (in the middle of the night), I very nearly jumped out of bed and baked it right then and there. However, I decided that the quest for a Great Vanilla Cake wasn’t worth a 2 am bed time, so I held off.


Kids? I’ve found My Vanilla Cake recipe. Huge thanks to King Arthur Flour for another great recipe!


To find the recipe go here. And please, if you can, use a kitchen scale and the “weight” option to get the recipe in ounces instead of cups.

Friday, July 8, 2011

Hong Kong Egg Waffles (Gai Daan Jai) (้›ž่›‹ไป”)

IMG_9050IMG_9054

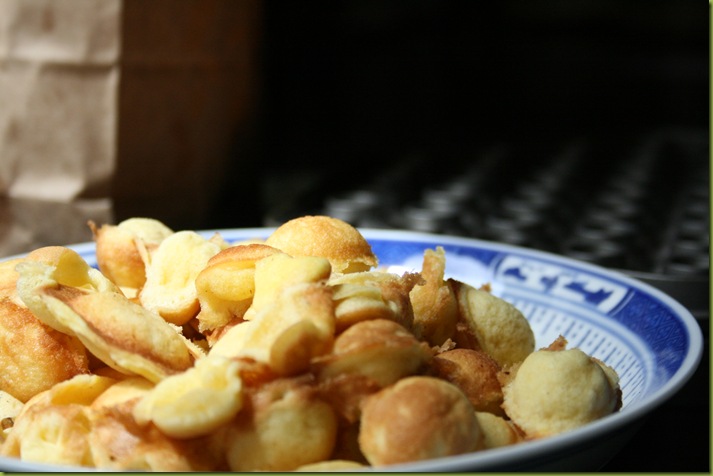
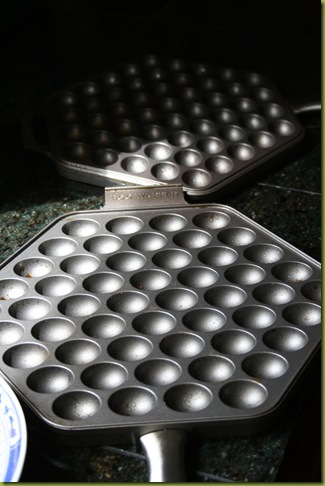
(Gai Dan Jai, and the Nordic Ware Egg Waffle Pan. The pan is currently only available in America at Williams-Sonoma, for about $50. Or you could go to Hong Kong and buy one there. Your choice. But going to Hong Kong seems a bit drastic, just for a pan. There are no other American options besides mail-order, so I was pretty thrilled when I saw this pan come through my inbox.)


These were my favorite street-vendor treat in NYC’s Chinatown, and my husband has fond memories of eating these as a child on the streets of Hong Kong. Even my Mother in Law couldn’t contain her excitement when she saw the pan I had brought home from the mall. “My grandpa used to make me gai dan jai every Saturday for breakfast when I was a little girl!” My Mother in Law is a fabulous cook, and nothing I do in the kitchen ever excites or surprises her. When I served her her first homemade gai dan jai in 50 years…her eyes sparkled, and she actually giggled. It was worth every penny for that pan. (Actually, these waffles sell for $3 each on the streets of NYC, so the pan really isn’t that bad of a deal.)


Even though these are technically waffles, in Hong Kong they are hardly ever eaten for breakfast. These are generally served piping hot, in a small paper sack, and enjoyed while walking home from school.


Hong Kong-Style Egglet Waffles (Gai Dan Jai) (้›ž่›‹ไป” )

(Adapted from Christine’s Recipes)

(This recipe is in grams, and that is honestly the best way to make it. It’s super easy – put your bowl onto your digital scale, pour in your ingredient until you reach the desired amount, tare off, and do it again! If you do not have a digital kitchen scale, I have included approximate “American” measurements.)

Ingredients:

140 g. (1 1/4 cup) all-purpose flour

7.5 g (1 1/2 tsp.) baking powder

1 T. custard powder (instant vanilla pudding will work here, and is MUCH easier to find.)

28 g. (2 Tbsp.) tapioca starch (available at any Asian market for approximately $1 for a small bag)

2 eggs, beaten

140 g (heaping 1/2 cup) white sugar

28 g. (approx. 2 Tbsp.) evaporated milk (coconut milk is also a tasty choice here)

140 ml (2/3 c.) water

2 tsp. vanilla

oil for your pan


1. Sift together your flour, baking powder, custard powder and tapioca starch.

2. Add your eggs and sugar, and beat well to combine.

3. In a small bowl, mix together your milk, water and vanilla. Gradually add to your flour mixture, and beat until there are no lumps.

4. Refrigerate the batter for one hour before using. (This step is not strictly necessary, but I did find that it made a nicer, lighter waffle.)

5. When your batter is done resting in the fridge, pull it out and prepare your Egg Waffle Pan. (Any waffle pan would work, but it wouldn’t make the signature egglet shape that gives these waffle their name.)

6. Separate your pan, lightly grease both sides, and preheat.

7. To make your waffles: pour approximately 3/4 cup batter into one side of the pan, and shut the lid. Wait about 30 seconds, flip the pan over, and cook for another 2-3 minutes.  Be careful not to get the pan too hot – your waffles will burn before they are finished cooking.

8. Remove from the pan and place on a wire rack. Serve warm. These can be pulled apart and eaten as is, or wrapped up with berries and cream.

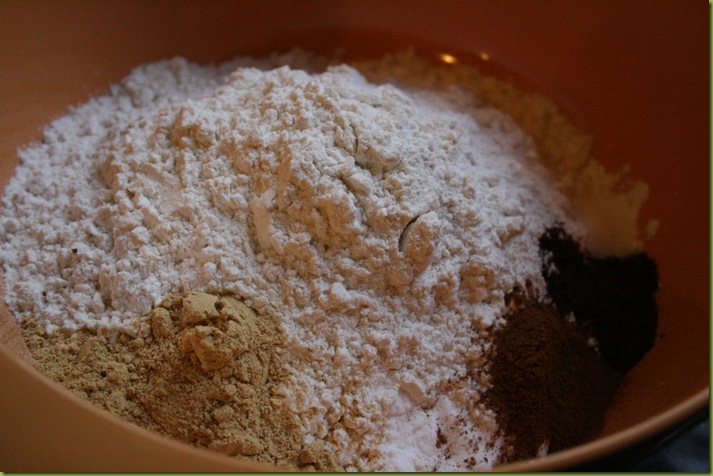
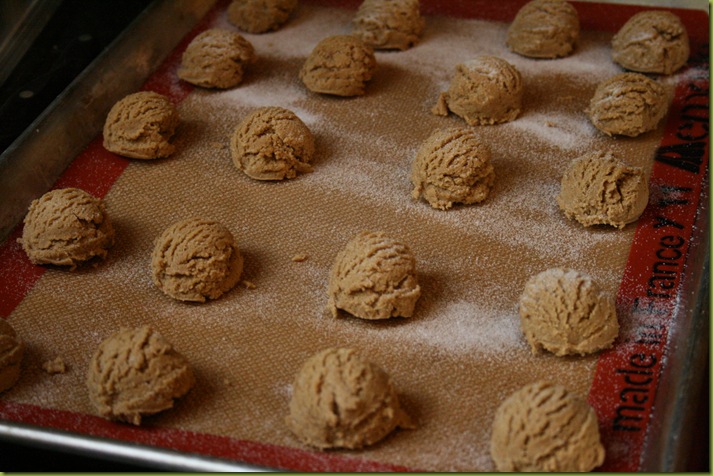
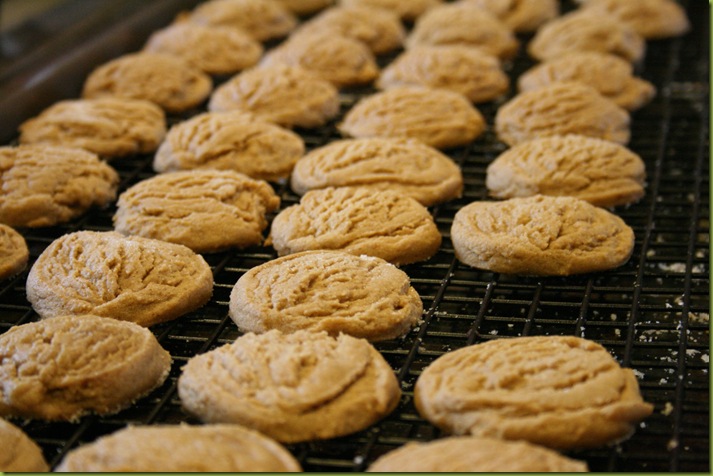
Ginger Cookies

I found these while looking for a tasty afternoon snack for the kids and I. Oh boy, were these tasty! My favorite cookie texture – tender and chewy, almost like a brownie, but gingery and spicy. IMG_8979IMG_8982IMG_8985


Ginger Cookies

Adapted from Better Homes and Gardens New Cook Book

Approximately 120 cookies


Ingredients:

4 1/2 cups all-purpose flour

4 tsp. ground ginger

2 tsp. baking soda

1 12 tsp. ground cinnamon

1 tsp. ground cloves

1/4 tsp. salt

1 1/2 cups shortening

2 cups sugar

2 eggs

1/2 cup molasses


Preheat oven to 350


1. In a medium bowl, whisk together your flour, ginger, baking soda, cinnamon, cloves and salt.

2. In the bowl of your electric mixer, beat your shortening on low speed for 30 seconds, then add sugar. Beat until well combined, scraping the sides of the bowl as needed. (You can skip this this scraping step if you have a rubber edged blade, such as the Beater Blade.) Add your eggs and molasses and mix until combined. Add all your flour at once and mix in what you can with the mixer, then finish the job with a wooden spoon if necessary.

3. Use a small scoop to pull out balls of cookie dough approximately 1” in diameter (your hands would work here, too). (Balls of dough can be rolled in sugar at this point, if you like. You’ll need about 3/4 cup total.) Arrange cookies 1 1/2 inches apart on ungreased cookie sheets, and bake 8-9 minutes, or until the cookies are puffed and just slightly browned on the bottom. Don’t overbake these! Allow to cool on the sheet for one minute, then remove to a wire rack to finish cooling.

Monday, July 4, 2011

Sweet Potato “Mac n’ Cheese”

IMG_9092

This dinner was based off of a recipe found here, at Finding Joy in My Kitchen. It was such a hit, even with the Sweet Potato Haters in the group, that I just have to get this written down for posterity.


I made a huge batch of the sauce (enough for two pounds of pasta) and froze half of it, before mixing the other half with one pound of pasta for our dinner that night. I’m on a freezer-stocking kick, and half of nearly everything I make ends up in the freezer. I have marinated meat, pizzas, spaghetti sauce, etc. YUM. If you do not want this much sauce, by all means, just cut the recipe in half. Oh, and I used evaporated milk, because I had it in the fridge and it needed using up. Feel free to use whatever you like.


Sweet Potato “Mac n’ Cheese”

(makes 2 pounds of pasta)

Ingredients:

2 pounds pasta

3-4 medium sized sweet potatoes, cut into 2-3” chunks (mine were nearly white inside)

2 medium carrots, cut in 2-3” chunks

1 cup sliced onion (2-3 medium)

4 cloves garlic, sliced

1 cup milk, chicken broth or water

Oil

Salt, Pepper and Sugar to taste


1. Prepare your sweet potatoes: Place your sweet potatoes and carrots in a soup pot, add cool water just to cover the veg, and bring to a boil. Reduce heat and simmer until the potatoes and carrots are tender, about 15-20 minutes.

2. Meanwhile, prepare your pasta and onions and garlic. Bring a large pot of water to boil, and cook your pasta according to package directions, being careful not to overcook. Drain it when it is done, and return it to the pot.

3. In a sautรฉ pan, heat 1-2 teaspoons of oil and add your onions and garlic. Cook until soft, 5-7 minutes.

4. When your sweet potatoes, carrots, onions and garlic are all done in their respective pots, combine all four in a blender or food processor with your milk and blend well. Season to taste with salt, pepper and sugar.

5. Now that your sauce and your pasta are done, it’s time to combine! Dump your delicious sauce over your pasta, and add a few handfuls of cheese. Cheddar would be great, or parmesan. Let yourself go wild here! You don’t need much, so you can splurge here.


Enjoy! My husband enjoyed his bowl with hot sauce on top…whatever floats your boat.
Thursday, June 16, 2011

Banana Bars

Well, hi there. This is a recipe that was a STAPLE in Myrnie’s repertoire a few years ago. Babies, and lactose intolerance, came between her and her beloved banana bars…but we are bringing them BACK. The recipe comes from her mother-in-law’s kitchen, and is just a simple, straightforward banana bar. These are dense and sweet and excellent cold.


I made these a few days ago and had to adapt to what I had in my fridge – a little vanilla yogurt to replace the sour cream I didn’t have, with an extra banana thrown in to finish out the “wet ingredients.” However, these are much better if made following the ingredients listed below.


Debbie’s Banana Bars:

Preheat oven to 350 degrees F.

Prepare your pan. (I used a half-size jelly roll pan, lined with a silicone baking mat. A 9x13, greased and floured, would give you thicker bars, but fewer of them.)

Ingredients:

1/2 cup butter
1 1/2 cup sugar
2 eggs
1 cup sour cream
1 tsp vanilla
2 cups flour
1 tsp baking soda
1/4 tsp salt
1 cup mashed bananas

Sour Cream Frosting (recipe to follow)


In a bowl, whisk or sift together your flour, baking soda and salt. Set aside.


In the large bowl of your electric mixer, cream together your butter and sugar. Then add eggs, sour cream and vanilla. Beat to combine. Stir in the mashed bananas. Add your flour mixture, and stir to combine.


Dump into your prepared pan, and bake for 20-25 minutes, or until a toothpick inserted into the middle of the pan comes out dough free.  Cool and frost.

Cream Cheese Frosting
8 oz. cream cheese
1/2 cup butter
2 tsp vanilla
3 1/2 - 4 cups powdered sugar


Whip together cream cheese and butter. Add vanilla and enough powdered sugar to make the icing hold a peak.

Wednesday, May 11, 2011

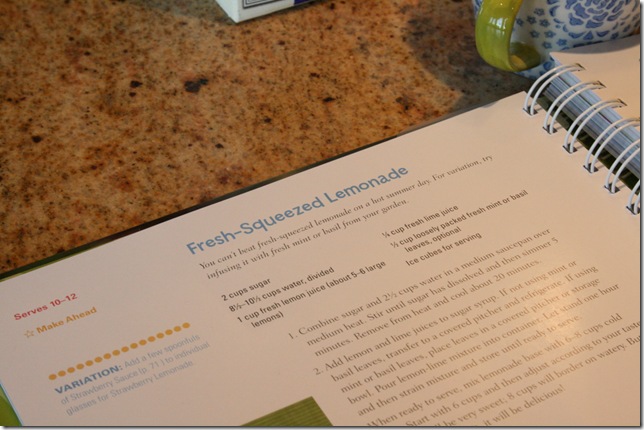
Review: Our Best Bites (Fresh-Squeezed Lemonade)

IMG_8711

(Woohoo! Amateur photography skills + low light = blurry cover shots! Oy. But you get the idea.)

IMG_8704

(Amazing lemonade recipe, clever layout with serving size, a note telling you this is a make-ahead kind of recipe and ideas for variations.)

IMG_8700

(Ingredients for amazing lemonade recipe. The secret ingredient is missing from this picture though…)


Recently, I was at a church function where a bunch of ladies got together to learn how to put together hanging baskets. We wanted to make refreshments that would highlight herbs you could grow at home. I made these lavender brownies, and someone else made some scrumptious lemon bars. (Hey! You CAN grow lemons indoors!) The hostess told me she had found a great recipe for lemonade and asked me to mix it up while she was finishing the final prep work for the evening’s lesson. I was pretty tickled when she pulled out the new Our Best Bites cookbook, written by Kate Jones and Sara Wells. Both girls used to attend this congregation, and we all have fond memories of them and are INSANELY proud of them. (Their cookbook, by the way, ought to hit ALL the Costco warehouses nationwide sometime this week. Talk about awesome! The book is also on sale right now on Amazon.com, even lower than last week when I bought mine!)
 

I was excited to try the recipe, because I accidentally left my copy of the book at my sister’s house on Mother’s Day, and haven’t been able to really get into it yet. Boo. And this recipe? Did not disappoint.


The original recipe calls for making a simple syrup, and flavoring it with lemon and lime juices, then adding some mint. You let that steep, and then strain the mint out. The resulting syrup is then mixed with ice water to make lemonade. I didn’t have that much time, so we used super-fine bakers sugar mixed into cold water, plus lemon juice and lime juice. I washed the mint and threw it into the pitcher. When it was time to serve the lemonade, we put some ice into a pitcher and strained the lemonade into that.


It. Was. Amazing. I think I had four glasses. At first, people couldn’t pinpoint the mint in the mix. It was subtle, but gave it an extra little kick that was totally addicting.


If you see this cookbook at Costco this week, I highly recommend it! You can also find the cute girls blogging over at Our Best Bites.


PS – I was not paid, recompensed or otherwise acknowledged for writing this review. As I said, I know the girls who wrote this cookbook and want to try out their recipes and let you guys know about it. That is all. Thanks!

Lavender Brownies

IMG_8770

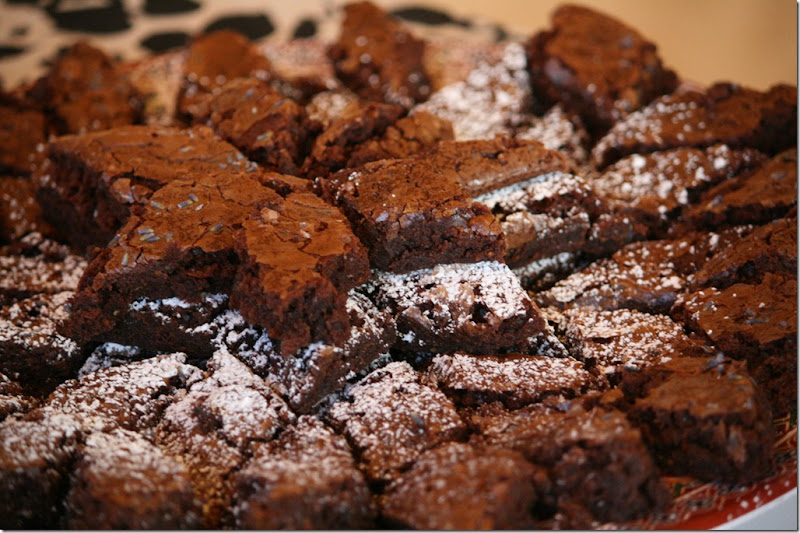
Oh, I know they don’t look like much. Just some fudgy brownies, from a box. In fact, what makes these brownies so special is something so subtle, you could miss it completely if you’re not paying attention. You might think they taste a little different…just a smidge floral perhaps?

And you’d be right.

The lavender in these was so subtle, but so delicious. I was really surprised! The lavender I used was bought from a tea shop in China, so it is not as fresh as what I could gather from my own yard. These brownies were made as refreshments for a class at church on building your own hanging baskets, and meant to highlight what you could do with herbs from your own garden. (The surprise hit of the night was the Herb Hanging Basket. Brilliant, right? Stick seven of your favorite herbs in a hanging pot, hang it…and enjoy a slug-less and bunny-less herb garden all summer long!)

(Please note – I doubled the recipe and baked it in a Silpat-lined half-sheet jelly roll pan for about 30 minutes, and they were perfect. I probably should have stuck them in the freezer for about 10 minutes before cutting them, though, to help me get the edges prettier.)

(Also, this would absolutely work with a from-scratch brownie recipe. Brownies aren’t a favorite around here, so I don’t make them very often. That being the case, I haven’t tried to make them from-scratch since I was about 13. I didn’t want to experiment on my friends at church, so…a mix it was! I used a Milk Chocolate mix, and that was perfect.)

Lavender Brownies

Ingredients:
1 boxed brownie mix (or your favorite brownie recipe)
(Ingredients required for your mix. Generally water, oil and eggs)
2 Tbsp. dried lavender flowers, plus extra for garnish

The night before, open your bag of brownie mix and add the lavender. Twist the top shut, shake to combine, and let sit overnight. This marinates the flavor of the lavender into your brownies. (If you are making brownies from scratch, the night before you bake them, measure out the required sugar and add your lavender to that. Let the sugar and lavender sit overnight and bake as usual the next day.)

On baking day, prepare your brownies and bake as directed. Before baking, sprinkle more lavender across the top of the brownies.

Serve sprinkled with powdered sugar.

Thursday, May 5, 2011

Review: Cupcake Royale

A few months ago, the hubs and I purchased a coupon for cupcakes from a local bakery, Cupcake Royale. It took us several months to USE the coupon, because of the stipulation that cupcake orders be placed before noon, the day before you intend to pick up your cupcakes. (And I? Don’t think that far ahead, in general.)


The cakes came in an attractive, and clever, box. (Pink is always a hit around here, and the addition of a crown sealed the deal with the Princess set.)


IMG_8607

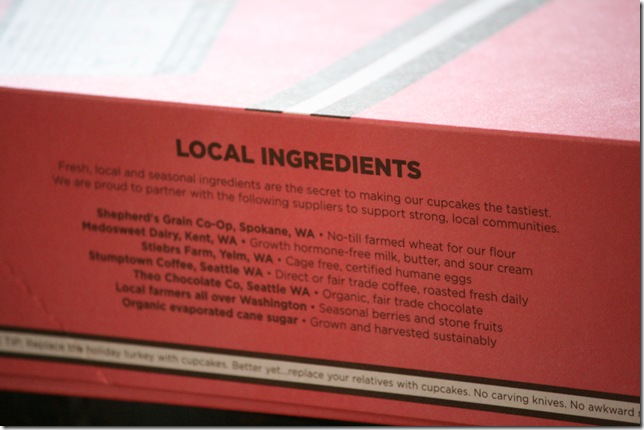
Cupcake Royale boasts of local and seasonal ingredients, and lists their vendors on the side of the box as proof.

IMG_8604

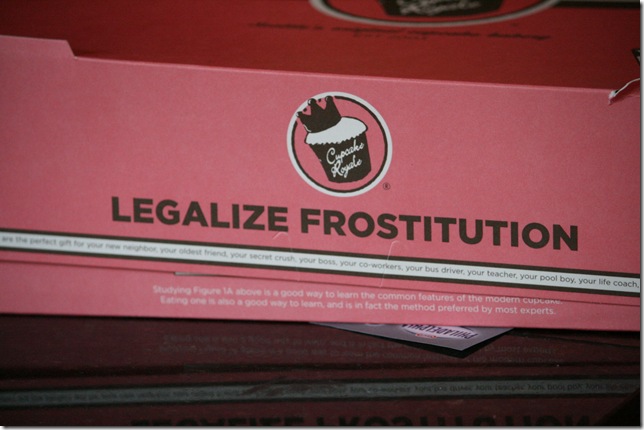
This side of the box made very little sense to me, as it seemed to be supporting the rights of home bakers to sell their own cupcakes, commercial-kitchen free. But I could be wrong about those sentiments.

IMG_8605

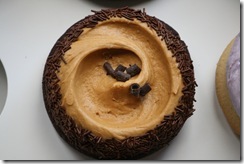
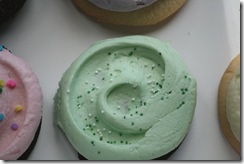
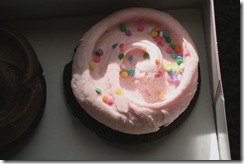
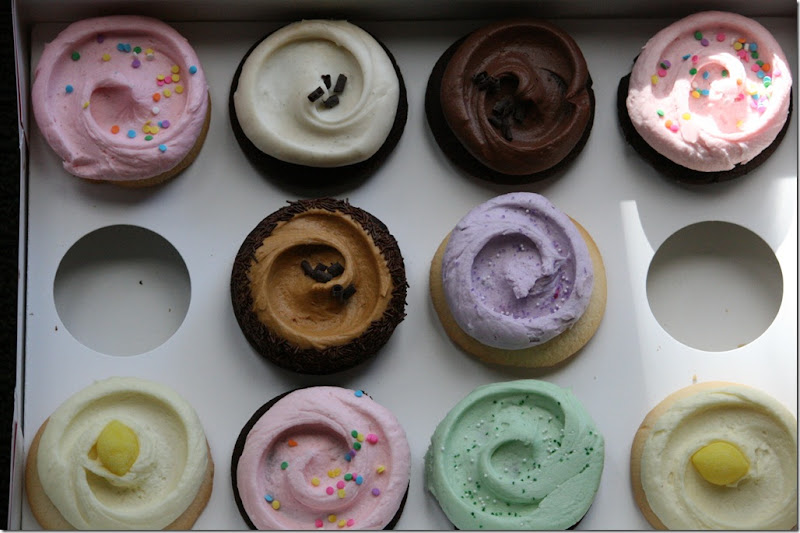
Now…ready to meet the kids??! When I placed my order, I told them four or five cupcakes that I absolutely must have (vanilla with pink icing, lavender, cookies and crรจme and mint) and asked them to fill out the rest of the box with whatever looked best.

IMG_8609


IMG_8612IMG_8613IMG_8614IMG_8615IMG_8616


Overall, I really preferred the vanilla cupcakes. The chocolate ones crumbled to bits as soon as you bit into them. The vanilla ones, though, had a gorgeous tight crumb, like a light pound cake. My favorite icing was the lavender, which had just a hint of lavender flavor and was very refreshing! The icing on the Lemon Drop was also quite nice.


The shop was cozy and comfortable, and the staff very friendly. Overall, I wasn’t blown away by the cupcakes, though. They were beautiful, and tasty, but they were no Crumbs. (Crumbs is high on the list of things I miss from living on the East Coast. *sigh*)


PS – I can’t decide if my review is good or bad. I have spent so much time the past few months perfecting my favorite cupcake recipes…I was mostly just disappointed that boutique cupcakes weren’t as tasty as my homemade ones. When cupcakes first hit the scene, when I was in high school, I remember going to a shop and ordering a beautiful cupcake from the gleaming glass hutch. I took a bite…and was so disappointed. It was beautiful, and dry. Ick. It wasn’t until my cupcake buying adventures on the East Coast that I realized store-bought cupcakes could be drool-worthy. Perhaps my box had sat out too long? However, when I ordered my cupcakes, they preferred that I pick them up in the afternoon. Perhaps they had been sitting in that box since the evening before. I have no idea. When talking with other friends, they raved about Cupcake Royale, so perhaps going in and buying a cupcake a la carte is a different experience.)

(