Showing posts with label Bread. Show all posts

Wednesday, January 29, 2014

Honey Whole Wheat Oatmeal Bread


Mmmm. Fresh bread, warm from the oven. There is no better smell, right? I've been making bread for my family for about 5 years, but it was my sister who showed me a way to really kick it up a notch. Whenever we have leftover oatmeal after breakfast...it's bread day! 


The oatmeal holds a lot of water, without actually watering down your dough. Once you mix up the loaf and bake it, you cannot find a single oat, so nobody will ever know your secret. 


The result, though, is a chewy, moist loaf that is absolutely delicious. It makes great sandwiches, and is fantastic toasted with jelly, peanut butter, or (my favorite) Nutella!


LoLo's Honey Whole Wheat Oatmeal Bread
4 Loaves (recipe can easily be scaled back)

Ingredients: 
4 cups warm water
1/4 cup honey
2 tbsp. yeast
1/4 cup olive oil
4 tsp. salt
2 cups prepared oatmeal
7-10 cups whole wheat flour

In the bowl of your electric mixer, combine your water, honey and yeast. Allow to proof for several minutes, until foamy, then add your oil, salt, prepared oatmeal and 7 cups of whole wheat flour. Stir to combine, then set aside to rest for 20-30 minutes. 

After the resting period, begin mixing with your dough hook. Add flour as needed, until the dough can just clear the sides of your bowl, and allow to knead for 10 minutes. After 10 minutes, cover the bowl with a damp towel and allow to rise until doubled in size, about one hour. 

After an hour, dump the dough onto a floured surface. Divide into four portions, roll each portion into a loaf shape, and place (seam side down) into a greased 9x5 loaf pan. Allow to rise again until the loaves are even with the top of the pan, almost another hour. 

Bake at 350 for 30-35 minutes, or until the bottom of the loaves sound hollow when tapped with your fingernail. 

Enjoy!


Thursday, August 29, 2013

Cream Biscuits

Are you ready for the easiest biscuits in the world? So simple, you don't even need a recipe, but I'll give you one anyhow. (The beauty of not needing a recipe is that you can eyeball things if you need to make just a few biscuits, or need to use up an odd amount of flour left in the canister. Cool.)

Cream Biscuits
(Adapted from the millions of cream biscuit recipes out there, all of them Southern)

Makes 12-16 biscuits

Preheat your oven to 375.
Lightly grease a sheet pan.

In a medium sized bowl, add 2 cups of self-rising flour and 1 1/2 cups (12 oz.) heavy (whipping) cream. Stir with a wooden spoon until just combined. If it is a bit crumbly, add another splash of cream. Sticky? Add a tablespoon of flour.

At this point, you have two options: drop biscuits and cut biscuits.

If you want drop biscuits, drop spoonfuls of your biscuit dough onto your prepared cookie sheet, 1/2" apart.

If you want cut biscuits, lightly flour your work surface and gently fold/knead your dough two or three times until it makes a sort of smooth ball. Roll it out to about 1/2" thick, and cut with a 3" cookie cutter. Please your biscuit rounds onto your prepared cookie sheet, again 1/2" apart.

Bake 15-17 minutes, or until the bottoms just start to get golden (or a little longer, if you like darker biscuits). Remove to a cooling rack, or straight into your serving basket.

(These biscuits are pretty darn close to what you get with your fried chicken with the eleven secret herbs and spices. Just FYI.)

Tuesday, March 19, 2013

Welsh Cakes

Fact: My family has done quite a bit of genealogy, and has turned up ancestors in nearly every part of the Caucasian world. (I'm quite the mutt!) Including Wales.

Fact: March 1 is St. David's Day, a rather important day in Wales as St. David is the patron saint there.

Fact: On St. David's Day, it is traditional to eat welsh cakes.


It probably won't surprise you to know that, prior to seeing a delicious looking pin on Pinterest on March 1, I had no idea St. David had a day, much less a patronage, and I had never heard of a welsh cake.

Being the adaptable person that I am, I decided on the spot that welsh cakes must be a part of that evening's meal. They are absolutely delicious. Moist, chewy, dense, studded with fruit. Picture a pan-fried scone, and you are pretty close. I turned to Joy of Baking to find a recipe, as she has never ever steered me wrong. This time was no different. I made a few alterations, based on what I had on hand and some dietary preferences. While Joy of Baking used sultanas, butter and milk, I used Craisins, butter, and soy milk. (Next time, I think I will try coconut oil instead of the butter.) When you throw these lovelies onto a hot griddle, the butter melts out, frying the exterior to golden perfection. The inside remains moist and toothsome. I'm sure you won't think badly of me if I told you that we ate the entire batch for dinner and when my son asked to have these again the next morning for breakfast, I happily complied.


Welsh Cakes
(Adapted from Joy of Baking)

Ingredients:
2 cups AP flour
1/3 cup white sugar
2 tsp. baking powder
1/4 tsp. salt
1/4 tsp. cinnamon
2 dashes nutmeg
1/2 cup cold butter, cut into small chunks
1/3 cup dried cranberries (ie - Craisins)
1 egg, beaten
1/4 cup soy milk, as needed

In a large bowl, whisk together the flour, sugar, baking powder, salt, cinnamon and nutmeg. Cut in the cold butter until the entire mixture appears crumbly and pebbly (just like making a pie). Add your dried cranberries. Add the beaten egg, and enough soy milk to make a rollable dough.

Sprinkle a countertop or cutting board with flour, and throw your dough down. Knead it into a ball, and flatten it out with the palm of your hand to approximately 1/2" thickness. Using a 3" biscuit cutter or glass, cut out rounds. Cut straight down, without twisting, for the tallest cakes possible after baking. Gather up the scraps and re-roll as many times as necessary to use all the dough, handling it as little as possible each time.

Heat a griddle over medium heat (cast iron is traditional), and cook your cakes until golden on both sides and done in the middle, approximately 2-3 minutes per side.


Serve sprinkled with powdered sugar if desired. Can also be spread with jam, but that is completely optional. Best warm, but also quite delicious after they have cooled down!

Enjoy!

Tuesday, March 12, 2013

Whole Wheat Orange Cranberry Muffins


I woke up this morning just craving a muffin. Something chewy and filling, sweet but not greasy. (Honestly, what I truly wanted was one of my grandmother's bran muffins. I have no idea what she used to put in those things, but they were amazing. Got the job done, you know? Unfortunately, I never got the recipe from her, and I didn't have any bran on hand anyhow. I'll have to see if I can figure those out later.)

I pulled out the recipe book that came with my blender, and came up with these. They use both fresh whole wheat flour and white flour, so they are filling without being overly crumbly. The liquid comes from an egg (fresh from our coop!), a little bit of olive oil, and an entire orange. All of the wet ingredients are combined in the blender and whipped up into an eggy orange smoothie, then folded into the dry ingredients. Finally, cranberries are folded in to give these some contrast. With all the fiber from the whole wheat and the whole orange, these are delicious and very filling!

The original recipe used a loaf pan. I wanted my muffins now, though, so I used mini muffin tins instead.

Orange Cranberry Muffins
(Adapted from VitaMix Orange Cranberry Loaf)

Yield: 1 loaf, 12 muffins, or 3 dozen mini muffins

Grease your pan of choice, and preheat oven to 350.

In a medium mixing bowl, combine:
1 cup whole wheat flour
1 cup white flour
1 tsp. baking powder
1/2 tsp. baking soda
1 tsp. salt

In a powerful blender, layer:
1 medium orange, peeled and cut in half, plus a 2" piece of the peel
1 cup sugar
1/4 cup olive oil
1 large egg

Blend completely, and then pour your egg/orange mixture into your flour mixture. Stir until just mixed, and then fold in:
1 cup dried cranberries (or other fruit/nuts of your choice)

Portion into your pan, and bake until a toothpick comes out clean.
(Bake 10 minutes for mini muffins, or 60 minutes for a loaf. I imagine normal muffins would require about 25 minutes.)


Tuesday, April 10, 2012

Honey Whole Wheat Bread


(All photos courtesy of Sonja, from Simply Sonja Photography based in Bellevue, WA)

One of my most requested recipes, my Honey Whole Wheat bread! This bread is half whole wheat (fresh ground, if you can), half white flour, and all awesome. I use fresh-ground red wheat, but white-wheat would make a tamer taste, as well as a slightly smoother crumb.

One of the tricks is to use plenty of honey and olive oil. These two things condition the wheat to give you a nice smooth, sweet bread.


Fresh ground red wheat going into the 20 year old Bosch mixer. (I use the Bosch when I make 4-loaf batches. We keep one loaf out and freeze the rest. They come out of the freezer even better than when they went in.)

One thing you absolutely must do is to mix in the whole wheat flour FIRST, and then add white flour. This allows the whole wheat flour to plump up a bit and get evenly dispersed. The white flour can then work around it to form the gluten network it needs to make non-crumbly bread.

You can stop adding flour when your bread looks like this for a super fluffy, light loaf.

If your bread gets to this point, you will have a denser, sturdier loaf, perfect for peanut butter and jelly sandwiches.

All rounded up and ready for its first rise. I needed the mixer for something else, so I moved my dough to a greased bowl to rise, instead of just letting it rise in the mixer.


All baked up and ready to bag or eat!

LoLo Honey Whole Wheat Bread
Yield 2 loaves

Ingredients:
2 cups warm water
1 1/2 Tbsp. yeast
1/2 cup olive oil
1/2 cup honey
2 tsp. salt
4 cups of whole wheat flour (or 2 cups of wheat berries, ground. I measure whole wheat, not wheat flour. Fresh is best.)
2-4 cups of all-purpose flour

In the bowl of your mixer, combine water, yeast, olive oil, honey, salt and whole wheat flour. Mix until well combined, then add 2 cups of white flour. Continue to add white flour until the dough just pulls away from the side of the bowl. A stiffer dough will give you a denser bread. A lighter dough, with less white flour, will get you a fluffier bread. Once the dough is how you like it, continue to knead for 5 more minutes. Turn off your mixer, remove your dough hook, cover with a damp towel, and allow to rise until doubled in size (about an hour, in Seattle conditions). Remove dough from the bowl, divide into two loaves, *form and place into greased loaf pans. Allow to rise until larger by about 50%, then bake at 350 for 30-35 minutes, or until the bottom of the loaf sounds hollow when tapped with your fingernail.

To see how I form my loaves, go here. To find the rest of this bread course, go here.

Honey White Bread

(All photos courtesy of Sonja, from Simply Sonja Photography based in Bellevue, WA)

 This was the bread that started it all - the bread that was so delicious, my husband let me stop buying bread at the store. Wait...that sounds weird. Let me put it this way: I may be the cook in the family, but it's not fair of me to replace tasty bread from the store with nasty bread from home if nobody likes it.

Here is one of my most basic recipes, in pictures.

So, I experimented and tried new recipes until I found one that could surpass store-bought in quality and taste AND was less than half the cost of store-bought. (One loaf of this bread, even with olive oil and honey, is about $.75 if you buy the ingredients in bulk.)

I make the bread four loaves at a time, using my ancient Bosch mixer. The bread freezes beautifully, and is almost better from the freezer! It retains its moisture, and has a very smooth crumb.

Still too sticky. You want the dough to just barely stick to your fingers, but not climb to you and make a mess.


LoLo's Honey White Bread
Yield 2 Loaves

Ingredients:
2 cups warm water
1 Tbsp. yeast
1/2 cup honey
1/2 cup olive oil
2 tsp. salt
6-7 cups All-Purpose Flour

In the bowl of your mixer, add water, yeast, honey, olive oil and 6 cups of flour. (If you are concerned that your yeast might be old, you may proof it first: Combine water, yeast and honey in your bowl. Wait for it to foam, about 5 minutes, then add oil, salt and flour.) Mix with dough hook and add more flour as necessary, until the dough pulls away from the sides of the bowl and forms a ball. Knead for 5 more minutes, and then turn off your mixer.

Remove the dough from the bowl, remove the dough hook, spray the bowl with cooking spray, and return your ball of dough to your greased bowl. Turn the dough to coat with oil, and cover with a damp towel. (I like to wash my hands at this point, grab a fresh tea towel to dry them off with without shaking the water off my hands, and use that to cover up the dough. It seems just damp enough.) Allow the dough to rise until about doubled in volume. It's ready when you poke it with two fingers and it easily holds the indent.

When the dough has risen, remove from bowl, divide in half, and *form into two loaves. Place in greased loaf pans and allow to rise for 30-45 minutes, or until approximately 50% larger. Bake at 350 for 30-35 minutes, or until the bottom of the loaf sounds hollow when tapped.

Don't be afraid to play around with mix-ins! Dried fruit, spices, orange juice in place of part or all of the water. This is a really forgiving framework to work with. This is also the recipe I use for dinner rolls and cinnamon rolls - 1 loaf makes 12 dinner rolls or 12 cinnamon rolls.

*To see how I form my loaves, go here: How I Form Bread Loaves

For the rest of this bread course, go here: LoLo's Bread Class

How I Form Bread Loaves

(All photos courtesy of Sonja, from Simply Sonja Photography based in Bellevue, WA)

 Everybody has their favorite way to form a loaf. Some people cut off a hunk and carefully round it into a loaf shape. My sister slap their dough into the pan and then poke it until it fills out the corners. Some people...well, ok I don't know if anyone else does this...but I roll mine up like a jelly-roll. I think I read about this method in an ancient Betty Crocker cookbook. Since it's always worked well for me, I've stuck with it. There are a few tricks, though.

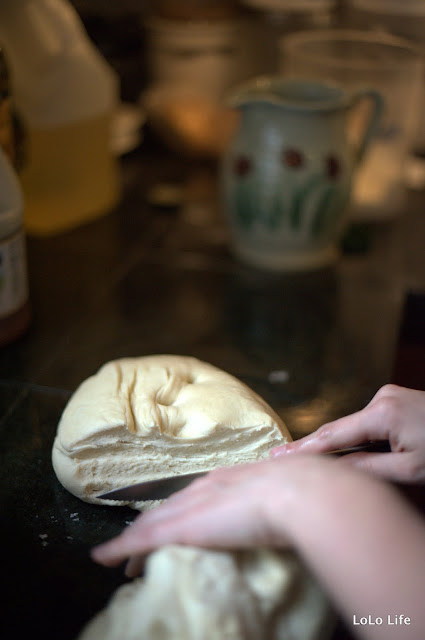
First, if you've made a batch with more than one loaf, divide your dough. I like to use a knife with large serrations.

If eye-balling dough lumps isn't your thing, you can plop your pieces onto a scale to make sure they are all the same weight. That will take care of any differences in air content between the piece you squished when you cut it off and the piece you cut off FROM, that isn't squished yet. (Does that make sense to anyone??)
Next, take your loaf chunk, set it on the counter, and use your knuckles to flatten it out. You want it just about as wide as your loaf pan, and about 1/2" thick.
Grab one of the smaller ends and start rolling. You want NO air bubbles here, so make sure you stretch the dough and tuck it tightly. If you have any air bubbles, they will expand in the oven leaving you with large doughy holes in your final loaf.
As you work, you'll notice it getting wider than your pan, with scraggly little ends. Use your pinkies to tuck those ends in as you roll.

The final product! Round, with the seam on the BOTTOM of the loaf. If it's anywhere besides due south, your bread will kind of explode open in the oven. It will still taste fine, but it might not fit into the toaster. Now pop it into a greased loaf pan, or onto a greased cookie sheet, and let it rise about 30-45 minutes before baking.

French Bread

(All photos courtesy of Sonja, from Simply Sonja Photography based in Bellevue, WA)

If you've seen my post on "pizza" bread, this post will look very, very familiar. The process is basically the same...so I'm using a lot of the same photographs. Waste not, want not!


Put water in your biggest bowl. The water should be very warm, like a steaming bath. Other ingredients will cool it down before you add your yeast.


Add your salt, oil and sugar to your water. Add half of your flour.

This is what your dough should look like after the first addition of flour. (Except your dough will be white - remember I'm using pictures from a different variation of this bread.

Add your yeast to the loose flour mixture, then add the rest of your flour and stir to combine.

You'll need to use your hand at the end. Scoop around the side of the dough, catching some of the loose flour with your hand, and scoop under the dough. Then lift up the dough and fold it in on itself.


Once the dough is how you want it, let it rest for an hour, punching it down every 10 minutes. Form into two loaves, let rise for 30 minutes, and bake at 350 for 30-35 minutes. Delicious, and about two and a half hours from start to finish. These loaves come out to about $.50 each, if you buy the ingredients in bulk.

French Bread
(Adapted from Myrnie's recipe)

Ingredients:
2 1/2 cups warm water
3 Tbsp. sugar
1 Tbsp. salt
2 Tbsp. canola oil
6-7 cups of All-Purpose flour, divided
2 Tbsp. yeast

In a large bowl, combine water, sugar, salt, oil and 3 cups of flour. Stir well to combine - your dough should be very loose. Add the yeast and another 3 cups of flour. Stir with a wooden spoon, and then use your hand to fold in flour, adding more as necessary. The dough will be soft - you are not kneading the dough. Just folding in flour until it forms a basically cohesive shape. Let the dough rest for 10 minutes, and then punch it down and flip it over in the bowl. Repeat the resting-punching process every 10 minutes for an hour, then remove the dough from the bowl. Divide it into two loaves and form into long rolls. Place on a greased cookie sheet and allow to rise for 30 minutes. Preheat the oven to 350. Slash the tops (don't be afraid!) and bake for 30-35 minutes, or until the bottom of the loaf sounds hollow when you tap it with your fingernail.

Thursday, November 10, 2011

Gai Mei Bau (Rooster Tail Bun)

Hello, all! Welcome to my crazy. I am trying (and trying and trying) to recreate the Hong Kong Gai Mei Bau (雞尾包). It is my husband’s favorite bakery bun, and we haven’t found any great ones near our home. Oh, I’m sure they’re out there, but I’m too lazy to drive around and test buns from all the local bakeries to find a great one!


I’m just lazy enough to stay home and test recipe after recipe to figure out how to make them myself. Because that is how my crazy works.


My first attempt was using a recipe from Auntie Yochana (here). They were delicious. I omitted the Mexican Cream topping, as well as the egg wash and the sesame seeds. (They would have been delicious, I’m sure, but at that point in the day, I was tired of adding butter to my creation, and I was just tired in general. So…there.)


Oh my goodness, guys. These buns were seriously delicious. However, as tasty as they were, they didn’t taste like the real buns. The filling was declared “right” by Lo Gung, and so I will keep that portion of the recipe. The bread portion came out tasting a lot like the Australian Toaster Biscuits I loved to eat when I was a kid (and didn’t realize how much butter could be packed into a baked good. Mmmm…those were the days!).


So. Here’s the filling recipe (adapted from Yochana’s Cake Delight!)

Coconut Filling for Buns

250 gm. Butter, softened
250 gm. shredded coconut
120 gm. plain flour
100 gm. powdered milk
1/2 tsp. Vanilla extract


Combine all ingredients  in a bowl and set aside.

When I made my initial batch of buns, I made a half batch, and froze half of my filling mixture. If that doesn’t work out well….well, then, I will let you know.

My next attempt at the dough will be using this recipe, from Hong Kong Breads.

The first recipe I tried involved custard powder, which is fabulous in other applications, but I don’t think it quite works here. I’ll let you know how this goes!

Tuesday, October 25, 2011

Whole Grain Corn Bread

This is, hands down, my favorite corn bread.  It's sweetened, but not sweet.  It's made with freshly ground corn and wheat, so it's filling.  It's soft and hearty and moist, with little crunchy bits of corn, and so, so good.  The original recipe is from the side of the Alber's Corn Meal box.  I've doubled it, and substituted freshly ground grains.

This is fantastic with chili or beans.  I like it plain, and some in my family smother it with butter and honey.  I remember, growing up, drizzling molasses over my corn bread- I highly recommend it!  (Plus, molasses is a good source of iron.)

Whole Grain Corn Bread
1 heaping cup popcorn, ground into coarse flour
1 heaping cup winter white wheat, ground into fine flour, plus more (see below)
1/2 cup sugar
2 Tbsp. baking powder
2 tsp. salt
2 cups milk
2/3 cup vegetable oil
2 eggs, beaten.

Measure out 2 cups of corn meal and 2 cups of wheat flour.  (I normally grind a bit of extra wheat flour, to make sure I have 4 cups of grain flour total, since I can more easily use up excess wheat flour than corn meal.)  Mix with dry ingredients in a bowl.

In a large measuring cup, combine liquid ingredients- stir to beat eggs.  Mix the wet ingredients into the dry, with as few strokes as you can.  As soon as everything is wet, stop mixing- lumps are OK!

Baked in a greased 9x13 pan, at 400 degrees for 20-30 minutes until a knife inserted in the center comes out with just a few moist crumbs.

Thursday, April 28, 2011

Honey White Cinnamon Chip Bread

This bread is one of my most favorite creations of late. It is sweet, and spicy, and yummy enough to slice up and eat as-is for breakfast.


You start by making these cinnamon chips ahead of time. They need to be completely cool and broken up before you can move on to the bread part of your day, so I make a big batch once every few weeks, and store them in a Mason jar in the cupboard.


Mix up a batch of your favorite bread, and knead in 1/3-1/2 cup of cinnamon chips. Allow to rise as usual, shape into a loaf, and bake.


Oh, and FYI? Sugar is hydroscopic…meaning that it sucks water out of its surroundings. (That’s the reason you can dump sugar on slice strawberries, and come back to a bowl full of smooshy berries and cups of juice.) Your bread dough will be able to handle a little extra flour, since it will get wetter as it rises.


IMG_8564IMG_8567IMG_8571IMG_8576

Now, if you don’t have a favorite bread recipe, or are not sure it’s going to work in this instance, I’ll help you out.


Aunt LoLo’s Honey White Cinnamon Chip Bread

Ingredients:

2 cups warm water

1 tbsp. yeast

1/2 cup honey

1/2 cup olive oil

2 tsp. salt

6-7 cups flour (or 3 cups whole wheat and 3-4 cups white flour)

1/3-1/2 cup cinnamon chips


In the bowl of your mixer, combine your water, yeast and honey. When you can see your yeast foaming, add the olive oil, salt and  6 cups of flour. Add more flour, gradually, until the dough is pulling  away from the sides of the dough. Dump in your cinnamon chips and continue to knead until the chips are mixed in. Add more flour if you need it.


Remove your dough from the mixing bowl, spray the bowl with cooking spray, and put the dough back in. Turn to coat, cover with a damp towel, and place in a warm, draft-free area to rise.  When the dough has doubled in size, and can hold a dent when you poke it with two fingers, it is ready to divide. Divide in half.


To form your loaf, take one piece of the dough and pat, stretch and poke it into a long oblong (like a pizza crust) then roll it up tightly to form a loaf. Pinch the seam together, and tuck the ends under. Place it in a greased 9x5 loaf pan, and repeat with the other loaf. Allow to rise until the loaves are a little less than double their original size. While the loaves are rising in their pans, preheat your oven to 350. Bake for 30-38 minutes, or until the bottom of the loaf sounds hollow when you tap it.*  Remove from the pan as soon as possible, and cool on a wire rack.


*Yes, you’ll need to pop a hot loaf out of a hot pan to tap on it, but it’s totally worth it. Nothing’s worse than cutting open your cooled bread and finding dough in the middle. The best way to do this is to pull one loaf pan out of the oven and shut the oven. Hold the pan with one hot-padded hand, and flip the bread into the other hot-padded hand. Set down the pan, remove the hot pad from that hand, and use your finger nail to tap the bottom of the bread. If it doesn’t sound hollow, pop the bread back into the pan, and stick it back in the oven. The whole process should take about 30 seconds, so the bread doesn’t cool down too much.

Wednesday, April 27, 2011

Cinnamon Chips

I cannot take credit for this recipe. It’s floating around in various places, but it is always the same…so if anybody knows who to give credit to, let me know!

A few weeks ago, I stopped by a local bakery and picked up a few loaves of bread. Both were so good, that I set about to recreate them at home! 

One of the loaves was a white bread with cinnamon chips. They weren’t like the ones you can buy at the grocery store, though – the chips weren’t waxy, like cinnamon flavored chocolate chips. They were little crumbles of sugar and cinnamon. I believe they are available online from one or two specialty stores, and then…there was this one recipe. I modified it a bit – the original recipe called for teaspoons and tablespoons, and made enough filling for one loaf of bread. It took half an hour in a 250 degree oven, plus cooling time, and I just figured there had to be a faster way!
1. Combine ingredients in a skillet and mix with a fork. Cook until bubbly.
IMG_8547
2. Pour onto a lined cookie sheet (greased tin foil, parchment paper and silicone liners are all great options here).
IMG_8551
3. Allow to cool completely, then break it up into chunks.
IMG_8559
4. Store in an airtight container, at room temperature. It will keep for several weeks.
IMG_8560

I’m going to give this to you in “parts”. If you want enough for one loaf, substitute in “teaspoons” for “parts” (and remember that 3 tsp. = 1 Tbsp. That will save you some grief, trying to count to 9.) If you would like enough to fill a mason jar, and make closer to six loaves, then substitute “1/4 cup” for “parts.”
Cinnamon Chips:
2 parts corn syrup
2 parts shortening
3 parts cinnamon
9 parts sugar

Combine all ingredients in a skillet with a fork, and then cook over medium low heat until bubbly and gooey, stirring with a silicone spatula or similar. When the mixture is ready, pour it into a prepared (lined) cookie sheet and allow to cool completely. Break into small pieces and store in an airtight container. Will keep at room temperature for several weeks.

Mix it into your favorite white (or wheat!) bread to make this.
IMG_8576