Showing posts with label Cake. Show all posts

Sunday, April 13, 2014

Strawberry Lime Confetti Bundt Cake

Today, I had some of my family over to celebrate my father's birthday. While preparing a dessert, I knew I had to keep it simple - the kids were underfoot, there were other things to be seen to, and multi-tasking doesn't usually lead to tastier desserts, if you know what I mean. So, I took a shortcut and pulled out a box of cake mix. I keep them on hand for days like today - when you need a little something, but just don't have the mental capacity to measure out cups and teaspoons, no matter how simple or delicious the recipe. I doctored the mix up, and the results were pretty tasty! 

(Special thanks to my little brother Ted for the photos - he grabbed my camera and snapped these shots while I was serving cake and ice cream to the hungry masses.) 


Strawberry Lime Confetti Bundt Cake

Ingredients:
1 box white cake mix
3 1/2 Tbsp. strawberry gelatin
5 eggs
1/2 cup oil
1 cup water
10 drops lime essential oil (I use doTERRA brand)
1/3 cup large sprinkles

Preheat your oven to 350. Spray a 9-cup Bundt cake pan with cooking spray, sprinkle with flour, and set aside.

In the bowl of an electric mixer, combine the cake mix, gelatin, eggs, oil and water. Mix together on low until combined, then on medium for 2 minutes. Reduce speed and add essential oil and sprinkles. Mix until combined. Pour your cake batter into your prepared Bundt pan and bake for 45 minutes, or until a toothpick inserted into the thickest part of the cake comes out clean.

Serve with whipped cream or ice cream, or both! (A lime glaze would also be nice.)


Tuesday, December 24, 2013

Apple Cranberry Bundt Cake

This is a riff on an old family recipe, from my Great-Grandma Susie. She raised her family in a small home in the Alabama swamps. Unfortunately, I haven't been able to spend much time down South, but from the stories that I hear, it was a rare day when you wouldn't find an apple cake waiting on her sideboard for unexpected company. Her cake recipe makes a rich, smooth cake that keeps moist for over a week (thanks to a generous helping of chopped apples and oil).

Today's version included applesauce in lieu of half of the oil (to lighten it up just a smidge), a little extra brown sugar to make things extra sticky, and a few handfuls of fresh cranberries. Topped with a sprinkling of powdered sugar and a dollop of whipped cream, this was a holiday winner! I served this cake after our formal Christmas Eve dinner with family.

Apple Cranberry Bundt Cake
Serves 12-20

Ingredients:
3 cups flour
2 cups white sugar
1/2 cup brown sugar
2 tsp. baking powder
1 tsp. salt
1 tsp. cinnamon
1/2 cup applesauce
1/2 cup oil
2 eggs
2 tsp. vanilla
3 tbsp lemon juice
3-4 medium apples (cored, sliced and chopped)
2 cups fresh cranberries*

(These can be washed and thrown in whole, or chopped if you prefer your berries to have a little less bite.)

Preheat your oven to 350.

Grease and flour a large bundt cake pan and set aside. (This is an extremely sticky cake - be generous with the greasing and the flouring!)

In a large bowl, whisk together all your dry ingredients.

In a 2 cup measuring cup, measure out your applesauce, oil, eggs and vanilla. Add enough lemon juice to equal 2 cups of liquid, about 3 tbsp.

Add your wet ingredients to your dry ones and stir to combine. This batter is thick, and that is ok. Just mix it up. Fold in your fruit, making sure it is evening distributed.

Spoon your finished batter into your prepare bundt pan, and smooth out the top.

Bake for 50-60 minutes, or until a toothpick inserted into the thickest part of the cake comes out clean.

Allow to cool in the pan for about 10 minutes, use a spatula to loosen the sides, and carefully flip the cake out onto a cooling rack to cool completely. If you're lucky, the cake will have cleanly slid out of the pan. If you're even more lucky, there will still be a small amount of cake stuck to the inside of the pan. Scoop it out with a rubber scraper, eat the evidence, and sift a generous amount of powdered sugar onto the finished cake before serving. Nobody will ever know the difference!

Top each slice with whipped cream or vanilla ice cream.

Enjoy!


Monday, December 23, 2013

Sticky, Crumby Fruitcake

If you hate fruitcake, you can just go ahead and stop reading right now. Myrnie and I, co-authors on this blog, both happen to adore fruitcake with a passion. We grew up eating our grandmother's fruitcake every Christmas, the "proper" way - sliced thick and topped with a generous slab of sharp cheddar. Grandma's fruitcake was dense and tended to the dry side (since our loaf wasn't allowed to be soaked in rum), but we always thought it delicious as we didn't know any different.

Grandma, rest her soul, has been gone for over five years now. It was time for Myrnie and I to try and bring back the fruitcake tradition. We both started with bargain bin neon fruit assortments and went from there. Myrnie found a copy of what she believes is the recipe Grandma used. I went with a recipe from King Arthur Flour that was titled Fruitcake Even Fruitcake Non-Lovers Will Love. (Now THAT is a mouthful!)

The verdict? We both prefer our versions best. Figures, eh? Hers came out as dense and sliceable and yummy as we remember Grandma's being. Mine came out sticky and soft and delicious and I can't stop eating it.

(Myrnie? This is your cue to get your recipe written down here so we don't lose it!)

My fruitcake, ready to pop into the oven. 

An inside shot of my finished fruitcake. Check out those glorious day-glo fruits! That's my favorite part...

Half of a finished mini loaf. The other half was my breakfast. Just keeping it real, folks.


I give you...my new favorite fruitcake recipe. I made a few tweaks, so I'll go ahead and share my take here. The original recipe includes slightly different spices, a different assortment of fruit, and a lot of nuts. I didn't have all-spice, I prefer the neon fruit from the baking aisle, and I don't like nuts in my cake. So...there ya go.

Aunt LoLo's Sticky Fruitcake
(adapted from King Arthur Flour's recipe here)

As I prepared this, it makes 12 "mini loaves", or it could make one giant 9x5 loaf

Ingredients:
2 pounds "fruitcake mix" (sold in plastic tubs in the baking section during the holidays - includes cherries and candied citrus peel)
8-10 (minimum) chopped dates
1/2 to 1 cup of juice (I used a cherry/grape/apple blend)
1 cup butter, softened
2 cups brown sugar
1 tsp. salt
1 tsp. ground cinnamon
1/4 tsp. ground cloves
1/4 tsp. ground nutmeg
1 tsp. baking powder
4 eggs
3 cups flour
2 tbsp. cocoa
1/4 cup dark corn syrup

Glaze (I used straight agave syrup, but simple syrup is what is recommended in the original recipe) (Simple syrup is made by cooking equal parts sugar and water in a pot until the sugar dissolves.)

Preheat the oven to 300 degrees Fahrenheit. Prepare a half sheet pan by lining it with parchment paper. Set aside.

1. In a medium saucepan, combine your assortment of fruit, and your juice. Cook it over low to medium heat, stirring occasionally. The idea is to plump up your fruit. Mine was particularly chewy, so I added a few extra splashes. When you can easily chew a piece of the fruit, you're good to go. Set the pot aside to cool.

2. In the bowl of a stand mixer, combine your softened butter and your brown sugar. Cream those two things together until they are nice and fluffy. With the mixer on low, add your salt, cinnamon, cloves, nutmeg and baking powder.

3. Add the eggs, one at a time. Scrape the bowl well after each egg (or use a plastic paddle with rubber scrapers on it).

4. Add your flour, cocoa, and corn syrup. Mix until everything is very well combined.

5. Turn off the mixer, remove the bowl, and dump your batter into the largest mixing bowl you have (at least 6 quarts). (If your mixer has a 6 quart bowl, you're good to go. Just take the bowl off the mixer.)

6. Stir in your plumped fruit and any leftover juice. Make sure everything is combined.

7. Carefully scrape all of your fruited batter into your prepared pan. Pop your pan into the oven, and set the timer for 90 minutes. Start checking it every ten minutes after an hour. The cake is done with a toothpick comes out with a few crumbs, not a smear of dough.

8. When the cake is done, carefully remove the pan from the oven (you have nearly 3 pounds of yumminess there - it's heavy!). Immediately brush the top with your glaze of choice and then set the pan aside to cool. When the cake is completely cool, flip it out onto a cutting board and use a long, sharp knife to slice it up.  I cut mine into 12 "mini loaves". Wrap each piece up carefully and tightly in plastic wrap.

Enjoy!


Monday, March 26, 2012

Caramel Apple Upside Down Cake


The cake portion itself was a fail, the apples were amazing, and the whole thing looked like a hot mess... but the idea is irresistible! 2 pounds of granny smith apples, cored and sliced, then cooked in a mixture of butter and brown sugar. I simmered that in my dutch oven on the stove until the juice reduced and the apples were just slightly cooked, then removed that from the heat and poured a whole wheat cake batter over it and popped the whole thing into the oven. I baked it for about 35 minutes at 350, and inverted it onto a serving platter. It smelled amazing, and the apples were just to die for. The cake recipe was bland, and quite tough, but the SWEET apples kind of balanced it out. The kids liked it! (I used an apple upside down cake recipe from Cooks Illustrated for the apples, and then a recipe for pineapple upside down cake from my Vitamix cookbook for the cake.) 

Please, somebody - perfect this recipe for me! The cake needs to be fairly sturdy...but not THIS sturdy. Take on the challenge! 

Saturday, July 9, 2011

A Vanilla Cake That Looks Like Cake

IMG_9113

IMG_9120

My fellow Chow-ians…I give you a vanilla cake. It is not a “white cake”, because it involves egg yolks…so it’s yellow. But it’s tall! And fluffy! And it looks like a cake. My father will laugh when he hears this, but I spent all weekend trying to recreate, from scratch, what would take me $.99 with a box. My father’s grandmother was brilliant, both in the classroom and in the kitchen. Her husband was a scientist. They both appreciated a good cake…and knew that the easiest way to get one was to take advantage of all the science and work that went into the boxed mixes. They drilled that fact into their grandson, who in turn passed the wisdom on to me – Use The Box.


And, can I vent for a moment? Indulge me. Last weekend, I baked four white cakes. Why? Because the second one didn’t turn out how I wanted it to…neither did the third. Or the fourth. The first one was for us, and I used Dorie Greenspan’s Perfect Party Cake recipe. It makes the most amazing cupcakes – tiny crumb, moist, tender. However, my cake? Didn’t rise more than 1/2”. Not acceptable, but it was just for us, so…what are you going to do, right? (After some research, it turns out that great cupcake recipes don’t often translate to great cake recipes. However, great cakes can usually be made into great cupcakes. Weird, right? It’s sad, too, since Dorie’s cake was intended to be baked as a cake! However, she knows all about the issues with the cake, going so far as to nickname it “The Cake that Won’t Rise.” She has no idea why her cakes work and ours don’t.) The second cake was an “order” from a friend, for her mother’s birthday. It was the same recipe, baked in a 9x13 pan. It hardly rose. I tried again, to make a second layer for the cake (since the first cake couldn’t very well be split). I followed the directions exactly…and got the same results.


The next day, after hours of research the night before, I tried another recipe…just to see what would happen. It was the Cook’s Illustrated White Cake. Not only was the rise as sad as Dorie’s cake when baked in a 9x13 pan, but the texture of the cake was something like sweet, butter-laden cornbread. It was great with strawberries and whipped cream…but it wasn’t the white cake I was looking for. (It was at this point that I started to get just a little bit Mad at The Universe. Seriously, folks – if a white cake should be WHITE, why does it rely on temperamental YELLOW butter??!) (I realize now, after some more research, but I probably could have solved a lot of my problems by just substituting in shortening for the butter. And my cake would have been white.)


Finally, I came across King Arthur Flour’s Golden Vanilla Cake. Not only did it use ingredients I commonly kept in the cupboard (who keeps cake flour around??!), it came with a KAF guarantee, oodles of great reviews, and a handful of horrible reviews…followed by responses from the KAF team with suggestions for the bakers, or offers of telephone assistance, or both. When I found the recipe (in the middle of the night), I very nearly jumped out of bed and baked it right then and there. However, I decided that the quest for a Great Vanilla Cake wasn’t worth a 2 am bed time, so I held off.


Kids? I’ve found My Vanilla Cake recipe. Huge thanks to King Arthur Flour for another great recipe!


To find the recipe go here. And please, if you can, use a kitchen scale and the “weight” option to get the recipe in ounces instead of cups.

Wednesday, May 4, 2011

The Big Girl Bakes A Soda Pop Cake

Please don’t hate me, but I’m about to show you a recipe that I would NEVER make myself. Never would I look at the calendar, see that I have guests coming, and say, “Oh! I know! I’ll make that thing I blogged about the other day!” Not this time.

But I would totally let my four year old make it, and if she did…I would serve it to you with a smile. Because sometimes, teaching culinary confidence to the pre-k set is more important than from-scratch and gourmet. (All that said, this cake is surprisingly tasty, and very addicting. It has the added benefit of being egg and dairy free, other than whatever is already present in your ingredients.)

(Oh, and if you’ve been reading Chow Review for a while, you will totally recognize this recipe. Last time, we used a yellow cake mix with a store-brand lemon-lime soda. This time, it was chocolate cake mix with 7Up. It was very good!)

Behold: Soda Pop Cake!
IMG_8586
So, you take these two things…
IMG_8578
…and give them to a child with a bowl and a spoon.

IMG_8579
When she says, “Hey! Let’s add dried cranberries!”, just nod and say yes. It’s her cake, after all.

IMG_8581

While she’s doing all her mixing and mastering, spray a 9x13 pan with cooking spray and pre-heat your oven to 350.

Help her pour all the batter into the pan, and bake for about 30 minutes, or until a toothpick inserted into the center comes out clean.

IMG_8583

Enjoy!

Soda Pop Cake
makes one 9x13 cake

Ingredients:
1 boxed cake mix
1 can of soda pop

Preheat oven to 350 and spray a 9x13 pan with cooking spray. Set aside.

In a bowl, stir together the cake mix and soda pop.

Pour into the prepared pan and bake for 25-30 minutes, or until a toothpick inserted into the middle comes out clean.

Friday, April 8, 2011

A Rosy Posy Cake!

IMG_8446

A sweet friend of mine turned 26 and, as everyone knows, that is an occasion that calls for CAKE. (Besides that fact, I was looking for nearly any excuse to bake another cake. I seem to have misplaced my Cake Mojo, and I want it back! The icing…is hiding a multitude of flaws.)

IMG_8448

I followed the directions from here, and was pretty pleased with the results! I put on a “crumb layer” using some leftover pink buttercream from the freezer. Then, I made the roses using my usual chocolate frosting recipe, subbing in mint extract for half of the vanilla extract called for. Even with filling, and crumb coating, the cake in a separate frosting, one batch of icing was still not quite enough to do up this cake. Just a note for future reference.


IMG_8447


Cake and frosting recipe here.

PS – I think part of my issue is my oven temperature…and the amount of baking soda the cake calls for. I used the King Arthur flour site to convert the cake measurements to weight, so I’m sure that I measured everything correctly. However, I don’t think I baked it long enough. The edges of the cake just crumbled off, and after I iced the cake and cut into it, the middle was like fudge. Not exactly what I was going for. So, next time…bake it longer, knock down the baking soda to 1 tsp. instead of 1 1/2, and add a smidge more salt, for more contrast with the super sweet icing.

Monday, March 14, 2011

Our Favorite Chocolate Cake

So, this is just for your benefit. A sort of public service announcement. (Ok, and it’s for me, too, so I don’t lose track of these recipes.)


If you are looking for an awesome chocolate cake recipe, go here. It’s absolutely, positively awesome. Perfect for cupcakes and layer cakes.

January 2011 022

You’re welcome.


(PS – If you want my favorite white cake recipe, go here.)

IMG_8396


You’re welcome!

Thursday, March 10, 2011

Perfectly Awesome Party Cake

IMG_8399

Adapted from Dorie Greenspan’s Perfect Party Cake, from Baking, From My Home to Yours

Makes two 9” round cakes, or 30 cupcakes. These are lovely little white cupcakes, flecked with orange zest and flavored with vanilla. The crumb is small and tight, and they are just fabulous.

IMG_8398

Ingredients:

2 1/2 cups AP flour

1 tbsp. baking powder

1/2 tsp. salt

1 1/4 cups milk (I used homemade buttermilk – 2 Tbsp. lemon juice, plus milk to 1 1/4 cups)

4 large egg whites

1 1/2 cups granulated sugar

2 tsp. orange zest (optional) (originally lemon) (I used orange, but might leave it out next time and simply make a vanilla cake.)

1 stick unsalted butter, at room temperature

1/2 tsp. vanilla extract (originally pure lemon extract)


Preheat oven to 350 and prepare pans. Prep with butter and flour if you are baking round cakes, or line muffin pans with paper liners. I made cupcakes and filled two 12-pocket muffin pans, plus an extra 6 cupcake liners on a baking sheet.


In a medium bowl, sift together flower, baking powder and salt. Don’t cheat and use a whisk this time. Go with the sifter.


In a small bowl, combine your milk and egg whites.  Whisk these up, and set aside.


In the bowl of your mixer, combine your sugar and zest, if using. Mix with your fingers until it smells fabulous and looks slightly damp, then add in your butter and beat on medium speed in your stand mixer for 3 minutes, at least, or until light and fluffy. (This took about four minutes for me, as my butter was still a little cold when I put it in.) Add your extract.


Add in 1/3 of your flour mixture, then half of your milk, 1/3 of your flour, the rest of your milk, then the rest of your flour. You want to beat this cake well, but (experience has taught me that) no matter how carefully you add your flour and milk, it will FLY if your mixer is still humming along on medium. Slow it down, add your next ingredient, then speed it up as quickly as you are able to, without slopping your ingredients out the sides.


When everything is in the bowl, leave it on medium and give it a good mix for another two minutes. This makes a rather sturdy, and fluffy, cake batter. It reminded me of un-set marshmallows.


Spoon your batter into your prepared pans, and bake, on the center shelf in your oven. 30-35 minutes for 9” rounds, or about 25 minutes for cupcakes. They are done when a toothpick, inserted into the middle of the cake, comes out batter-free. Cool in the pans for a few minutes, then carefully remove your cakes to wire racks to finish cooling.


I will warn you – my cupcakes puffed up just above the edge of my paper liners and looked adorable. When they cooled, however, the cakes shrank back on themselves, giving me a perfectly flat plain to pipe my icing onto. Some of them were filled less than others, and actually pulled away from the paper liner. You want them 2/3 full.


This makes a sturdy, but light, cake with a tiny crumb. Just what I was looking for! This is a cake that can be sliced, stacked, filled or (possibly?) carved. I’ve found my vanilla cake recipe!


PS – I frosted these with Bright White Icing, from Better Homes and Gardens. It’s a basic shortening/powdered sugar/milk frosting, with vanilla, almond extract and added pink food coloring. Quick and easy!

Monday, September 13, 2010

A Birthday Carrot Cake!

IMG_7064 

I have been drawn to the kitchen nearly all my life. When I was 5, my mother (bed-ridden with a pregnancy) would send me downstairs to make her a sandwich for lunch. When I was 9, my father took my twin sister and I into the kitchen and taught us how to read a recipe.


There were several years following this momentous occasion where….Interesting Dinners resulted from our novice attempts at cooking. One particular meatloaf stands out in my mind. The recipe called for breadcrumbs, and dehydrated onions. The recipe helpfully suggested that if you did not have any breadcrumbs, you could toast bread and break it up. Having never seen breadcrumbs, per-say, I took the second option. And broke it up into one inch chunks. Then, tackling the onion problem…I looked through the spice cupboard, checking every ingredient label as I went. Finally, I found something that had onions in it – Onion Powder! So I put in three tablespoons of that.


The resulting meatloaf looked like brain (from the bread “crumbs”) and tasted like pure onion. It took me a long time to live down that onion loaf….


The other thing I could not get right was cake. I tried one, from the same cookbook, and it came out looking (and feeling) like a golden, buttery brick.


My father told me to chalk it up to experience…and that I had just re-invented the Pound Cake.


Needless to say, with the many other options available to me in the kitchen, it has taken me a long time to return to cake making. If I can get perfect results with Betty Crocker and an egg….who am I to mess with perfection!


My friends, it has taken me over 15 years…but I have finally found a few cakes that I can (successfully!) turn out for parties, celebrations and the like. The first is Pioneer Woman’s Chocolate Sheet Cake, with a few modifications. (I like to throw in a few dashes of Saigon Cinnamon now, to kick it up a bit. Mmm.)


The other cake I can successfully turn out?


Dorie Greenspan’s Carrot Cake. I first used it to cater a wedding luncheon this summer, and have since used it to celebrate two birthdays. It’s a hit. Nothing very unique about it…except that it turns out exactly how a carrot cake should be – not too sweet, not too spicy, and never dry. Just…perfect. 


Bill’s Big Carrot Cake

(adapted from Baking: From My Home to Yours, by Dorie Greenspan)

Ingredients:

2 cups all-purpose flour

2 tsp. baking powder

2 tsp. baking soda

2 tsp. ground cinnamon (I use Saigon cinnamon. It tastes like red-hots.)

3/4 tsp. salt

3 cups grated carrots (approximately 9 carrots) (a food processor makes this really quick!)

1/2 cup moist raisins, or dried cranberries (both are good!)

2 cups sugar

1 cup oil

4 large eggs

(The original recipe also includes nuts and coconut, but we don’t like nuts in cakes, and I never have coconut on hand. So…there ya go.)


Preheat your oven to 325 and prepare your pans. I like to use 2 9” pans, or make cupcakes. (Depending on the size of your cupcakes, this can make anywhere from 12-24.) You can also use 3 9” pans for more frosting-space, but I only have two. Spray well with cooking spray, or smear with butter, and flour liberally. Set aside.


In a medium bowl, whisk together the flour, baking powder, baking soda, cinnamon and salt. In a small bowl, stir together the carrots and raisins or cranberries.


Using a stand mixer, with your paddle attachment, beat together the sugar and the oil, on medium speed, until smooth. Add the eggs one at a time, and keep on beating until the batter is even more smooth. Take the speed down to low and add in the flour mixture until just mixed. Carefully mix in the chunky stuff, and divide the batter into your prepared pans.


Bake for 40 minutes, or until the cake just begins to pull back from the edges of the pan and a toothpick stuck into the middle comes out batter-free.


Cool the cakes for 5 minutes on a cooling rack, then run a small flexible rubber scraper around the outside and turn the cakes out onto racks to cool.


(The cakes can be wrapped up once they’re cool and kept at room temperature overnight, or in the freezer for two months.)


Frosting:

(This is a pretty generic Cream Cheese frosting, and easy to dress up)

Ingredients:

8 oz. cream cheese

1 stick (8 Tbsp.) unsalted butter, at room temperature

1 pound (3 3/4 cup) powdered sugar, sifted

Flavoring (1 Tbsp. lemon juice, 1/2 tsp. pure extract, 1 tsp. vanilla, etc.)


Beat the cream cheese and butter together, in a stand mixer (with the paddle attachment) until creamy. Carefully add the powdered sugar and mix until it is smooth. Gradually add in your flavoring, adjusting to taste.


Now go forth and build the Carrot Cake of your dreams! This really does make excellent little cupcakes, or a rather elegant (and easy!) birthday cake.


(Another excellent quality of this cake is that, if you were to leave a few cupcakes un-frosted, you now have an excellent dairy-free dessert for any lactose intolerant nieces that might be lurking around your kitchen!)

Friday, August 6, 2010

LoLo Banana Bundt Cake

Adapted from Dorie Greenspan’s “Baking, From My Home to Yours” (Classic Banana Bundt Cake)
IMG_6963

Ingredients:
3 cups AP flour
2 tsp. baking soda
1/2 tsp. salt
1 cup olive oil
2 cups sugar
2 tsp. pure vanilla extract
2 large eggs
About 1 1/2 cups mashed bananas (about four medium bananas), very ripe
1 cup plain yogurt

Preheat your oven to 350, with a rack in the middle. Prepare your Bundt pan by greasing it well. (I used cooking spray.)
In a medium bowl, whisk or sift together flour, baking soda and salt.
In the bowl of a stand mixer, beat together the olive oil and sugar until well-combined and smooth-ish. Add the vanilla and then the eggs, one at a time, beating for about one minute after each egg goes in to make sure it is well incorporated. Turn the mixer down to low, and add in your bananas. Finally (still on low), mix in half the flour mixture, then all of the yogurt, and then the rest of the flour mixture.  Remove all of the batter to your Bundt pan and smooth out the top.
Bake for 65-75 minutes, or until a toothpick in the deepest part of the cake comes out clean. (Check it at 30 minutes – if it’s getting too brown for your liking, cover it loosely with tin foil for the rest of the baking time.) Cool the cake pan on a rack for 10 minutes, and then take the cake out of the pan and let it finish cooling on the rack.
This is even better the next day!

Friday, January 22, 2010

A New (Old) Apple Cake


My son celebrated his birthday in December, and for his party with his friends I made his (new) favorite cake - an apple cake. The recipe originally came from my Great-Grandma Susie. Story is that, should you happen to find yourself in her front room during the autumn or winter, more likely than not you'd find yourself in the company of this particular cake. The secret, I believe, is that the cake is heavy handed on the oil...meaning that you have a cake that is as delicious, squishy and moist on Sunday evening as it was on the Monday before. Brilliant, right? It's almost a cross between a pudding, a bread and a cake.


I found two copies of the recipe - the one I copied from my grandmother's recipe files, and the one that my great-aunt published in their church cookbook 30 years ago. For the first run through, I made the cake as my grandmother taught me. However, with 3 cups of flour, two cups of sugar and 1 1/2 cups of oil...it was a bit of a once-a-year-treat. Since I had already made it that way once (for a party at church), I decided to put a bit of a LoLo spin on it. The results were delicious and, for some of the guests who sampled both cakes, actually preferrable! My version is by no means a diet version, but certainly less oil-some than the original. It is perfect plain, for breakfast, or topped with a dollop of Cool Whip. (I can't break tradition, guys - sorry! It was always Cool Whip at Grandma's house.)


Aunt LoLo's Fresh Apple Cake


Serves 12-15


Ingredients:


3 cups AP flour (unsifted)


2 cups white sugar


1 tsp. cinnamon (Saigon, please!)


1 tsp. baking powder


1 tsp. salt


1/2 cup oil


1 cup apple juice


2 eggs, lightly beaten


1 tsp. vanilla


1 Tbsp. lemon juice


4 medium sized apples, cored and chopped. (I used two Granny Smith - tart- and two Cortland - sweet. Peels on, please. No need to be fussy!)


Preheat your oven to 325F.


Grease a 12-cup Bundt pan well. Really, really, really well. Some of the cake will still stick...but don't let that discourage you. Just do your best!


In a LARGE bowl, whisk together the dry ingredients (flour, sugar, cinnamon, baking powder, salt).


In a 2 cup measuring cup, pour in 1/2 cup oil and then 1 cup apple juice. (You could, of course, do this in two steps - but I'm trying to save you time here!) Pour that into your dry ingredients. In the same cup, crack two eggs and whisk them lightly. Dump them into the flour bowl. Squeeze in your vanilla (one short squeeze is about right) and your lemon juice (one long squeeze). (Just trying to keep it real here!).


Stir that all together. I like using a spatula, so I can make sure all of the flour is mixed in. Fold in your apples.


Give it a taste. Yummy? Great! Now spoon it into your prepared Bundt pan. (Trust me - if you try to pour it, your arm will get tired and fall off, and your cake will end up all over the counter. This is definitely a spooning operation.) (Heh.)


Put your cake into the oven and set a timer for an hour. It won't be done after an hour - it will take closer to an hour and a half - but you really don't want to leave the kitchen for that last half hour, as this is not an exact science. The cake is done when a toothpick stuck into the deepest part comes out batter-free. A few crumbs are ok. You don't want this cake to get dry!


Enjoy with just a dollop of Whipped Cream...or not, as the case may be.

Wednesday, October 7, 2009

Great-Grandma Susie's Apple Cake

My friends...I canNOT believe I haven't shared this recipe with you yet! This is an old family favorite, from my great-grandmother. She was a humble woman, living in backwoods Alabama. What they ate they mostly raised themselves. They were frugal. They were gracious.

The story is that this apple cake could usually be found on Grandma Susie's sideboard, just waiting for a hungry child after school, or a friend who stopped by for a chat. (Because, down south, nobody stops by for a chat without having a bite to eat! My mother used to time her visits to "chat" for right after Great-Aunt Velma pulled her chicken n' biscuits out of the oven. Heh.)

Without further ado....

Great-Grandma Susie's Apple Cake
Makes 1 10-cup bundt cake

Ingredients:
3 cups unsifted flour
2 cups sugar
1 tsp. cinnamon
1 tsp. salt
2 tsp. baking powder
1 cup oil
2 eggs, beaten
2 tsp. vanilla
3 Tbsp. artificial lemon juice (or 1 Tbsp. real)
3-4 cups firm apples, chopped (3 large apples)

Grease a 10-cup bundt cake pan and set aside. Preheat your oven to 350.

In a large bowl, whisk together the flour, sugar, cinnamon, salt and baking powder. Set aside.

In a medium bowl, mix together the oil, eggs, vanilla and lemon juice.

Gently mix the wet ingredients into the dry ingredients until just combined. Fold in the apples.

Bake until a skewer inserted in the middle comes out clean. (Approximately 75 minutes for a bundt cake.)

This is a rather rich cake, so we usually serve it in small slices, with a dollop of whipped cream.

Thursday, June 11, 2009

Food Fit For a Party

I attended a baby shower for a friend of mine this past weekend, and volunteered to bring some goodies.

When I was planning what to bring, I remembered that I've never met a pregnant lady who didn't appreciate some fresh fruit and some chocolate cake.

First off, the fresh fruit. I saw this idea in an old entertaining book I stole from Grandma when I was in high school. (Yes, Myrnie, I've still got it!) It has some truly crazy things - salmon mousse in the shape of a salmon, anyone? - but it also has some gems. Like this.


To make this watermelon, carefully cut away two wedge shaped sections from the top of the watermelon, with the point being a right angle. When both sections are cut away, carefully stick your knife through the section left in the middle and cut the fruit out. (I wasn't quite careful enough, and nearly went through the handle on one side. Oops!)

The easiest way to break up the watermelon into servable chunks is to just attack it with a spoon. Scoop/break out serving sized pieces, pile them into a bowl, drain the leftover juice out of the watermelon, and pile the fruit back into the watermelon. (Of course, you can't fit all of the fruit back in. Just pile in what you can, and leave the rest at home for your toddler and husband to enjoy. Om nom nom!)

Because I wanted to be fancy, I took a long piece of plastic wrap and made a box to decorate my "basket." (Couldn't you tell what it was?!)

And of course, we couldn't forget to bring a chocolate cake!

I chose to use Pioneer Woman's Chocolate Sheet Cake. It's as good as she says, y'all. It's really, really good. You can see my notes below. WARNING: This is not diet food! This cake should only be made if there are a minimum of 20 prospective mouths to feed.

Don't say I didn't warn you.

Pioneer Woman Chocolate Sheet Cake

Combine in a mixing bowl:
2 cups flour
2 cups sugar (I cut this down to 1 1/2 cups, and could probably cut it down to 1 cup.)
1/4 teaspoon salt

In a saucepan, melt:
2 sticks butter
Add 4 heaping tablespoons cocoa. Stir together.

Add 1 cup boiling water, allow mixture to boil for 30 seconds, then turn off heat. Pour over flour mixture, and stir lightly to cool.

In measuring cup, pour 1/2 cup buttermilk.
Add:
2 beaten eggs
1 teaspoon baking soda (Does anybody know why you are supposed to mix the baking soda into the eggs and buttermilk??)
1 teaspoon vanilla

Stir buttermilk mixture into butter/chocolate mixture. Pour into sheet cake pan and bake at 350-degrees for 20 minutes. (I'll turn the cake partway through baking next time - my oven is tipped and one corner of my cake was paper thin!)

While cake is baking, make icing:
Chop 1/2 cup pecans finely.
Melt 1 3/4 sticks butter in a saucepan.
Add 4 heaping tablespoons cocoa, stir to combine, then turn off heat.

Add:
6 tablespoons milk
1 teaspoon vanilla
1 lb minus 1/2 cup powdered sugar
Stir together.

Add pecans, stir together, and pour over warm cake.


I cut this into 30 squares, and that was just about right for a baby-shower type setting. Several people went back for seconds (or thirds!) but those of us who were dieting could just grab a small piece and call it good.

Monday, May 25, 2009

Soda Pop Cake

This recipe is listed so many places, I hardly even know who to credit for it! I originally heard the recipe linked to the Jenny Craig weight loss system...so we'll go with that. The cake is egg free, fat free...and really, just fun to make!

Ingredients and supplies:
1 box cake mix (the two-layer size) (I used yellow cake)
1 can soda pop (12 oz.) (You can use diet if you're into that sort of thing, but I used regular because Aspartame scares me. I used Sprite, to give my yellow cake a sort of lemon lime flavor)
1 toddler, in an apron
1 long wooden spoon
1 enormous mixing bowl
9x13 pan, greased


1. Preheat your oven to 350 and grease your pan.
2. Stand your toddler on a chair next to you. Show her how to dump the whole bag of cake mix into the large bowl.

3. Open the can of soda, and let your toddler dump all of that into the large bowl. (Try to stop her from drinking it, if you can - you need the soda for the cake, and it will give her cavities. Trust me.)
4. Give said toddler the long wooden spoon, and let her go to town! When she has mixed the cake to within an inch of its life, wrestle the spoon back and give it a few good whipping stirs. You want to get all the lumps out. (You could do all of this in a mixer, as well, but then your toddler wouldn't get to play with a wooden spoon!)


5. Dump the cake batter into the prepared pan and bake according to package directions. Mine took about 33 minutes.

6. Hand the messy spoon and bowl over to your toddler. Come on - when else are you going to have a batter bowl that is completely egg free??!

Let the cake cool completely before cutting it. The cake is very sticky and crumbly...but moist. (I know - that sounds like an oxymoron, but trust me. The cake really, really wants to just crumble down to moist, sticky chunks.)

(I've heard that chocolate and Dr. Pepper is a great combination for this, or chocolate and cola. Oooh...how about confetti cake with strawberry soda! The mind boggles.)

Saturday, April 25, 2009

Chocolate Chocolate Cupcakes


Chocolate- Chocolate Cupcakes
Adapted from Baking, From My Home To Yours

Makes 12 cupcakes

Preheat your oven to 350 and line your cupcake pan with muffin liners.

In a medium bowl, sift together:
1 cup all purpose flour
1/4 cup unsweetened cocoa powder
1/4 teaspoon baking powder
1/4 teaspoon baking soda
1/4 teaspoon salt

In the bowl of a stand mixer, beat until light:
1/2 cup vegetable shortening

Add:
3/4 cup sugar

Beat until blended, or about 2 minutes.

Add:
1 egg, plus 1 egg yolk.

Beat one minute between the egg and egg yolk.

Add:
1/2 teaspoon vanilla extract

Add in half of the dry ingredients, and beat until just combined.

Combine in a bowl, and then add to the large bowl:
2 tablespoons lemon juice
enough soy milk to make 1/2 cup

Add the remainder of the dry ingredients, blending until just combined.

Fold in:
2 ounces semi-sweet chocolate (chocolate chips) melted and cooled.


Divide the batter evenly among 12 muffin cups and bake 22-25 minutes, or until a toothpick inserted in a cupcake comes out clean.


We served these sprinkled with a little powdered sugar, but you could definitely come up with a tasty frosting if you like!

Monday, March 30, 2009

Martha Stewart's One Bowl Chocolate Cake


I have found my Cake Recipe. It tastes better than a mix, has no scary ingredients (anybody else have nightmares after reading Omnivore's Dilemma?), and goes from cupboard to oven in about 7 minutes. It's an oil cake so there's no Crisco-induced guilt and no softening of butter. It is insanely moist and chocolate-y without being too dense or fudgy. Plus, it left my entire family in a crumby stupor, leaning back in their chairs sporting chocolate-y half-smiles.

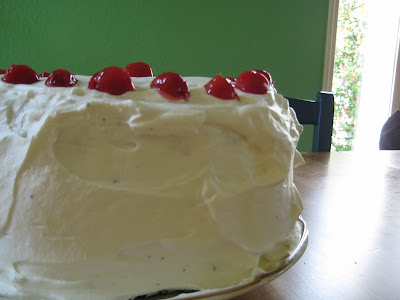
This time, I brushed it lightly with a simple syrup and scattered drained pie filling cherries over the sweetened, whipped, cream between and on top for a Black Forest-esqe cake. (Which, if I may say so, made the prettiest cake to ever emerge from my kitchen.)


Next time I might top simply with powdered sugar (although whipped cream is hard to beat as a frosting, although it doesn't keep well in the fridge.)


If you find yourself reaching for a cake mix time after time, because it's easier, save your money and pick up a can of cocoa next time at the store instead (this baby calls for a whopping cup and a half) and impress all your friends and family. (Or you could be like us and impress your neighbors too. They were the happy recipients of our leftovers, in a last-ditch attempt to save my waist line.)

So go! Go! Make a cake, and make someone happy today.

Recipe originally found here

Martha Stewart's One-Bowl Chocolate Cake

Ingredients

Makes 2 eight-inch square or 3 eight-inch round layers.
  • Unsalted butter, for pans
  • 1 1/2 cups unsweetened cocoa powder, plus more for pans
  • 3 cups all-purpose flour
  • 3 cups sugar
  • 1 tablespoon baking soda
  • 1 1/2 teaspoons baking powder
  • 1 1/2 teaspoons salt
  • 3 large eggs
  • 1 1/2 cups buttermilk
  • 1 1/2 cups water
  • 3/4 cup vegetable oil
  • 1 1/2 teaspoons pure vanilla extract

Directions

  1. Preheat oven to 350 degrees. Butter round or square cake pans, and line bottoms with parchment; butter parchment, and dust with cocoa. (I simply sprayed my pans with this, and it worked great.)
  2. Into the bowl of an electric mixer fitted with the paddle attachment, sift cocoa, flour, sugar, baking soda, baking powder, and salt. With the mixer on low, stir in eggs, 1 1/2 cups warm water, buttermilk, vegetable oil, and vanilla until smooth, about 3 minutes.
  3. Divide batter among prepared pans. Bake, rotating once, until tester inserted in center comes out clean, 35 to 45 minutes for 8-inch layers, depending on amount of batter.
  4. Let cakes cool in pans on a wire rack for 20 minutes, then remove from pans and cool completely, right side up on rack.


Monday, March 2, 2009

Dairy-Free Yellow Cake


This recipe is adapted from Better Homes and Garden's 75th Anniversary Edition cookbook. Originally, this was the Yellow Cake recipe, with the Simple White Frosting. My family liked how the edges of the cake were a little crispy, but the cake itself was moist like a breakfast muffin, but not as dense. If the only yellow cake you've had is from a box, try this one! I'm always surprised how it's not very much extra work to make a cake from scratch, but the quality is so much improved that it's almost unrecognizable when compared to a mix.

The frosting is from the same cookbook, their "Creamy White Frosting." It already called for shortening, so I just subbed non-dairy creamer for the milk.


I used non-dairy creamer- this is the first time I've tried this, and it worked well. Definitely a different taste from dairy, but also a different taste from soy milk (which can be a good thing in baking.) A friend with Crohn's disease taught me- she uses non dairy cream and water in a 1:3 or 1:1 ratio for her baking. It's inexpensive, and a good substitute for dairy in most recipes. She even uses it for crepes.

Oh. And about the very green frosting. You see, Ernie managed to fill up her ball jar on Saturday, and chose a cake for her treat. With green frosting. It's St. Patrick's Day, a little early!


Yellow Cake

Ingredients:
3/4 cup shortening
3 eggs
2 1/2 cups all-purpose flour
2 1/2 tsp baking powder
1/2 tsp salt
1 3/4 cups sugar
1 1/2 tsp vanilla
1/4 to 3/4 cups non-dairy creamer plus enough water to equal 1 1/4 cups total

Sift together dry ingredients and set aside.

In stand mixer, cream shortening and gradually add sugar. Beat on medium for minutes more, and add eggs one at a time, then beat in vanilla.

Alternately add non-dairy creamer mixture and dry ingredients, beating just enough to mix after each addition.

Spread batter into greased and floured pans.

Bake at 375 degrees. 20-25 minutes for 9" pans, 30-35 minutes for 8" pans, or 25-30 minutes for a 13x9" pan, or until a toothpick inserted in the center comes out clean. (I used square pans, and needed 30 minutes- I don't know if it was my pan size or the substitutions. Just a heads up.)

Creamy White Frosting

Ingredients:
1 cup shortening
1 1/2 tsp vanilla
1/2 tsp lemon, orange, or almond extract (I just used more vanilla)
8 drops food coloring
4 1/2 cups SIFTED powdered sugar
3-4 Tbsp non-dairy creamer

Cream shortening in mixer bowl, then add vanilla and other extract, and food coloring. Slowly add half the powdered sugar. Add 2 Tablespoons non-dairy creamer, and gradually beat in remaining powdered sugar. Add more non-dairy creamer to reach spreading consistency.

This makes enough to frost top and sides or two 8- or 9-inch cake layers. (Halve the recipe to frost a 13x9x2- inch cake.)