Wednesday, February 29, 2012

Review: Wonder Mill Electric Whisper Mill


(Originally published at Motherhood Reflections.) 


About three years ago, I stopped buying bread from the store. After a year of (rather tasty) white bread, I decided it was time to take the next step and start making whole wheat bread. Luckily, I had put a small hand-crank grinder on my Christmas wish list that year, so I felt I was all set. I pulled out my bucket of wheat, clamped my grinder onto the counter, and started cranking.

And cranking.

And cranking.

45 minutes later, I had produced 2 cups of whole wheat flour. I checked my recipe, and found that one loaf of bread requires at least 6 cups of flour. So, I kept cranking. (To add insult to injury, the resulting loaf of bread was horrible - dense and tasteless.)

I happened to be on the phone with my father that day, and told him my funny (and pathetic) story of my afternoon in the kitchen. As we talked, he hatched a plan - if he acted as my sponsor, and bought me a nice electric wheat grinder, would I make bread for his house as well as mine? (I still have a few siblings at home.) Of course! About a week later, after some research, my Wonder Mill Electric Whisper Mill arrived, in a big happy Amazon box.

I quickly got into the kitchen to try my new toy out. First of all, set-up was a snap. Put the lid on the flour canister, plug the feed tube into the grinder tower, and hit the power button. Easy peasy! One cup of whole wheat berries will give you approximately one and a half cup of whole wheat flour. And it is FAST. The flour canister can hold about 12 cups of flour (or 8 cups of whole wheat berries). The mill is, of course, noisy, but not so much so that you can’t carry on a conversation if you are determined to talk. It is noisy enough, though, that I can’t hear the phone ring when it is going. Think noisy-vacuum type noise levels. My favorite benefit of the machine, though, is that I can grind wheat so quickly, experimenting with new whole-wheat bread recipes no longer took hours of hand cranking! I can get the wheat going, and let it grind away while I add my water, yeast, sugar, etc. to my bowl. By the time I’m done with that, the wheat flour is ready to join the party.

Over the past three years, I have ground approximately 200 pounds of wheat...and this little machine is still going strong! It’s a kind of hefty investment (around $300), but for our family, it was worth it. Whole grain flours, whenever we want them? Yes!
Tuesday, February 28, 2012

Wednesday, February 22, 2012

Chocolate Revel Bars

A thick oaty shortbread crust, a fudgy layer, and a smattering of crispied shortbread baked on top.  This is an old Better Homes and Gardens Recipe, marked as "Best Loved" in their familiar red and white checked cookbook.  I used freshly ground whole wheat flour- these were lovely and squidgy still barely warm from the oven, but the flavors melded better after a night of resting.

chocolate revel bars

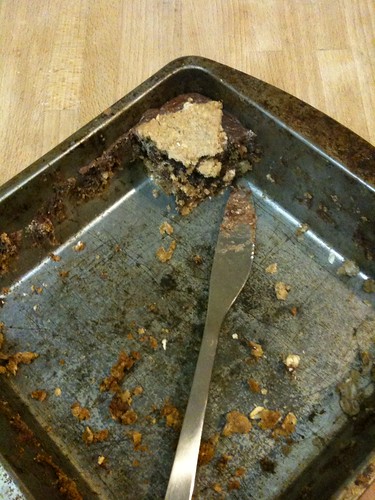
These were a big hit.  Actually, I never got a photo taken before they were eaten.  Glancing at the last remaining bar in its crumby pan, I asked my husband to please snap a picture for the blog before he ate it, I was going to bed.  Because one does not leave my husband alone with chocolate and expect it to be there in the morning.

I think this picture makes it look kind of like a crime scene.  But what a delicious crime!

Chocolate Revel Bars

1 cup butter, softened
2 cups packed brown sugar
1 teaspoon baking soda
2 eggs
2 teaspoons vanilla
2 1/2 cups flour
3 cups quick-cooking oats
1 1/2 cups semisweet chocolate pieces
1 can (14 ounces) sweetened condensed milk
1/2 cup chopped walnuts or pecans (I left these out)
2 teaspoons vanilla

1.  Set aside 2 Tbsp of butter.  Beat the remaining butter on medium to high speed 30 seconds.  Scrape down the sides, add the brown sugar and baking soda.  Beat until combined, scraping down sides occasionally.  Beat in the eggs and 2 tsp vanilla until combined.  Beat in as much flour as you can with the mixer, then stir in the rest of the flour, and the oats.  (I used the paddle attachment on my stand mixer and didn't have a problem at all.)

2.  For the filling, in a medium saucepan combine the reserved 2 Tbsp butter, the chocolate chips, and the sweetened condensed milk.  Cook over low heat, stirring occasionally, until chocolate melts.  Remove from heat, add nuts and 2 tsp vanilla.

3.  Press 2/3rds of the oat mixture into a 15x10x1" pan (I used two 8x8" pans).  This is about 3 1/3 cup.  Spread chocolate mixture evenly over crust.  Then take small pieces of remaining oat mixture and press into flat disks and arrange over the chocolate mixture.

4.  Bake in a 350 degree oven about 25 minutes, or until the top is lightly browned- the chocolate filling will still look moist.  Cool pan on a wire rack, and cut into bars.  Makes about 60 bars.

Friday, February 17, 2012

Vanilla Yogurt

Homemade  yogurt is something you should do, REALLY.  It's easy, inexpensive, delicious, and healthy.  Pretty much has everything in its favor!

You can use your favorite kind of yogurt as a starter- I really like Tillamook vanilla bean  yogurt, it has three active cultures, and makes a creamy set.  You can absolutely use flavored yogurt as a starter.  Just be aware that most store bought yogurts have additional ingredients- flavors, sugars, thickeners.  So those will end up in your final product, albeit in a very small amount.

Ingredients:
1/2 gallon whole milk
8 ounces store bought yogurt, at room temperature
1 tsp vanilla extract
1/4 to 1/2 cup sugar

In a large pot, over low heat, heat milk to 185 degrees Farenheit, stirring occasionally.  It will form a skin, and will have bubbles around the edges.

Remove milk from heat and let cool to about 110 degrees Farenheit.  It needs to be below 120 degrees, to not kill the yogurt bacteria- 105 to 115 is best.  Stir in sugar, vanilla, and yogurt.  1/4 cup sugar makes a fairly tart yogurt, 1/2 cup sugar is totally kid friendly (and still far less sugar than store bought yogurt.)  You don't want to whip bubbles in, but definitely stir enough to mix the yogurt in.

Pour into two, very clean, wide mouth mason jars and screw lids on tight.  (You will have about a half cup left over- drink it!)  Put jars into a small cooler, and fill with hot tap water.  Shut the lid, and let sit undisturbed until set, 4-8 hours depending on how warm it stays.  You can change the water part way through to keep it warmer, or cover with towels.  

Sunday, February 12, 2012

Spinach Salad with Crimini and Red Onion, Citrus Vinaigrette

I made this salad for a Sunday dinner with friends- it was very well received!  The vinaigrette is balanced, with sweet, salty, spicy, and acid.  Feel free to adjust seasonings to your tastes.  The salad portion is classic spinach salad, but I left out the proteins you'd find in a deli salad (sliced egg, cheese, and bacon.)

Serves 6-8 people

Salad
4 good handfuls baby spinach, washed and dried (enough to fill your salad spinner)
6 crimini mushrooms, sliced thin
1/4 of a red onion, sliced into very thin rounds, and then chopped
2 cans mandarin orange segments, drained

This is a basic vinaigrette, with a 1:1 ratio of oil to acid, not including seasonings.
Citrus Vinaigrette
2 oz mild oil (I used vegetable oil)
2 oz strawberry vinegar
1 Tbsp lime juice
2 Tbsp sesame seeds
1/2 tsp stone ground mustard
a few shakes of hot sauce (I used Tapatio)
1 good pinch kosher salt
Honey to taste