Tuesday, April 24, 2012
Hearty Spinach Sausage Soup
This soup came together from what was kicking around in the refrigerator...and isn't that always the best way for a soup to happen? It was delicious - savory, hearty and light, all at the same time. Served with some broiled cheese bread, this was a fantastic little supper!
(The cheese pictured above is called No Woman, from Beecher's Cheese in Seattle, Wa. It's a tasty white jack-style cheese with some Jamaican spices, onions and raisins.)
Aunt LoLo's Hearty Spinach Sausage Soup
Serves 4 as a main dish, or 8 as a side dish
Ingredients:
1 package smoked beef sausage, chopped (like Hillshire Farm sausage)
1 onion, chopped
3 carrots, chopped
4-5 medium tomatoes, cut into quarters
1 bunch spinach, chopped
3 cups frozen corn
Olive Oil
Water
Salt and Pepper to taste
In a large dutch oven, brown your sausage. (Mine was frozen, so I put it in the pot whole, then removed it to chop it and added it back later. If you plan ahead, then go ahead and chop your sausage up, brown it, and move on to the next step with your sausage remaining in the pot.) If your sausage is a little lean, add some olive oil to the pot, then add your onion and cook until slightly translucent, about 5 minutes.
Deglaze the pan with a splash of water, then add your chopped carrots and stir. Add about 4 quarts of water and bring to a boil. Add chopped sausage (if you removed it at the beginning) and tomatoes and reduce to simmer. Cook until the carrots are tender.
Add your chopped spinach and corn, and return to a simmer. Continue to cook until the corn and spinach are warmed through. Puree lightly with an immersion blender and season to taste with salt and pepper.
Serve with grilled cheese toast and enjoy!
Tuesday, April 10, 2012
Honey Whole Wheat Bread
(All photos courtesy of Sonja, from Simply Sonja Photography based in Bellevue, WA)
One of my most requested recipes, my Honey Whole Wheat bread! This bread is half whole wheat (fresh ground, if you can), half white flour, and all awesome. I use fresh-ground red wheat, but white-wheat would make a tamer taste, as well as a slightly smoother crumb.
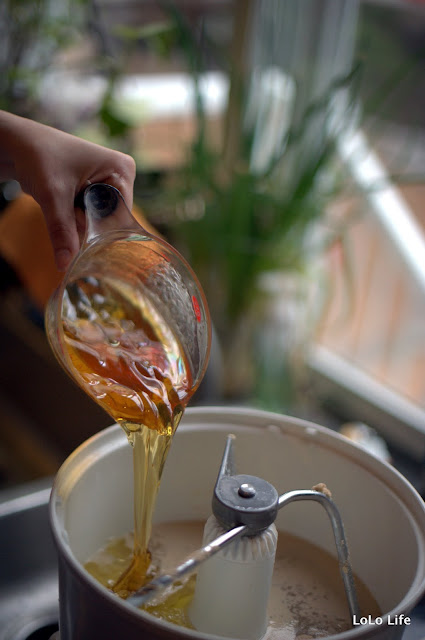
One of the tricks is to use plenty of honey and olive oil. These two things condition the wheat to give you a nice smooth, sweet bread.

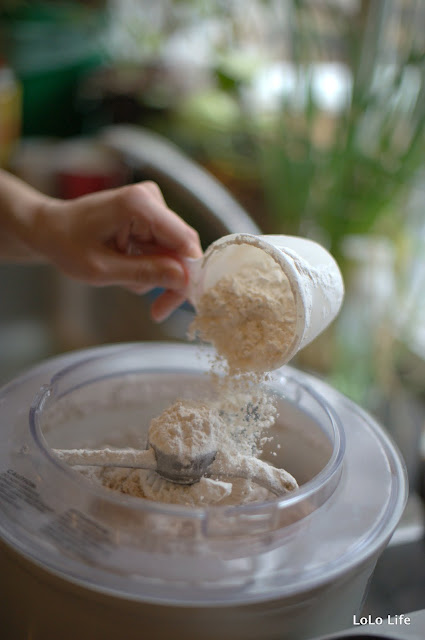
Fresh ground red wheat going into the 20 year old Bosch mixer. (I use the Bosch when I make 4-loaf batches. We keep one loaf out and freeze the rest. They come out of the freezer even better than when they went in.)

One thing you absolutely must do is to mix in the whole wheat flour FIRST, and then add white flour. This allows the whole wheat flour to plump up a bit and get evenly dispersed. The white flour can then work around it to form the gluten network it needs to make non-crumbly bread.

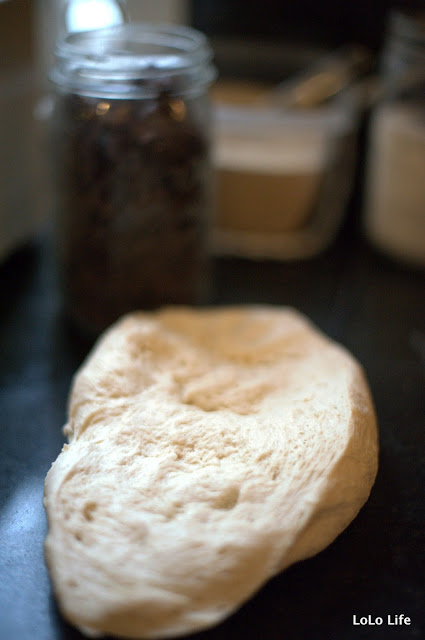
You can stop adding flour when your bread looks like this for a super fluffy, light loaf.

If your bread gets to this point, you will have a denser, sturdier loaf, perfect for peanut butter and jelly sandwiches.

All rounded up and ready for its first rise. I needed the mixer for something else, so I moved my dough to a greased bowl to rise, instead of just letting it rise in the mixer.

All baked up and ready to bag or eat!
LoLo Honey Whole Wheat Bread
Yield 2 loaves
Ingredients:
2 cups warm water
1 1/2 Tbsp. yeast
1/2 cup olive oil
1/2 cup honey
2 tsp. salt
4 cups of whole wheat flour (or 2 cups of wheat berries, ground. I measure whole wheat, not wheat flour. Fresh is best.)
2-4 cups of all-purpose flour
In the bowl of your mixer, combine water, yeast, olive oil, honey, salt and whole wheat flour. Mix until well combined, then add 2 cups of white flour. Continue to add white flour until the dough just pulls away from the side of the bowl. A stiffer dough will give you a denser bread. A lighter dough, with less white flour, will get you a fluffier bread. Once the dough is how you like it, continue to knead for 5 more minutes. Turn off your mixer, remove your dough hook, cover with a damp towel, and allow to rise until doubled in size (about an hour, in Seattle conditions). Remove dough from the bowl, divide into two loaves, *form and place into greased loaf pans. Allow to rise until larger by about 50%, then bake at 350 for 30-35 minutes, or until the bottom of the loaf sounds hollow when tapped with your fingernail.
To see how I form my loaves, go here. To find the rest of this bread course, go here.
Honey White Bread
(All photos courtesy of Sonja, from Simply Sonja Photography based in Bellevue, WA)
This was the bread that started it all - the bread that was so delicious, my husband let me stop buying bread at the store. Wait...that sounds weird. Let me put it this way: I may be the cook in the family, but it's not fair of me to replace tasty bread from the store with nasty bread from home if nobody likes it.
Here is one of my most basic recipes, in pictures.
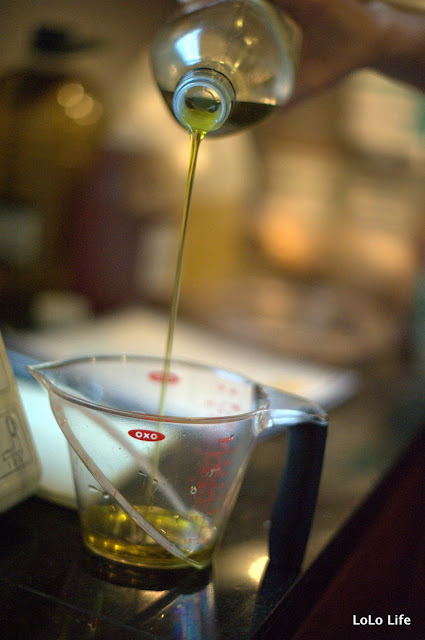
So, I experimented and tried new recipes until I found one that could surpass store-bought in quality and taste AND was less than half the cost of store-bought. (One loaf of this bread, even with olive oil and honey, is about $.75 if you buy the ingredients in bulk.)

I make the bread four loaves at a time, using my ancient Bosch mixer. The bread freezes beautifully, and is almost better from the freezer! It retains its moisture, and has a very smooth crumb.
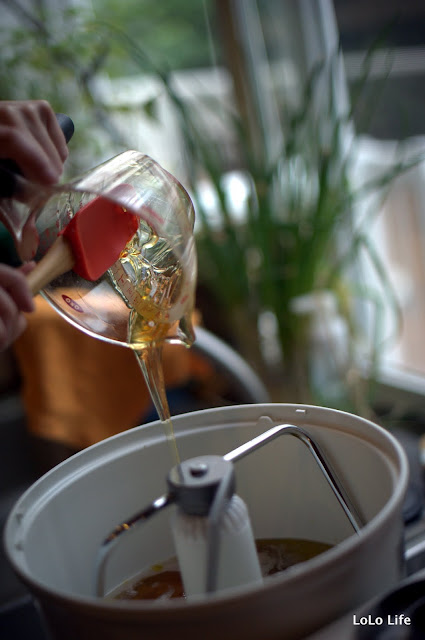
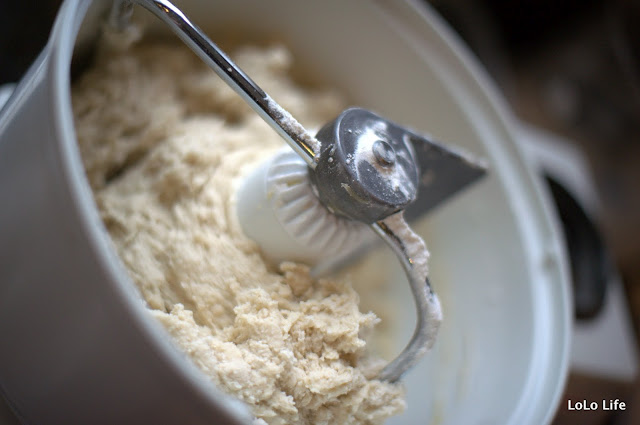

Still too sticky. You want the dough to just barely stick to your fingers, but not climb to you and make a mess.

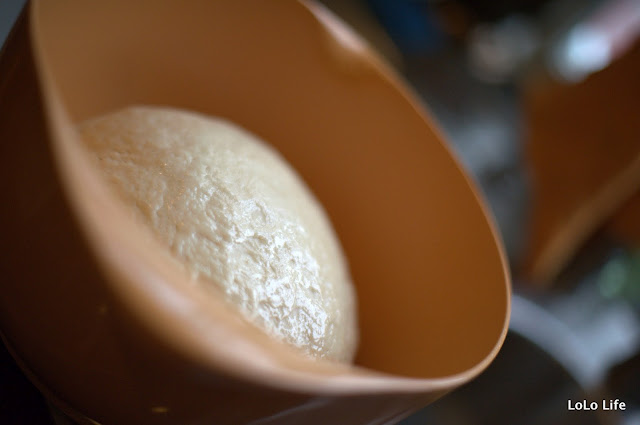
LoLo's Honey White Bread
Yield 2 Loaves
Ingredients:
2 cups warm water
1 Tbsp. yeast
1/2 cup honey
1/2 cup olive oil
2 tsp. salt
6-7 cups All-Purpose Flour
In the bowl of your mixer, add water, yeast, honey, olive oil and 6 cups of flour. (If you are concerned that your yeast might be old, you may proof it first: Combine water, yeast and honey in your bowl. Wait for it to foam, about 5 minutes, then add oil, salt and flour.) Mix with dough hook and add more flour as necessary, until the dough pulls away from the sides of the bowl and forms a ball. Knead for 5 more minutes, and then turn off your mixer.
Remove the dough from the bowl, remove the dough hook, spray the bowl with cooking spray, and return your ball of dough to your greased bowl. Turn the dough to coat with oil, and cover with a damp towel. (I like to wash my hands at this point, grab a fresh tea towel to dry them off with without shaking the water off my hands, and use that to cover up the dough. It seems just damp enough.) Allow the dough to rise until about doubled in volume. It's ready when you poke it with two fingers and it easily holds the indent.
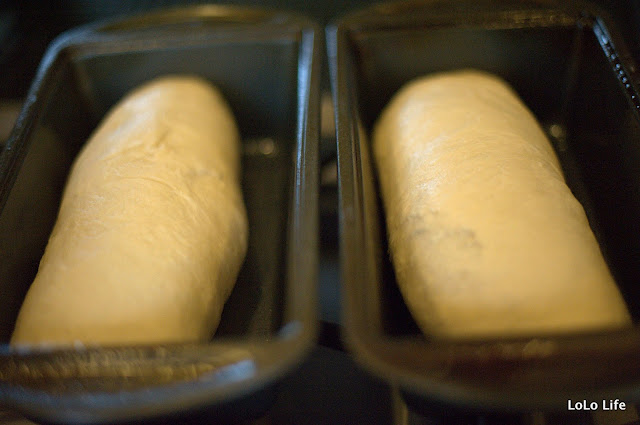
When the dough has risen, remove from bowl, divide in half, and *form into two loaves. Place in greased loaf pans and allow to rise for 30-45 minutes, or until approximately 50% larger. Bake at 350 for 30-35 minutes, or until the bottom of the loaf sounds hollow when tapped.
Don't be afraid to play around with mix-ins! Dried fruit, spices, orange juice in place of part or all of the water. This is a really forgiving framework to work with. This is also the recipe I use for dinner rolls and cinnamon rolls - 1 loaf makes 12 dinner rolls or 12 cinnamon rolls.
*To see how I form my loaves, go here: How I Form Bread Loaves
For the rest of this bread course, go here: LoLo's Bread Class
This was the bread that started it all - the bread that was so delicious, my husband let me stop buying bread at the store. Wait...that sounds weird. Let me put it this way: I may be the cook in the family, but it's not fair of me to replace tasty bread from the store with nasty bread from home if nobody likes it.
Here is one of my most basic recipes, in pictures.

So, I experimented and tried new recipes until I found one that could surpass store-bought in quality and taste AND was less than half the cost of store-bought. (One loaf of this bread, even with olive oil and honey, is about $.75 if you buy the ingredients in bulk.)

I make the bread four loaves at a time, using my ancient Bosch mixer. The bread freezes beautifully, and is almost better from the freezer! It retains its moisture, and has a very smooth crumb.


Still too sticky. You want the dough to just barely stick to your fingers, but not climb to you and make a mess.


LoLo's Honey White Bread
Yield 2 Loaves
Ingredients:
2 cups warm water
1 Tbsp. yeast
1/2 cup honey
1/2 cup olive oil
2 tsp. salt
6-7 cups All-Purpose Flour
In the bowl of your mixer, add water, yeast, honey, olive oil and 6 cups of flour. (If you are concerned that your yeast might be old, you may proof it first: Combine water, yeast and honey in your bowl. Wait for it to foam, about 5 minutes, then add oil, salt and flour.) Mix with dough hook and add more flour as necessary, until the dough pulls away from the sides of the bowl and forms a ball. Knead for 5 more minutes, and then turn off your mixer.
Remove the dough from the bowl, remove the dough hook, spray the bowl with cooking spray, and return your ball of dough to your greased bowl. Turn the dough to coat with oil, and cover with a damp towel. (I like to wash my hands at this point, grab a fresh tea towel to dry them off with without shaking the water off my hands, and use that to cover up the dough. It seems just damp enough.) Allow the dough to rise until about doubled in volume. It's ready when you poke it with two fingers and it easily holds the indent.
When the dough has risen, remove from bowl, divide in half, and *form into two loaves. Place in greased loaf pans and allow to rise for 30-45 minutes, or until approximately 50% larger. Bake at 350 for 30-35 minutes, or until the bottom of the loaf sounds hollow when tapped.
Don't be afraid to play around with mix-ins! Dried fruit, spices, orange juice in place of part or all of the water. This is a really forgiving framework to work with. This is also the recipe I use for dinner rolls and cinnamon rolls - 1 loaf makes 12 dinner rolls or 12 cinnamon rolls.
*To see how I form my loaves, go here: How I Form Bread Loaves
For the rest of this bread course, go here: LoLo's Bread Class
How I Form Bread Loaves
(All photos courtesy of Sonja, from Simply Sonja Photography based in Bellevue, WA)
Everybody has their favorite way to form a loaf. Some people cut off a hunk and carefully round it into a loaf shape. My sister slap their dough into the pan and then poke it until it fills out the corners. Some people...well, ok I don't know if anyone else does this...but I roll mine up like a jelly-roll. I think I read about this method in an ancient Betty Crocker cookbook. Since it's always worked well for me, I've stuck with it. There are a few tricks, though.
First, if you've made a batch with more than one loaf, divide your dough. I like to use a knife with large serrations.
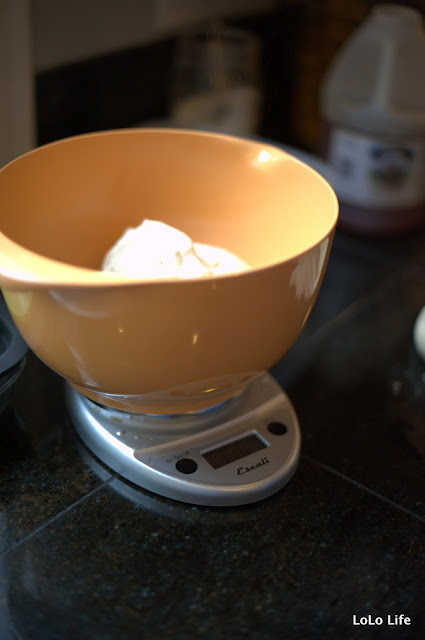
If eye-balling dough lumps isn't your thing, you can plop your pieces onto a scale to make sure they are all the same weight. That will take care of any differences in air content between the piece you squished when you cut it off and the piece you cut off FROM, that isn't squished yet. (Does that make sense to anyone??)
Next, take your loaf chunk, set it on the counter, and use your knuckles to flatten it out. You want it just about as wide as your loaf pan, and about 1/2" thick.
Grab one of the smaller ends and start rolling. You want NO air bubbles here, so make sure you stretch the dough and tuck it tightly. If you have any air bubbles, they will expand in the oven leaving you with large doughy holes in your final loaf.
As you work, you'll notice it getting wider than your pan, with scraggly little ends. Use your pinkies to tuck those ends in as you roll.
The final product! Round, with the seam on the BOTTOM of the loaf. If it's anywhere besides due south, your bread will kind of explode open in the oven. It will still taste fine, but it might not fit into the toaster. Now pop it into a greased loaf pan, or onto a greased cookie sheet, and let it rise about 30-45 minutes before baking.
French Bread
(All photos courtesy of Sonja, from Simply Sonja Photography based in Bellevue, WA)
If you've seen my post on "pizza" bread, this post will look very, very familiar. The process is basically the same...so I'm using a lot of the same photographs. Waste not, want not!

Put water in your biggest bowl. The water should be very warm, like a steaming bath. Other ingredients will cool it down before you add your yeast.

Add your salt, oil and sugar to your water. Add half of your flour.
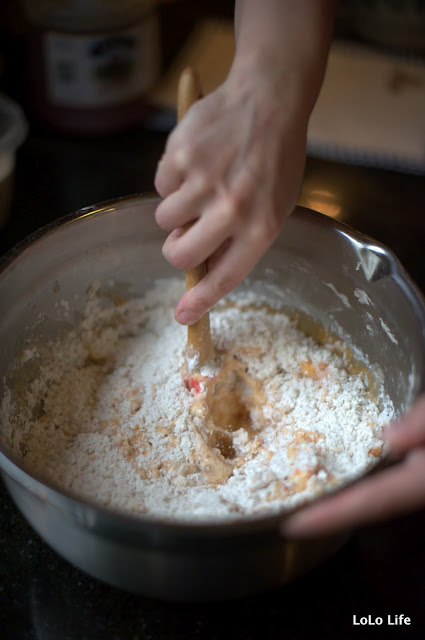
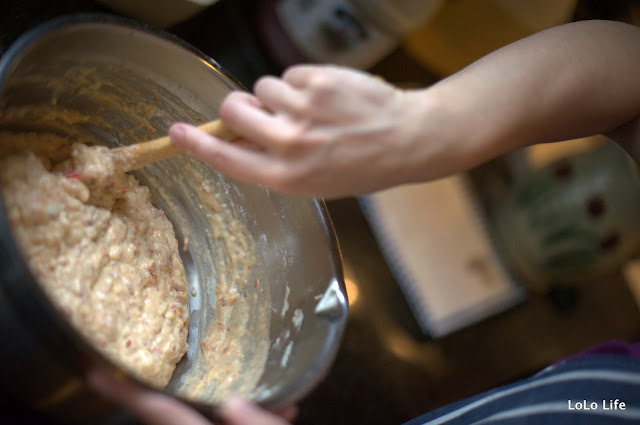
This is what your dough should look like after the first addition of flour. (Except your dough will be white - remember I'm using pictures from a different variation of this bread.

Add your yeast to the loose flour mixture, then add the rest of your flour and stir to combine.
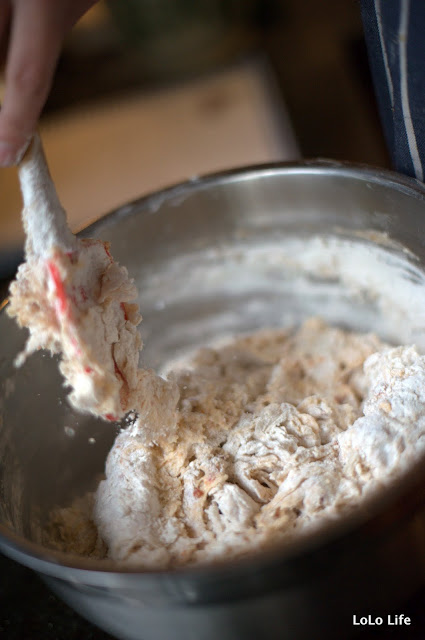
You'll need to use your hand at the end. Scoop around the side of the dough, catching some of the loose flour with your hand, and scoop under the dough. Then lift up the dough and fold it in on itself.

Once the dough is how you want it, let it rest for an hour, punching it down every 10 minutes. Form into two loaves, let rise for 30 minutes, and bake at 350 for 30-35 minutes. Delicious, and about two and a half hours from start to finish. These loaves come out to about $.50 each, if you buy the ingredients in bulk.
French Bread
(Adapted from Myrnie's recipe)
Ingredients:
2 1/2 cups warm water
3 Tbsp. sugar
1 Tbsp. salt
2 Tbsp. canola oil
6-7 cups of All-Purpose flour, divided
2 Tbsp. yeast
In a large bowl, combine water, sugar, salt, oil and 3 cups of flour. Stir well to combine - your dough should be very loose. Add the yeast and another 3 cups of flour. Stir with a wooden spoon, and then use your hand to fold in flour, adding more as necessary. The dough will be soft - you are not kneading the dough. Just folding in flour until it forms a basically cohesive shape. Let the dough rest for 10 minutes, and then punch it down and flip it over in the bowl. Repeat the resting-punching process every 10 minutes for an hour, then remove the dough from the bowl. Divide it into two loaves and form into long rolls. Place on a greased cookie sheet and allow to rise for 30 minutes. Preheat the oven to 350. Slash the tops (don't be afraid!) and bake for 30-35 minutes, or until the bottom of the loaf sounds hollow when you tap it with your fingernail.
If you've seen my post on "pizza" bread, this post will look very, very familiar. The process is basically the same...so I'm using a lot of the same photographs. Waste not, want not!

Put water in your biggest bowl. The water should be very warm, like a steaming bath. Other ingredients will cool it down before you add your yeast.

Add your salt, oil and sugar to your water. Add half of your flour.


This is what your dough should look like after the first addition of flour. (Except your dough will be white - remember I'm using pictures from a different variation of this bread.

Add your yeast to the loose flour mixture, then add the rest of your flour and stir to combine.

You'll need to use your hand at the end. Scoop around the side of the dough, catching some of the loose flour with your hand, and scoop under the dough. Then lift up the dough and fold it in on itself.

Once the dough is how you want it, let it rest for an hour, punching it down every 10 minutes. Form into two loaves, let rise for 30 minutes, and bake at 350 for 30-35 minutes. Delicious, and about two and a half hours from start to finish. These loaves come out to about $.50 each, if you buy the ingredients in bulk.
French Bread
(Adapted from Myrnie's recipe)
Ingredients:
2 1/2 cups warm water
3 Tbsp. sugar
1 Tbsp. salt
2 Tbsp. canola oil
6-7 cups of All-Purpose flour, divided
2 Tbsp. yeast
In a large bowl, combine water, sugar, salt, oil and 3 cups of flour. Stir well to combine - your dough should be very loose. Add the yeast and another 3 cups of flour. Stir with a wooden spoon, and then use your hand to fold in flour, adding more as necessary. The dough will be soft - you are not kneading the dough. Just folding in flour until it forms a basically cohesive shape. Let the dough rest for 10 minutes, and then punch it down and flip it over in the bowl. Repeat the resting-punching process every 10 minutes for an hour, then remove the dough from the bowl. Divide it into two loaves and form into long rolls. Place on a greased cookie sheet and allow to rise for 30 minutes. Preheat the oven to 350. Slash the tops (don't be afraid!) and bake for 30-35 minutes, or until the bottom of the loaf sounds hollow when you tap it with your fingernail.
Monday, April 9, 2012
Radish Cake (Loh Baat Gou)
Radish cakes were one of my first loves at the dim sum parlor. The flavor is fairly bland, so it is perfect for introducing the uninitiated to the wonders of dim sum!
You'll need to chop up a few sausages and sauté them in a pan until they just start to crisp up.
We grated our daikon in a food processor fitted with a grating blade. It only took a few minutes - my mother in law was very impressed. (She's always done this step by hand.)
These are dried shrimps, or haa mai. They are salty, shrimpy and a little sweet. They come in several sizes - you'll want to look for ones that are about 3/4" long dried. I think you can find them at Asian markets, but we usually get them at Chinese medicine shops. These are great to keep on hand - they're awesome in fried rice, rice noodles, or chow mein. We keep a small jar of these in the refrigerator at all times. (Refrigeration isn't necessary, but growing up in HUMID Hong Kong convinced my husband that all dried things should be kept in the refrigerator to keep them dry.)
Maggi is another great thing to keep around. It's very salty, and the flavor is like nothing else...except maybe Vegemite. I think it's a by-product of creating Vegemite, but I could be mistaken.
The daikon after it has been steamed and mixed with some seasonings. I got called away so I missed the part where Ma mixed in the rice flour, but it ended up looking like a very sticky cookie batter. Make sure you taste the final product - the basic flavor won't change after you steam it! Bland radish cake is just sad.
The finished cake, cooling on the counter after being steamed.
Ma's Homemade Radish Cakes (Loh Baat Gou)
Ingredients:
6 Chinese Sausages, diced
2 large daikon, grated (about 5 lb. total)
2 tsp. chicken base (or 2 bullion cubes, crushed)
1/2 cup dried shrimp, soaked and chopped (haa mai)
1 1/2 lb. rice flour
2 Tbsp. chopped green onion
2 Tbsp. soy sauce
2 Tbsp. Maggi sauce
1 Tbsp. sugar
2 tsp. each salt, sugar (to taste)
Water, as needed
(Yield: 5 pie plates of cakes)
Cook sausage on the stove until shiny, a bit crispy, and slightly translucent.
Put grated daikon into a large pot and add 1 cup of water and the chopped dried shrimps. Cover and cook over medium heat. Add more water as necessary. Steam until the daikon is cooked - it will be soft, and will have lost its peppery bite.
Add rice flour, green onion, soy sauce, Maggi sauce, sugar, salt and 2 cups of water. Stir and season to taste.
Spray pie plates with cooking spray and spoon daikon mixture into prepared pie plates. Steam each plate for about 30 minutes, then set aside to cool. These cake rounds can be wrapped well in plastic and frozen for later use.
To serve, slice the cakes into flat slices and pan fry in a little bit of oil until they are crispy on the outside and soft on the inside.
Serve with soy sauce, maggi or hoisin sauce to dip.
Subscribe to:
Posts (Atom)

